> ## Documentation Index
> Fetch the complete documentation index at: https://knowledge.bitbybit.studio/llms.txt
> Use this file to discover all available pages before exploring further.
# How to add a media upload field to a WhatsApp form
> Add a media upload field to your WhatsApp form so customers can submit images and documents, then view and download submitted files from the form response panel.
The media upload field lets customers attach images or documents when filling out a WhatsApp form. Submitted files appear as thumbnails or download links in the form response panel.
## Add a media upload field to a form
### Step 1: Open your WhatsApp form
Go to the [bitChat WhatsApp Form](https://app.bitbybit.studio/bitchat/whatsapp-form) dashboard and open an existing form, or create a new one.
### Step 2: Add a section and select "Media upload"
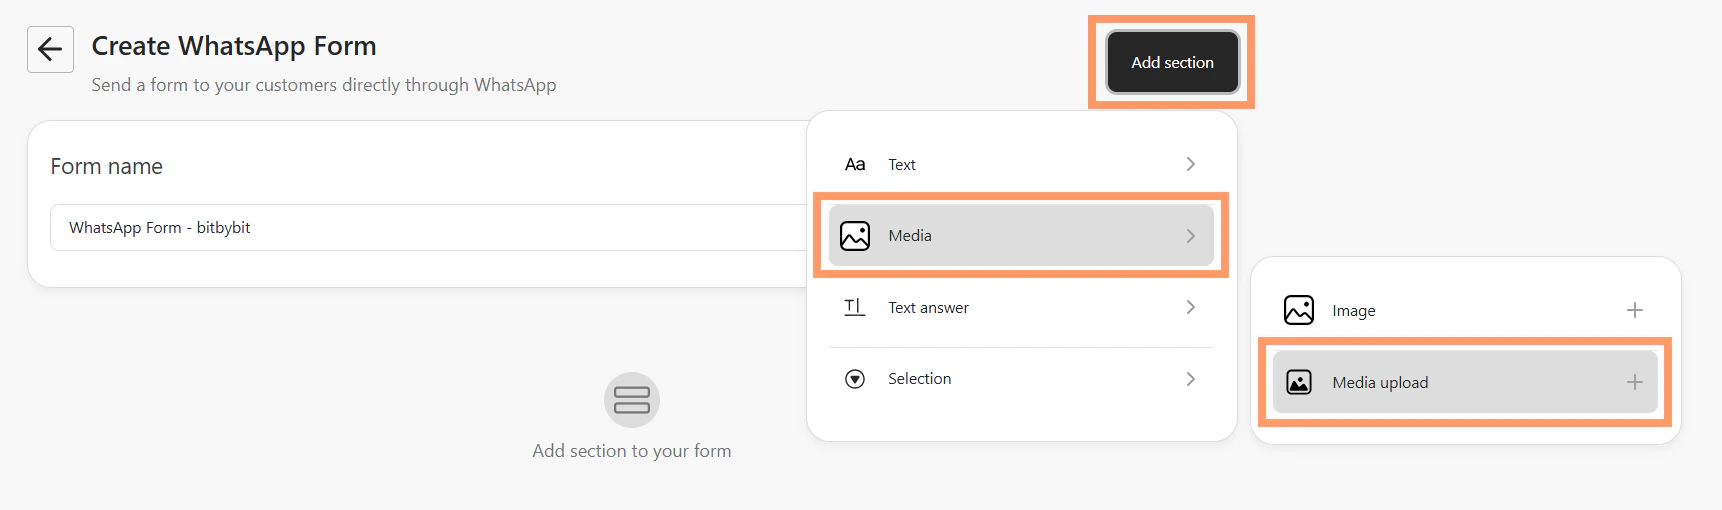
Click **Add section**, then choose **Media upload** from the field type options.
 ### Step 3: Configure the field
Fill in the configuration panel:
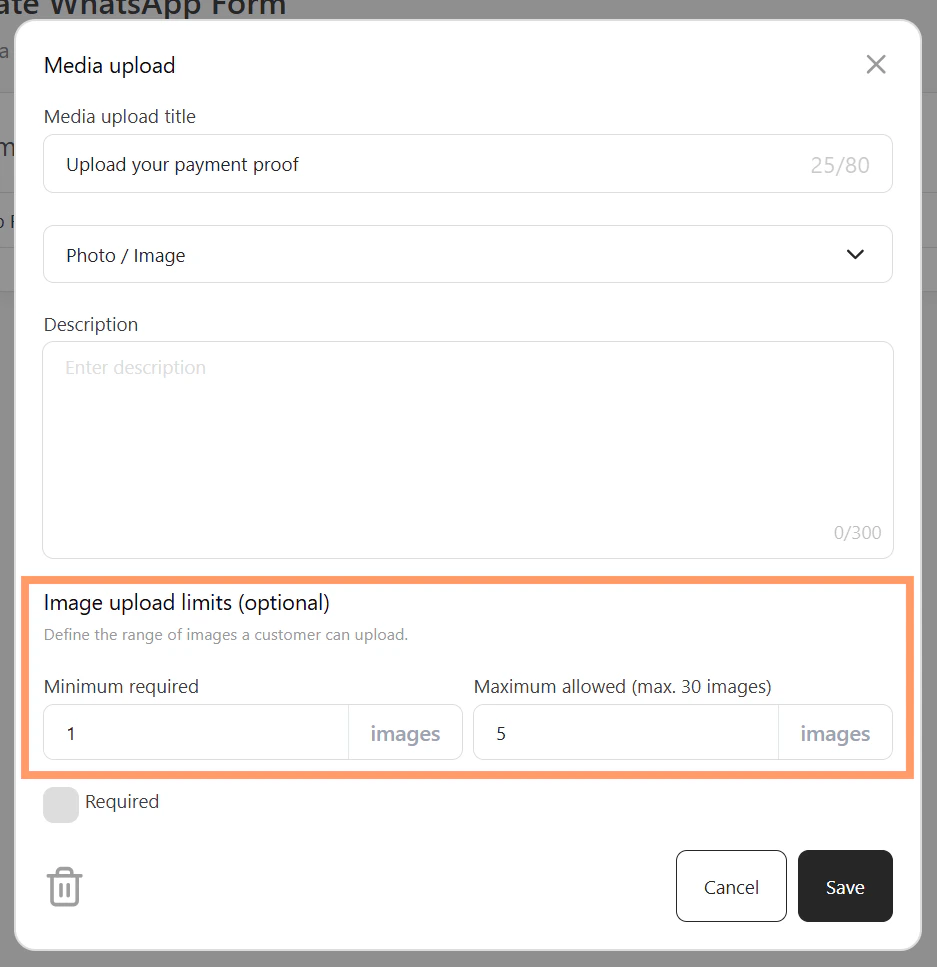
* **Media upload title** — the label customers see on the form (for example, "Upload your payment proof").
* **File type** — choose the type of file customers can submit (for example, **Photo / Image**).
* **Description** — optional helper text displayed below the field.
* **Image upload limits** — optionally set a minimum and maximum number of files a customer can attach (maximum allowed is 30).
### Step 3: Configure the field
Fill in the configuration panel:
* **Media upload title** — the label customers see on the form (for example, "Upload your payment proof").
* **File type** — choose the type of file customers can submit (for example, **Photo / Image**).
* **Description** — optional helper text displayed below the field.
* **Image upload limits** — optionally set a minimum and maximum number of files a customer can attach (maximum allowed is 30).
 ### Step 4: Mark as required (optional) and save
Toggle **Required** if the field must be filled before the customer can submit the form. Click **Save** when done.
## View submitted media in form responses
### Step 1: Open the form response panel
From the WhatsApp Form dashboard, select your form and go to the **Response** tab.
### Step 2: Browse responses
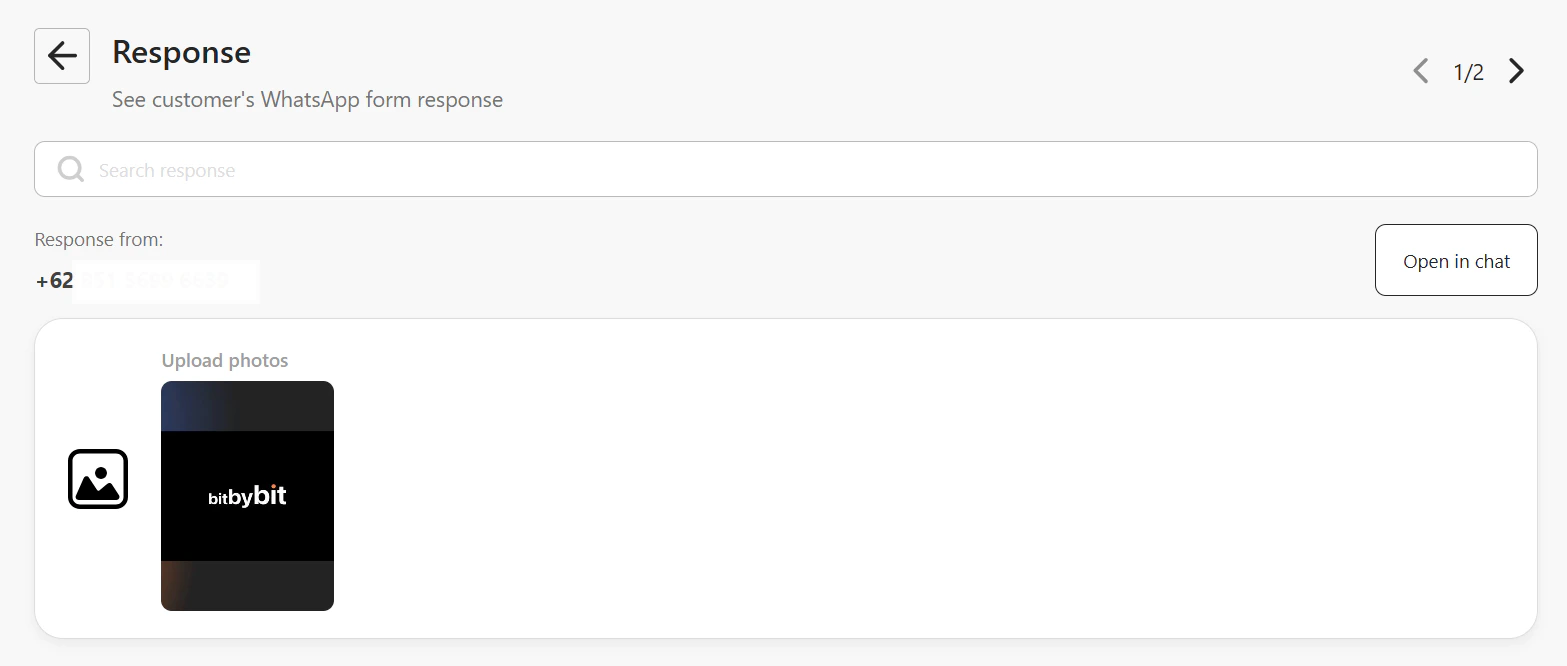
Use the arrow controls to move between responses. The media upload field displays submitted images as thumbnails and submitted documents as file names.
### Step 4: Mark as required (optional) and save
Toggle **Required** if the field must be filled before the customer can submit the form. Click **Save** when done.
## View submitted media in form responses
### Step 1: Open the form response panel
From the WhatsApp Form dashboard, select your form and go to the **Response** tab.
### Step 2: Browse responses
Use the arrow controls to move between responses. The media upload field displays submitted images as thumbnails and submitted documents as file names.
 ### Step 3: Preview an image in full
Click an image thumbnail to open it in the lightbox. The full-size image loads with a loading indicator while it fetches. Click outside the lightbox to close it.
## Download submitted media
**Image:** Open the image in the lightbox, then click **Download image**. The button shows a loading indicator while the file processes and is disabled until the download completes.
### Step 3: Preview an image in full
Click an image thumbnail to open it in the lightbox. The full-size image loads with a loading indicator while it fetches. Click outside the lightbox to close it.
## Download submitted media
**Image:** Open the image in the lightbox, then click **Download image**. The button shows a loading indicator while the file processes and is disabled until the download completes.
 **Document:** Click the document file name in the response card to download it directly.