> ## Documentation Index
> Fetch the complete documentation index at: https://knowledge.bitbybit.studio/llms.txt
> Use this file to discover all available pages before exploring further.
# bitbybit × n8n
> Connect bitbybit with n8n to forward incoming chats via a webhook and send AI-generated replies back through the bitChat API
This guide will help you connect **bitbybit** with **n8n** so you can:
* Send incoming chats from Bitbybit into n8n
* Send a reply back to your customer through bitbybit
## **Step 1: Set up in n8n**
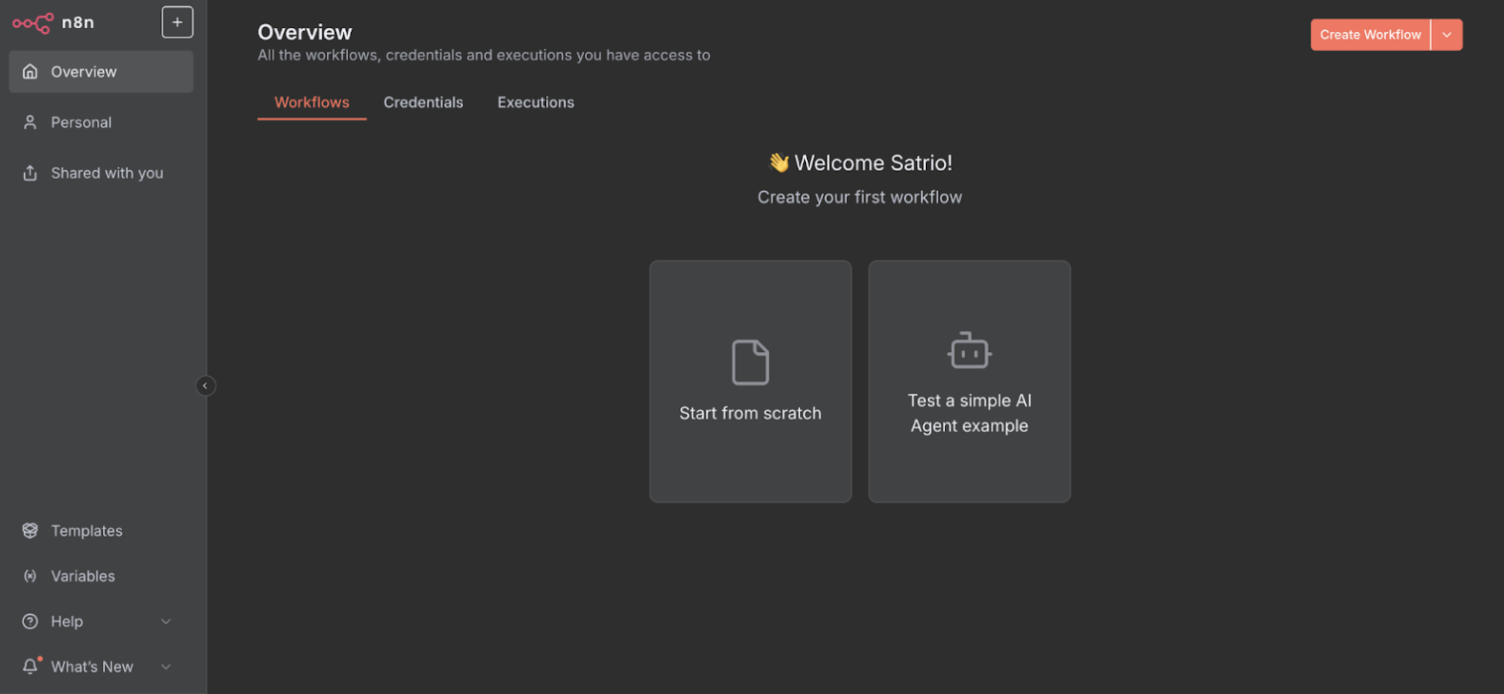
1. **Create a Project**\
Open your n8n workspace and create a new project/flow.
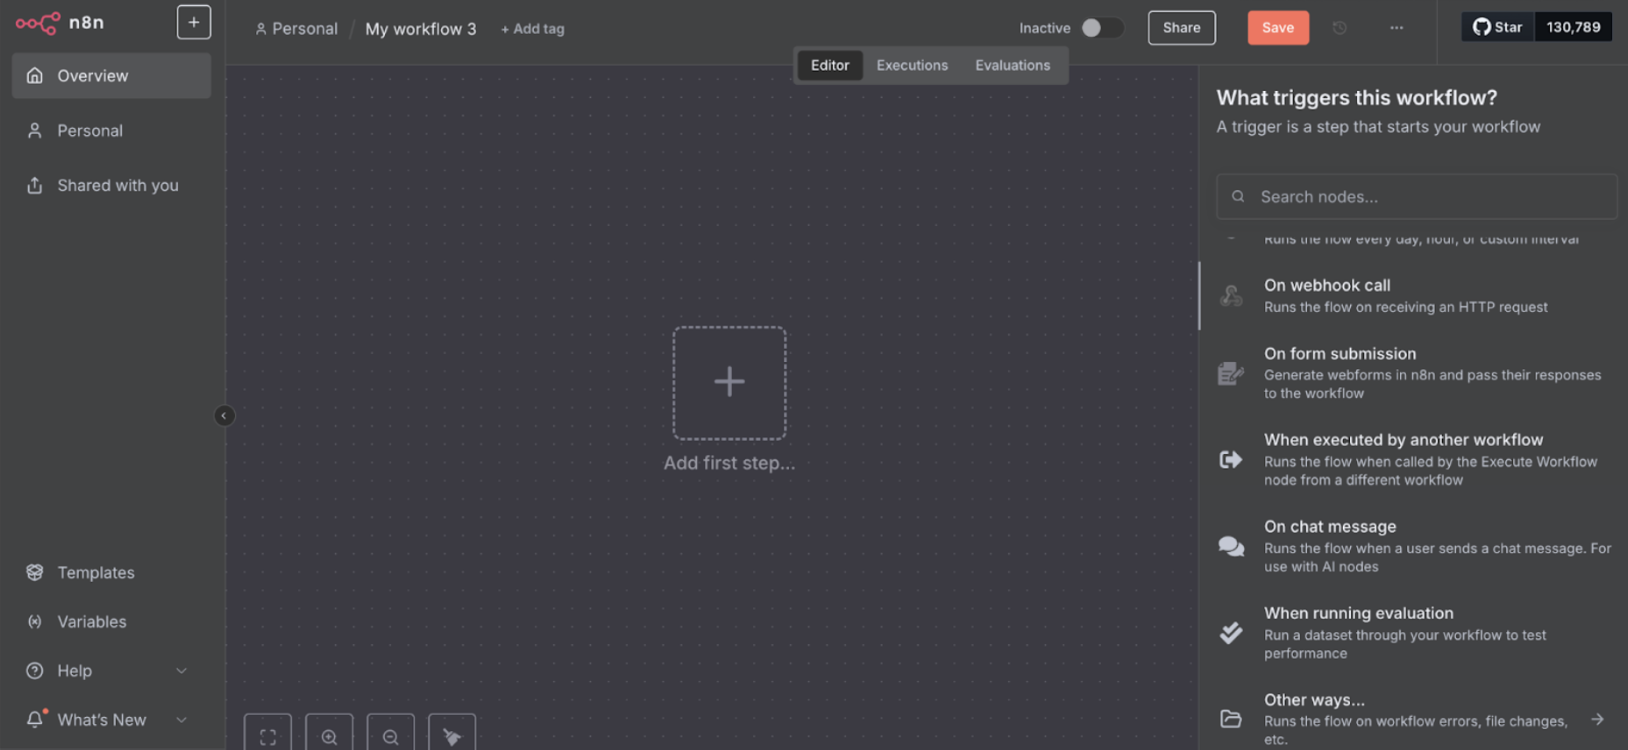
 2. **Add a Webhook Trigger**\
Choose **Webhook** as your trigger.
2. **Add a Webhook Trigger**\
Choose **Webhook** as your trigger.
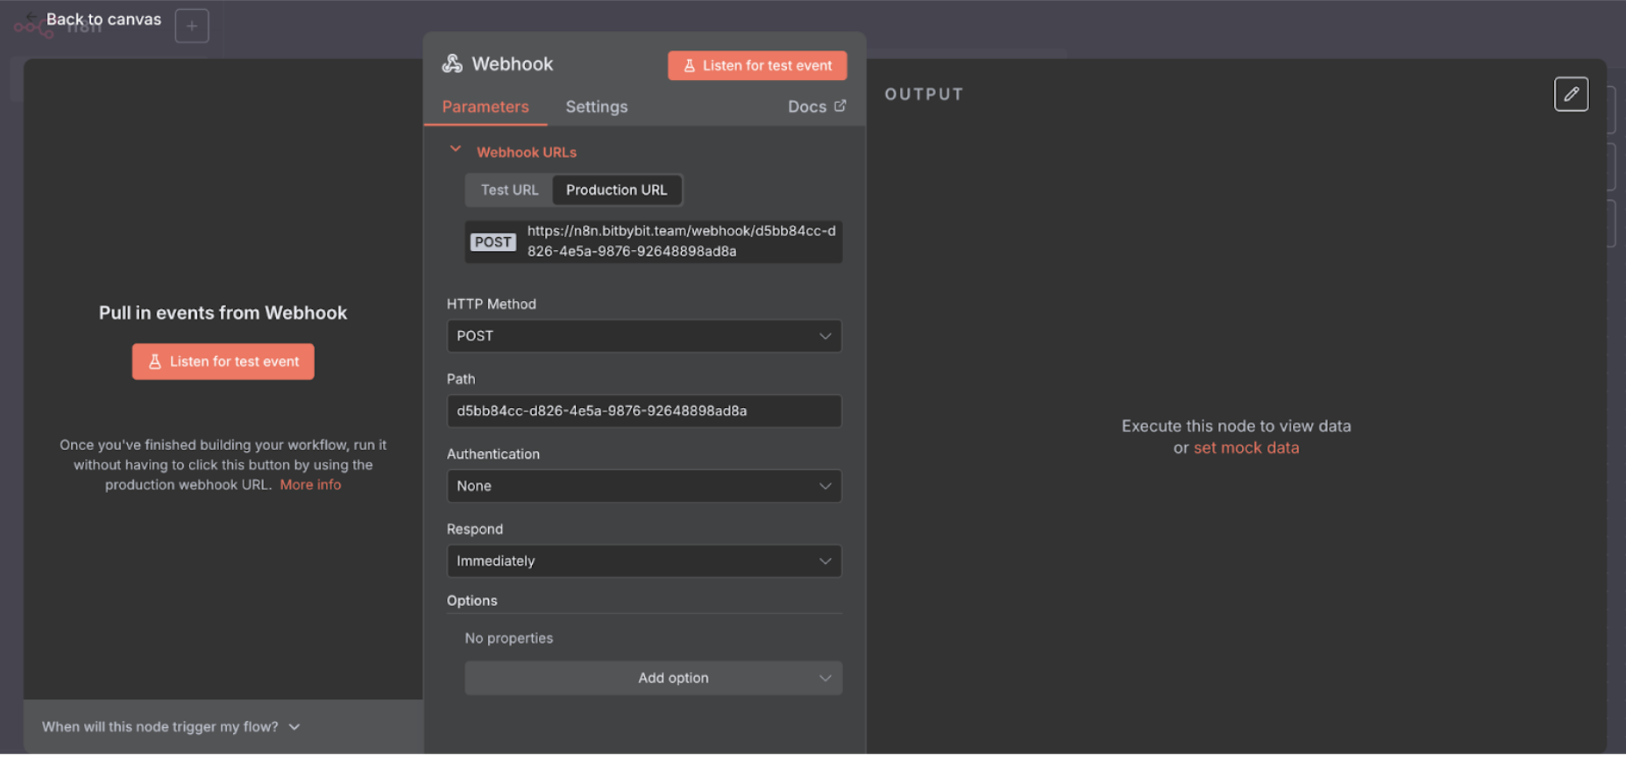
 3. **Copy the Webhook URL provided by n8n.**\
This is where bitbybit will send incoming messages.
3. **Copy the Webhook URL provided by n8n.**\
This is where bitbybit will send incoming messages.
 ## **Step 2: Setup in bitbybit**
1. **Create an Automation**
* Go to the **Automation** page in bitbybit [https://app.bitbybit.studio/bitcrm/automation-new](https://app.bitbybit.studio/bitcrm/automation-new) . Then click Create a new scenario.
* Choose **Trigger: Incoming Chat**. Also, choose the chat source for the selected messaging channel
2. **Add an Action after the Trigger: HTTP Request**
* Add new Action -> HTTP Request
## **Step 2: Setup in bitbybit**
1. **Create an Automation**
* Go to the **Automation** page in bitbybit [https://app.bitbybit.studio/bitcrm/automation-new](https://app.bitbybit.studio/bitcrm/automation-new) . Then click Create a new scenario.
* Choose **Trigger: Incoming Chat**. Also, choose the chat source for the selected messaging channel
2. **Add an Action after the Trigger: HTTP Request**
* Add new Action -> HTTP Request
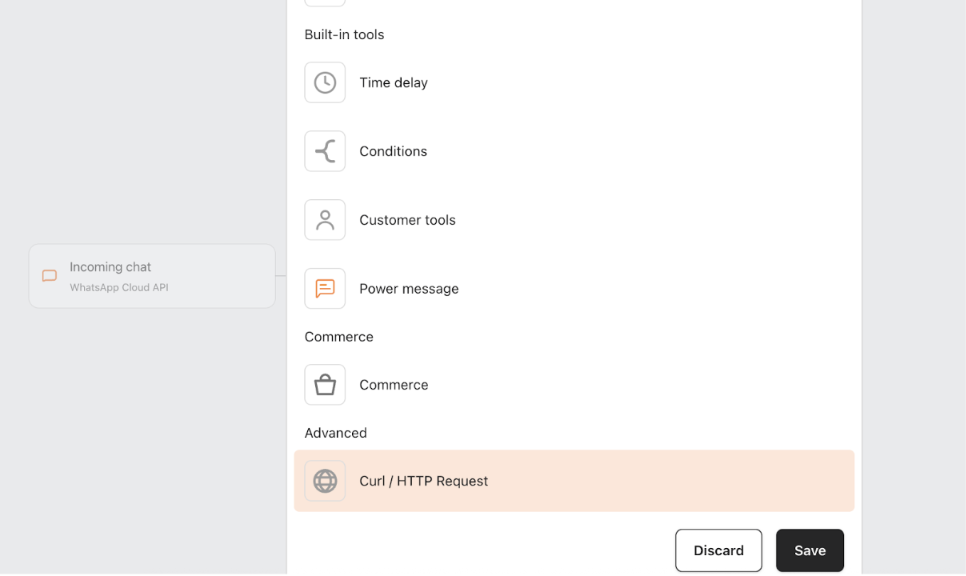 * Paste the **Webhook URL** from n8n into the URL field.
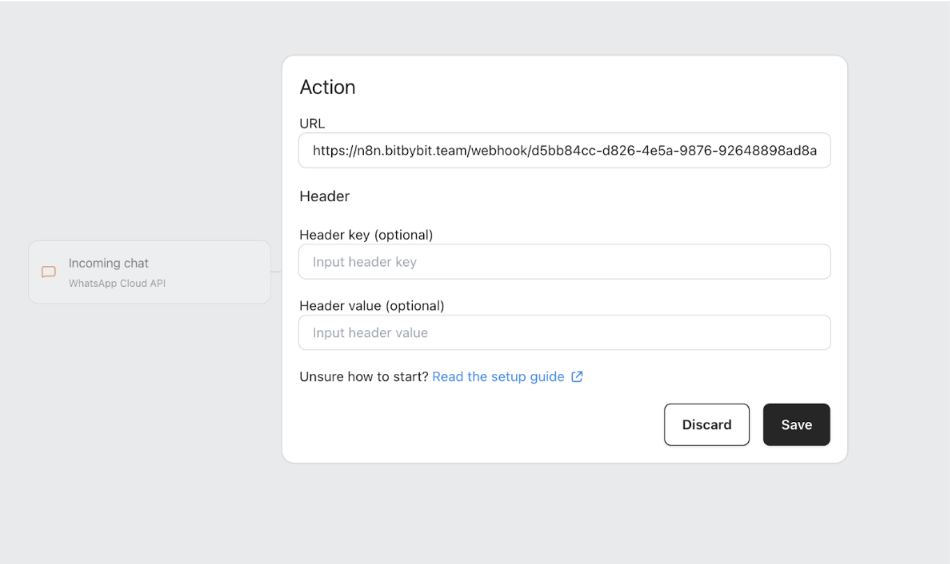 * (Optional) Add any custom **header key and value**.
3. **Save the automation.**
Now, every incoming chat in bitbybit will be forwarded to your n8n.
## **Step 3: Test the Webhook in n8n**
In n8n, test the webhook by sending a sample payload like this:
```json theme={null}
{
"clientNumber": "{{your-phone-number}}",
"clientName": "{{your-name}}",
"messages": [
{
"body": "Hello, can you help my problem ?"
}
]
}
```
At this stage, the message will flow into n8n, and you can decide what to do with it:
* Forward to an AI Agent
* Store in your database
* Read your Knowledge Base
* Send notifications
Or any other action supported by n8n
## **Step 4: Send a Reply Back to bitbybit**
If your workflow includes sending a reply back to the customer (e.g., after AI Agent responds), follow these steps:
1. **Get Your API Key**
* Go to[bitbybit Advanced Settings](https://app.bitbybit.studio/settings?section=advance-settings)
* Copy your **bitChat API key**
2. **Add an HTTP Request in n8n**
* Choose the **HTTP Request (POST)** node.
* Use this URL for sending a message:\
`https://api.bitbybit.studio/whatsapp/api/v3.1/message `
3. **Add Headers**\
`x-bitbybit-key: {{your-bitchat-api-key}}`
4. **Add the Payload**
```json theme={null}
{
"to": "{{client-number}}",
"message": "{{message-body}}",
"imageUrl": "{{image-url}}", // optional
"sources": "{{messaging-channel}}",
"ignoreActiveTicket": true // optional
}
```
* **to** → use the clientNumber from the incoming webhook
* **message** → use the AI Agent’s reply or your custom message
* **imageUrl** → optional, if you want to send an image
* **sources** → set to WHATSAPP (WhatsApp Business App) or WHATSAPP\_META (WhatsApp Cloud API)
* **ignoreActiveTicket** → to ignore message delivery while the chat is being handled by an Agent, add the following field to the request body:)
## **📚 Additional Resources**
For the full bitbybit WhatsApp API documentation, visit:\
👉[https://api.bitbybit.studio/whatsapp/docs](https://api.bitbybit.studio/whatsapp/docs)
* (Optional) Add any custom **header key and value**.
3. **Save the automation.**
Now, every incoming chat in bitbybit will be forwarded to your n8n.
## **Step 3: Test the Webhook in n8n**
In n8n, test the webhook by sending a sample payload like this:
```json theme={null}
{
"clientNumber": "{{your-phone-number}}",
"clientName": "{{your-name}}",
"messages": [
{
"body": "Hello, can you help my problem ?"
}
]
}
```
At this stage, the message will flow into n8n, and you can decide what to do with it:
* Forward to an AI Agent
* Store in your database
* Read your Knowledge Base
* Send notifications
Or any other action supported by n8n
## **Step 4: Send a Reply Back to bitbybit**
If your workflow includes sending a reply back to the customer (e.g., after AI Agent responds), follow these steps:
1. **Get Your API Key**
* Go to[bitbybit Advanced Settings](https://app.bitbybit.studio/settings?section=advance-settings)
* Copy your **bitChat API key**
2. **Add an HTTP Request in n8n**
* Choose the **HTTP Request (POST)** node.
* Use this URL for sending a message:\
`https://api.bitbybit.studio/whatsapp/api/v3.1/message `
3. **Add Headers**\
`x-bitbybit-key: {{your-bitchat-api-key}}`
4. **Add the Payload**
```json theme={null}
{
"to": "{{client-number}}",
"message": "{{message-body}}",
"imageUrl": "{{image-url}}", // optional
"sources": "{{messaging-channel}}",
"ignoreActiveTicket": true // optional
}
```
* **to** → use the clientNumber from the incoming webhook
* **message** → use the AI Agent’s reply or your custom message
* **imageUrl** → optional, if you want to send an image
* **sources** → set to WHATSAPP (WhatsApp Business App) or WHATSAPP\_META (WhatsApp Cloud API)
* **ignoreActiveTicket** → to ignore message delivery while the chat is being handled by an Agent, add the following field to the request body:)
## **📚 Additional Resources**
For the full bitbybit WhatsApp API documentation, visit:\
👉[https://api.bitbybit.studio/whatsapp/docs](https://api.bitbybit.studio/whatsapp/docs)