> ## Documentation Index
> Fetch the complete documentation index at: https://knowledge.bitbybit.studio/llms.txt
> Use this file to discover all available pages before exploring further.
# How to Create a New WhatsApp Business App Campaign
> Create a WhatsApp Business App campaign in bitCRM by choosing a segment, scheduling, and writing your personalized broadcast message
For a step-by-step guide on how to complete this pros, please visit [our YouTube Channel.](https://www.youtube.com/@bitbybit.studio/videos)
The WhatsApp Business App campaign tool in bitCRM provides an easy way to engage customers through personalized messages and real-time interactions. This feature allows you to schedule messages and even convert them into customer service tickets. Here's how to create a message and manage your next campaign with ease.
To create a personalized marketing campaign, please set your customer segmentations first, by following these guides below:
• [How to Create a Customer Segment.](https://knowledge.bitbybit.studio/bitcrm/how-to-create-a-customer-segment)
• [How To Create Customer Segmentation And Track Message After A Broadcast.](https://knowledge.bitbybit.studio/bitcrm/how-to-create-customer-segmentation-and-track-message-after-a-broadcast#how-to-create-customer-segmentation-and-track-message-after-a-broadcast)
Once you have segmented the customers, follow these steps to create a personalized Whatsapp campaign.
## **Step 1: Go to Campaign Dashboard.**
* Navigate to your [bitCRM Campaign](https://app.bitbybit.studio/bitcrm/campaign) dashboard and click "Create new campaign."
* Click "Create new campaign"
## **Step 2: Select a Channel.**
* Click "WhatsApp Business App"
* Click "WhatsApp Business App"
## **Step 3: Setup Your Campaign.**
* Enter "Campaign name" and Choose your "Segmentation" from the dropdown. Read [How to Create a Customer Segment](https://knowledge.bitbybit.studio/bitcrm/how-to-create-a-customer-segment) for the details.
* Enter fields or read [How to Create a Customer Segmen](https://knowledge.bitbybit.studio/bitcrm/how-to-create-a-customer-segment)t for the details
## **Step 4: Schedule & Fill in Message.**
* Click **Send immediately** or **Schedule send** by selecting the date and time. Then enter your campaign message.
* Select schedule send and enter your campaign message
## **Step 5: Upload Image and Review**
* Optionally, upload an image in **Media** and click **Save template**.
* Upload an image in
* Media
* and click
* Save template
 * Click "Create new campaign"
## **Step 2: Select a Channel.**
* Click "WhatsApp Business App"
* Click "Create new campaign"
## **Step 2: Select a Channel.**
* Click "WhatsApp Business App"
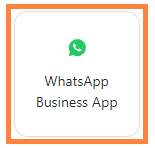 * Click "WhatsApp Business App"
## **Step 3: Setup Your Campaign.**
* Enter "Campaign name" and Choose your "Segmentation" from the dropdown. Read [How to Create a Customer Segment](https://knowledge.bitbybit.studio/bitcrm/how-to-create-a-customer-segment) for the details.
* Click "WhatsApp Business App"
## **Step 3: Setup Your Campaign.**
* Enter "Campaign name" and Choose your "Segmentation" from the dropdown. Read [How to Create a Customer Segment](https://knowledge.bitbybit.studio/bitcrm/how-to-create-a-customer-segment) for the details.
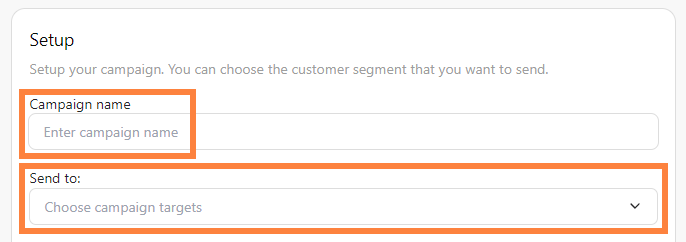 * Enter fields or read [How to Create a Customer Segmen](https://knowledge.bitbybit.studio/bitcrm/how-to-create-a-customer-segment)t for the details
## **Step 4: Schedule & Fill in Message.**
* Click **Send immediately** or **Schedule send** by selecting the date and time. Then enter your campaign message.
* Enter fields or read [How to Create a Customer Segmen](https://knowledge.bitbybit.studio/bitcrm/how-to-create-a-customer-segment)t for the details
## **Step 4: Schedule & Fill in Message.**
* Click **Send immediately** or **Schedule send** by selecting the date and time. Then enter your campaign message.
 * Select schedule send and enter your campaign message
## **Step 5: Upload Image and Review**
* Optionally, upload an image in **Media** and click **Save template**.
* Select schedule send and enter your campaign message
## **Step 5: Upload Image and Review**
* Optionally, upload an image in **Media** and click **Save template**.
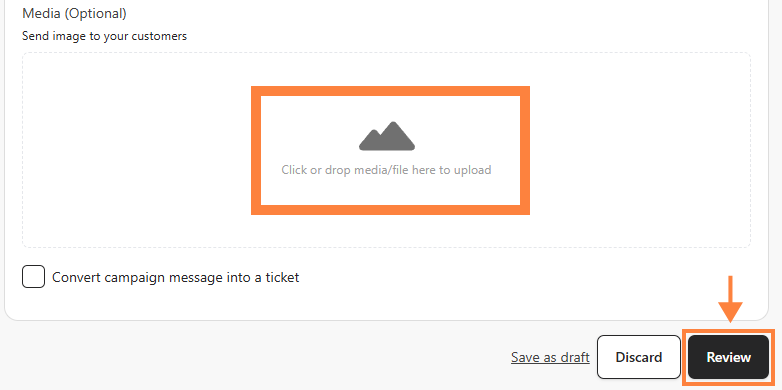 * Upload an image in
* Media
* and click
* Save template
* Upload an image in
* Media
* and click
* Save template