> ## Documentation Index
> Fetch the complete documentation index at: https://knowledge.bitbybit.studio/llms.txt
> Use this file to discover all available pages before exploring further.
# Set up the AI power message action in Automation
> Use the Generate message with AI action in bitCRM automation to automatically create Power Message content based on Shopify Web Activity triggers.
Use this page when you want your automation to send a Power Message whose content is generated by AI at trigger time, rather than written manually.
## Overview
The **Send Power Message** step in an automation has two action options:
* **Write custom message** — you write the header and body manually.
* **Generate message with AI** — AI generates the header and body at trigger time based on the customer's web activity and the goal you set.
This page covers the **Generate message with AI** option.
## Before you start
* Open [Automation](https://app.bitbybit.studio/bitcrm/automation-new).
* Make sure the automation already has a **Shopify Web Activity** trigger set. The Generate message with AI action is only available for Shopify Web Activity triggers.
* The **AI Studio** brand voice settings apply globally. Configure them in AI Studio before saving if you want a consistent tone.
## Steps
1. In your automation scenario, click the **+** button to add a step after the trigger.
2. Select **Communication channel**, then choose the connected channel.
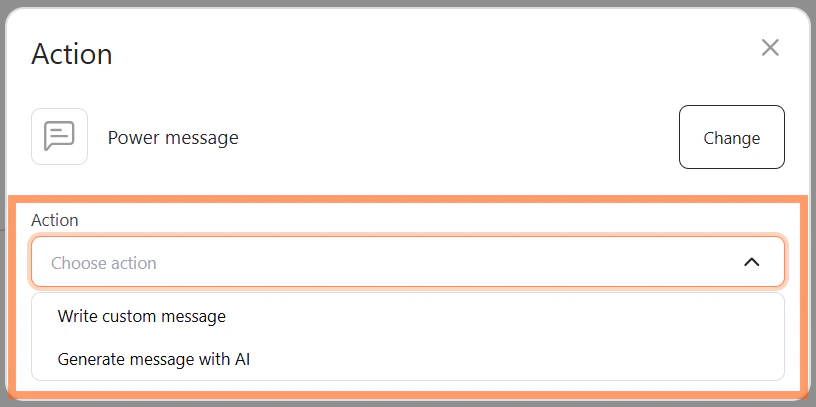
3. From the **Action** dropdown, select **Generate message with AI**.
 4. In the **Display after (In seconds)** field, enter how many seconds to wait before the Power Message appears. Enter `0` or a positive number. Negative values are not accepted.
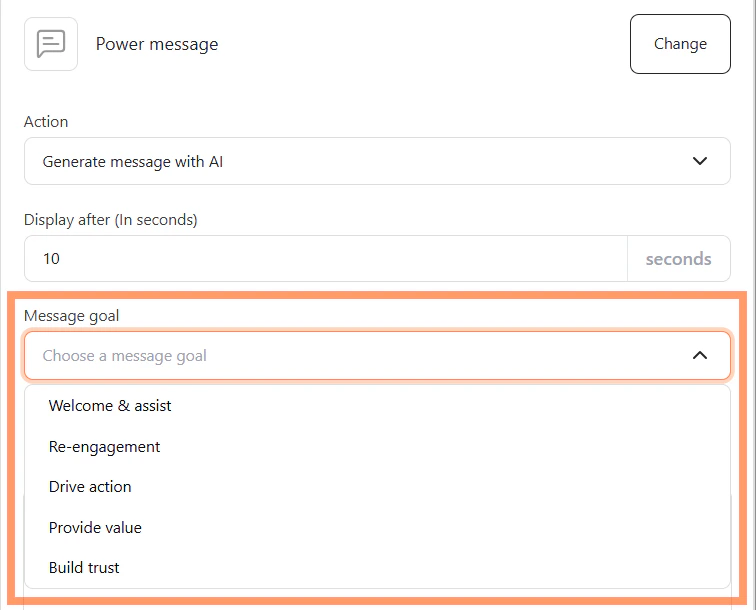
5. Open the **Message goal** dropdown and select the goal that best fits your trigger. Available options are: **Welcome & assist**, **Re-engagement**, **Drive action**, **Provide value**, and **Build trust**.
4. In the **Display after (In seconds)** field, enter how many seconds to wait before the Power Message appears. Enter `0` or a positive number. Negative values are not accepted.
5. Open the **Message goal** dropdown and select the goal that best fits your trigger. Available options are: **Welcome & assist**, **Re-engagement**, **Drive action**, **Provide value**, and **Build trust**.
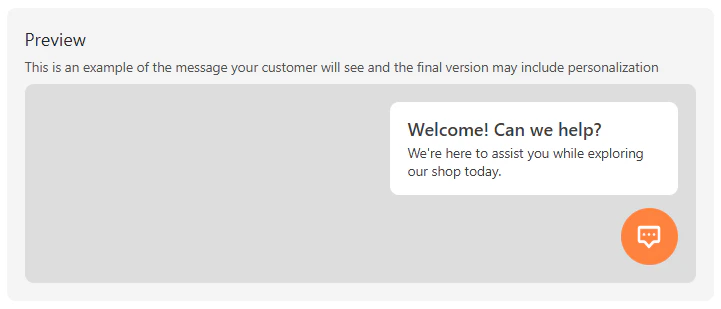
 6. Wait for the AI preview to generate. The preview appears automatically once a Message goal is selected — there is no Generate button.
 7. (Optional) Toggle **Generate AI quick replies** on if you want the Power Message to include relevant reply options based on the message context.
8. (Optional) Enter additional context in the **Custom instructions** field (up to 500 characters). Instructions are applied when the automation fires in production and do not change the preview.
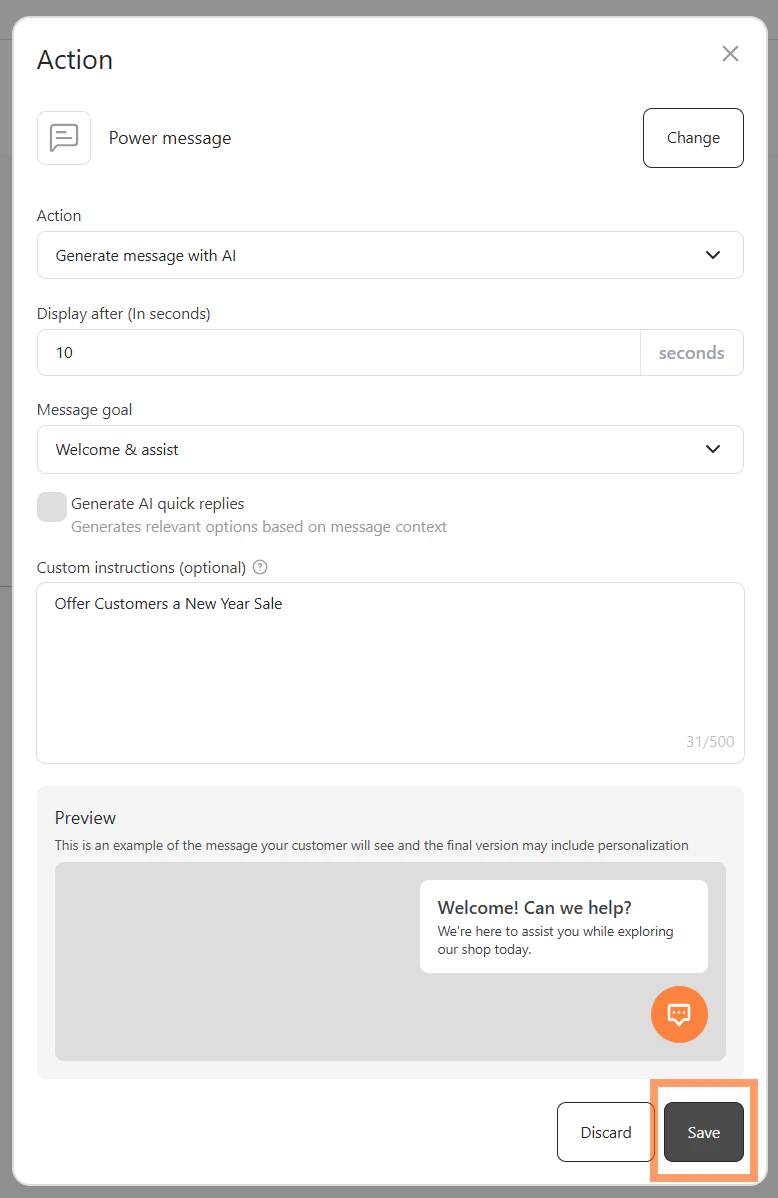
9. Review the preview, then click **Save**.
7. (Optional) Toggle **Generate AI quick replies** on if you want the Power Message to include relevant reply options based on the message context.
8. (Optional) Enter additional context in the **Custom instructions** field (up to 500 characters). Instructions are applied when the automation fires in production and do not change the preview.
9. Review the preview, then click **Save**.
 10. Click **Save automation**.
## How AI generates the message
When the automation triggers in production, AI generates the Power Message in real time using:
* The Shopify Web Activity trigger type and context (e.g., the specific product or page visited)
* Product catalog data — names, descriptions, prices, and URLs
* The **Message goal** you selected
* The customer's browsing context, if they are logged in
The generated content always stays within the character limits: **Header up to 20 characters**, **Body up to 60 characters**.
## Limitations
* **This action only works with Shopify Web Activity triggers.** It is not available for other trigger types.
* **You cannot edit the AI-generated content.** Control the output through Message goal and Custom instructions only.
* **The preview is a sample**, not the exact production output. Actual content varies based on real-time context.
* **Custom instructions are guidelines**, not hard rules. The AI may not always apply them verbatim.
* **Brand voice must be set in AI Studio** (global setting). It cannot be configured per automation.
## Related
* [Set up Web activity triggers in automation](/bitcrm/how-to-set-up-web-activity-triggers-in-automation)
* [Add steps to an automation](/bitcrm/how-to-add-steps-to-an-automation)
* [Add conditions to an automation](/bitcrm/how-to-add-conditions-to-an-automation)
* [Use time delay and schedule in automation](/bitcrm/how-to-schedule-steps-in-an-automation)
* [Test and preview your automation](/bitcrm/how-to-test-and-preview-your-automation)
10. Click **Save automation**.
## How AI generates the message
When the automation triggers in production, AI generates the Power Message in real time using:
* The Shopify Web Activity trigger type and context (e.g., the specific product or page visited)
* Product catalog data — names, descriptions, prices, and URLs
* The **Message goal** you selected
* The customer's browsing context, if they are logged in
The generated content always stays within the character limits: **Header up to 20 characters**, **Body up to 60 characters**.
## Limitations
* **This action only works with Shopify Web Activity triggers.** It is not available for other trigger types.
* **You cannot edit the AI-generated content.** Control the output through Message goal and Custom instructions only.
* **The preview is a sample**, not the exact production output. Actual content varies based on real-time context.
* **Custom instructions are guidelines**, not hard rules. The AI may not always apply them verbatim.
* **Brand voice must be set in AI Studio** (global setting). It cannot be configured per automation.
## Related
* [Set up Web activity triggers in automation](/bitcrm/how-to-set-up-web-activity-triggers-in-automation)
* [Add steps to an automation](/bitcrm/how-to-add-steps-to-an-automation)
* [Add conditions to an automation](/bitcrm/how-to-add-conditions-to-an-automation)
* [Use time delay and schedule in automation](/bitcrm/how-to-schedule-steps-in-an-automation)
* [Test and preview your automation](/bitcrm/how-to-test-and-preview-your-automation)