> ## Documentation Index
> Fetch the complete documentation index at: https://knowledge.bitbybit.studio/llms.txt
> Use this file to discover all available pages before exploring further.
# How to use AI-generated segment suggestions
> Get ready-made customer segments from your synced data, or describe an audience in plain language and let AI build the segment for you.
If you haven't created any customer segments yet, bitbybit gives you a head start instead of a blank builder — either AI-generated segments built from your own customer data, or predefined templates you can adapt. You can also describe an audience in your own words anywhere in the segment builder and have AI draft the filters for you.
## Getting your first segments
This applies once, the first time your workspace has zero segments — it re-checks automatically as your data changes, but stops offering suggestions as soon as you've created at least one segment (predefined templates or AI-generated).
### If you have enough synced customer data
Once you have at least a few dozen synced customers, bitbybit analyzes your store's real purchase and engagement data and creates up to three segments automatically — no click-to-accept needed, they're ready to use right away in [Segments](https://app.bitbybit.studio/customers/segments).
* Each generated segment is checked against your real data before it's created: it has to match at least 10 customers, and no more than 70% of your customer base, so you won't see a segment that's really "everyone" or a segment too small to be useful.
* You may see fewer than three if your store's data doesn't support that many good candidates — that's expected, not an error.
* Each generated segment shows a **Needs review** badge and **"AI"** in the **Created by** column.
* **"AI"** stays permanently, so you always know a segment's origin.
* **Needs review** clears the first time you open the segment and save it — reviewing is just opening the generated segment, checking (or adjusting) its filters, and saving, the same as editing any other segment.
* A generated segment is usable everywhere immediately — as a campaign audience, an automation trigger, in exports — even before you've reviewed it.
* You'll see a one-time toast confirming how many segments were created, for example: **"3 new customer segments are ready for your campaigns and automations."**
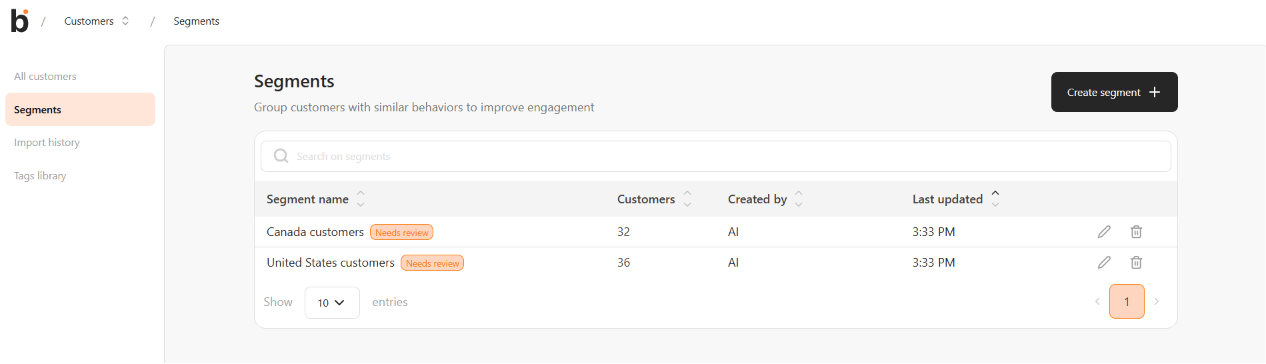 * Generated segments show **Needs review** and **AI** in the segments list
### If you don't have enough data yet
If you have no synced customers, or not enough for a reliable AI analysis, you'll see three ready-made segments instead: **VIP customers**, **Repeat customers**, and **Win-back customers**. Open one in the segment builder, adjust the filters to fit your store, and save it like any other segment.
* Generated segments show **Needs review** and **AI** in the segments list
### If you don't have enough data yet
If you have no synced customers, or not enough for a reliable AI analysis, you'll see three ready-made segments instead: **VIP customers**, **Repeat customers**, and **Win-back customers**. Open one in the segment builder, adjust the filters to fit your store, and save it like any other segment.
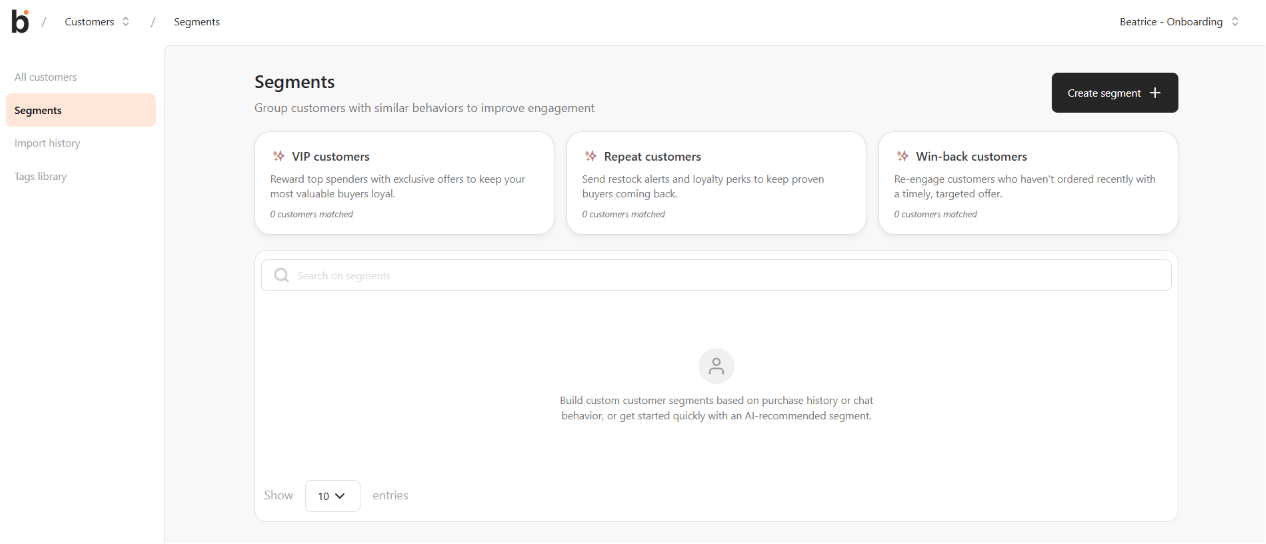 * The predefined templates, each with the AI-recommended sparkle icon
## Describe a segment in plain language
Inside the segment builder ([Customers → Segments → Create new segmentation](https://app.bitbybit.studio/customers/segments)), click **Build segment with AI** above **Segment details**.
* The predefined templates, each with the AI-recommended sparkle icon
## Describe a segment in plain language
Inside the segment builder ([Customers → Segments → Create new segmentation](https://app.bitbybit.studio/customers/segments)), click **Build segment with AI** above **Segment details**.
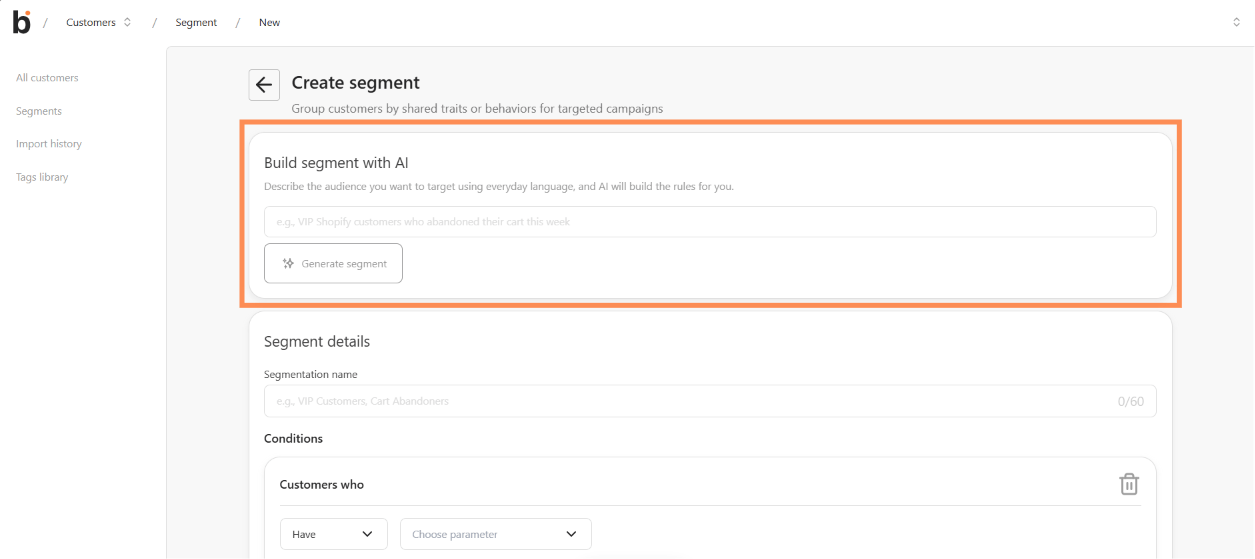 * The **Build segment with AI** panel, above **Segment details**
1. Type what you're looking for in your own words — for example "VIP Shopify customers who abandoned their cart this week."
2. Click **Generate segment**. bitbybit turns your description into the same kind of filters you'd set up manually, and pre-fills the builder with a name and conditions.
* The **Build segment with AI** panel, above **Segment details**
1. Type what you're looking for in your own words — for example "VIP Shopify customers who abandoned their cart this week."
2. Click **Generate segment**. bitbybit turns your description into the same kind of filters you'd set up manually, and pre-fills the builder with a name and conditions.
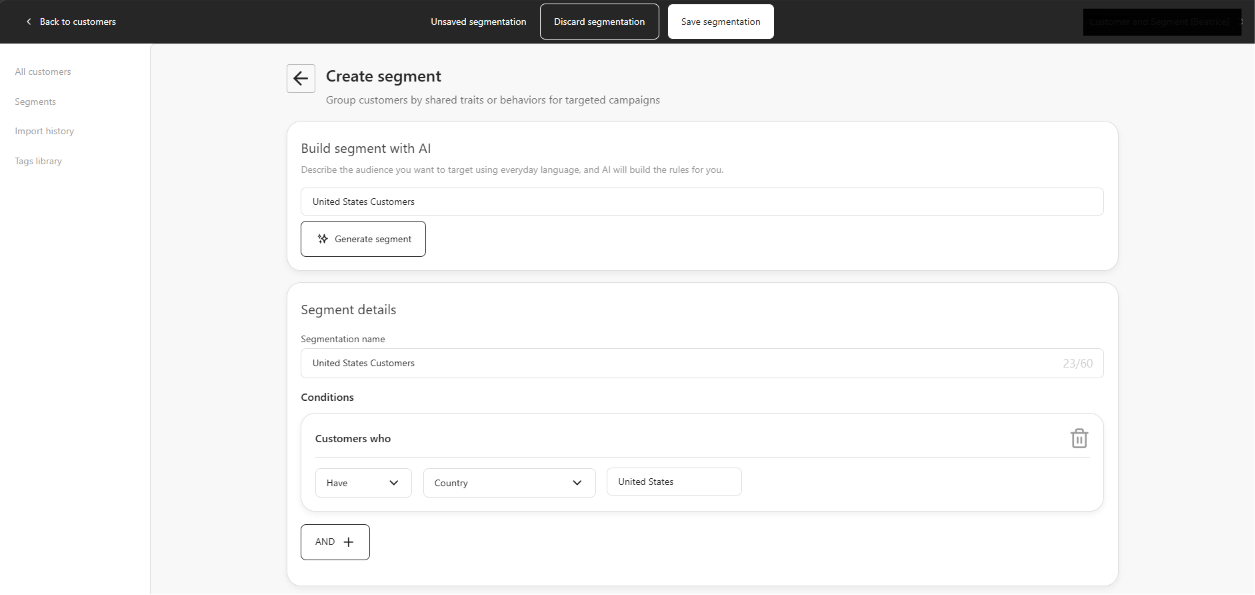 * The builder pre-filled with a segmentation name and conditions
3. Review the filters (edit them like any other segment condition), then save. Nothing is created until you explicitly save.
If your description can't be matched — it references something your store doesn't have data for, or it's too vague — you'll see a **Couldn't generate segment** alert explaining what wasn't found, with a suggestion for how to rephrase it. Edit your prompt and click **Try generating again**.
* The builder pre-filled with a segmentation name and conditions
3. Review the filters (edit them like any other segment condition), then save. Nothing is created until you explicitly save.
If your description can't be matched — it references something your store doesn't have data for, or it's too vague — you'll see a **Couldn't generate segment** alert explaining what wasn't found, with a suggestion for how to rephrase it. Edit your prompt and click **Try generating again**.
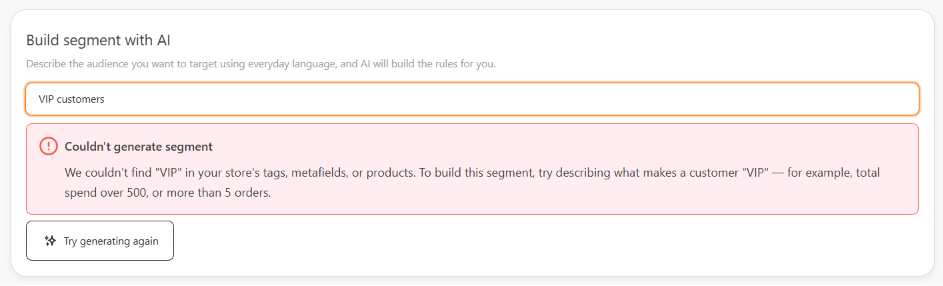 * The **Couldn't generate segment** alert
Building a segment with AI doesn't use your AI credit balance — it's included at no extra cost.
## Connecting Shopify during onboarding
If you're setting up bitCRM for the first time, the onboarding checklist includes a Shopify step that covers both connecting your store and starting the customer sync in one place:
* Connecting Shopify unlocks the sync action underneath it.
* Starting the sync runs in the background — onboarding shows a simple **Syncing** / **Synced** status, without blocking you from finishing the rest of the checklist.
* Once the sync completes, segment suggestions (above) become available for your data.
For the full sync experience — progress, re-sync, and freshness — see [Sync Shopify customer data](/bitcrm/how-to-sync-shopify-customer-data).
## Related
* [Sync Shopify customer data](/bitcrm/how-to-sync-shopify-customer-data)
* [Create a customer segment](/bitcrm/how-to-create-a-customer-segment)
* [Manage tags in the Tags library](/bitcrm/how-to-manage-tags-in-the-tags-library)
* The **Couldn't generate segment** alert
Building a segment with AI doesn't use your AI credit balance — it's included at no extra cost.
## Connecting Shopify during onboarding
If you're setting up bitCRM for the first time, the onboarding checklist includes a Shopify step that covers both connecting your store and starting the customer sync in one place:
* Connecting Shopify unlocks the sync action underneath it.
* Starting the sync runs in the background — onboarding shows a simple **Syncing** / **Synced** status, without blocking you from finishing the rest of the checklist.
* Once the sync completes, segment suggestions (above) become available for your data.
For the full sync experience — progress, re-sync, and freshness — see [Sync Shopify customer data](/bitcrm/how-to-sync-shopify-customer-data).
## Related
* [Sync Shopify customer data](/bitcrm/how-to-sync-shopify-customer-data)
* [Create a customer segment](/bitcrm/how-to-create-a-customer-segment)
* [Manage tags in the Tags library](/bitcrm/how-to-manage-tags-in-the-tags-library)