

Prerequisites
- You already created an AI agent in AI Studio.
- You know the questions your customers ask most, and what a good answer looks like.
How AI Tests works
- A test case is a group of questions, for example “Returns policy answers”.
- Each question is independent. The agent answers it as a new message, not as part of a chat.
- For each question, you write the Expected answer or behavior: what the agent must say or do.
- When you run a test case, your active AI agent answers every question, and the AI judge compares each answer with what you expected.
Step 1: Create a test case
- Go to AI Studio > AI Tests.
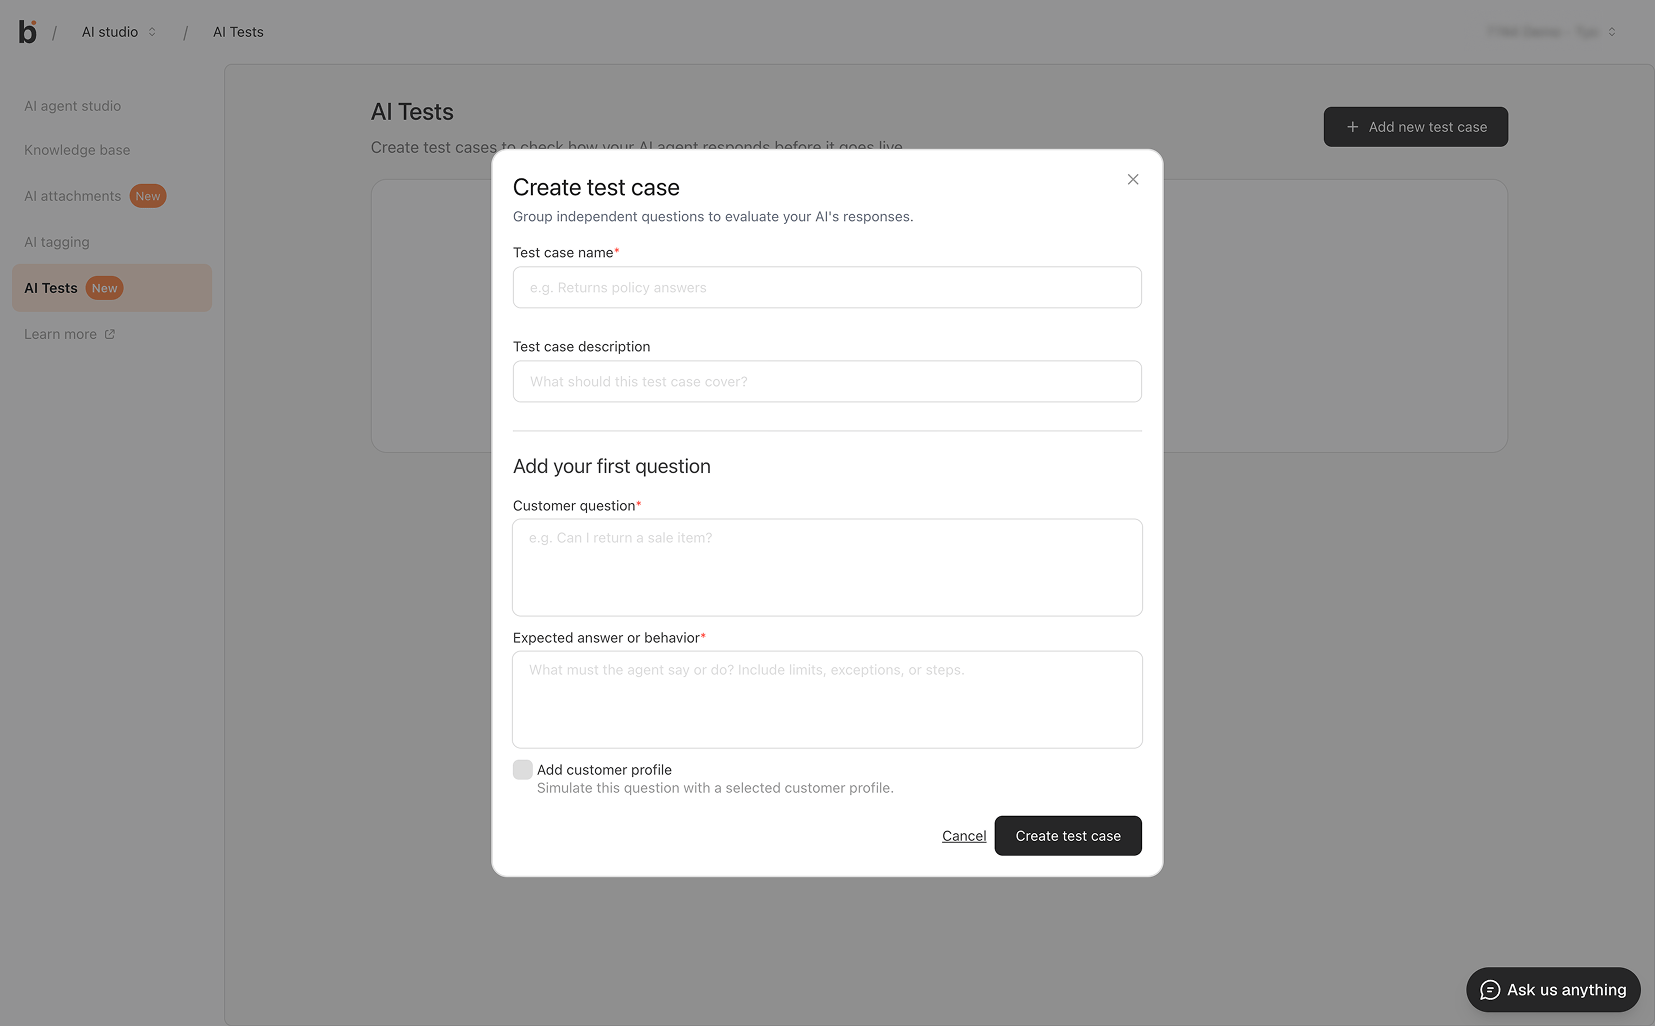
- Click Add new test case.
- Enter a Test case name and, optionally, a Test case description.
- Under Add your first question, fill in:
- Customer question: the message a customer would send, for example “Can I return a sale item?”
- Expected answer or behavior: what the agent must say or do. Include limits, exceptions, or steps.
- Optional: select Add customer profile, then pick a contact in Customer profile. The agent answers as if that customer asked the question.
- Click Create test case.
Step 2: Add more questions
- Click Add new item.
- Fill in Customer question and Expected answer or behavior. Add a customer profile if needed.
- Click Save question.
Step 3: Run the test
- Open the test case and click Run test.
- A progress card shows how many questions are done. If you stay on the test case, a message shows the pass count when the run finishes.
Step 4: Review the results
When the run finishes, the summary at the top of the test case shows how many questions passed, for example 8 of 10 passed. Each question also shows a Last result.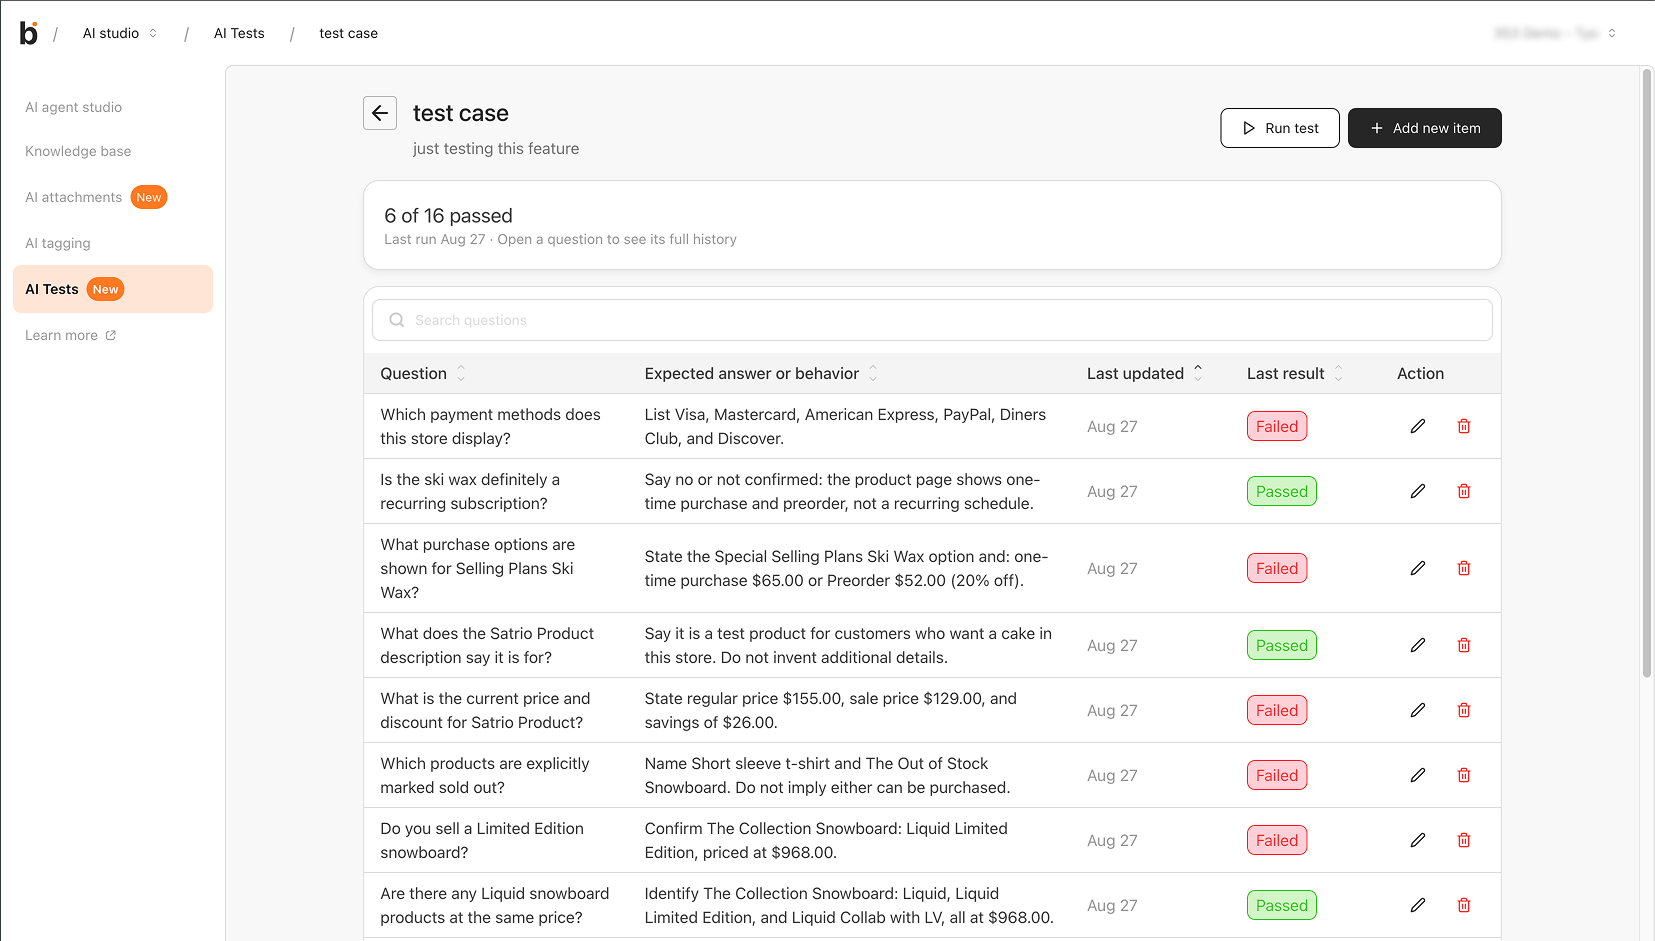
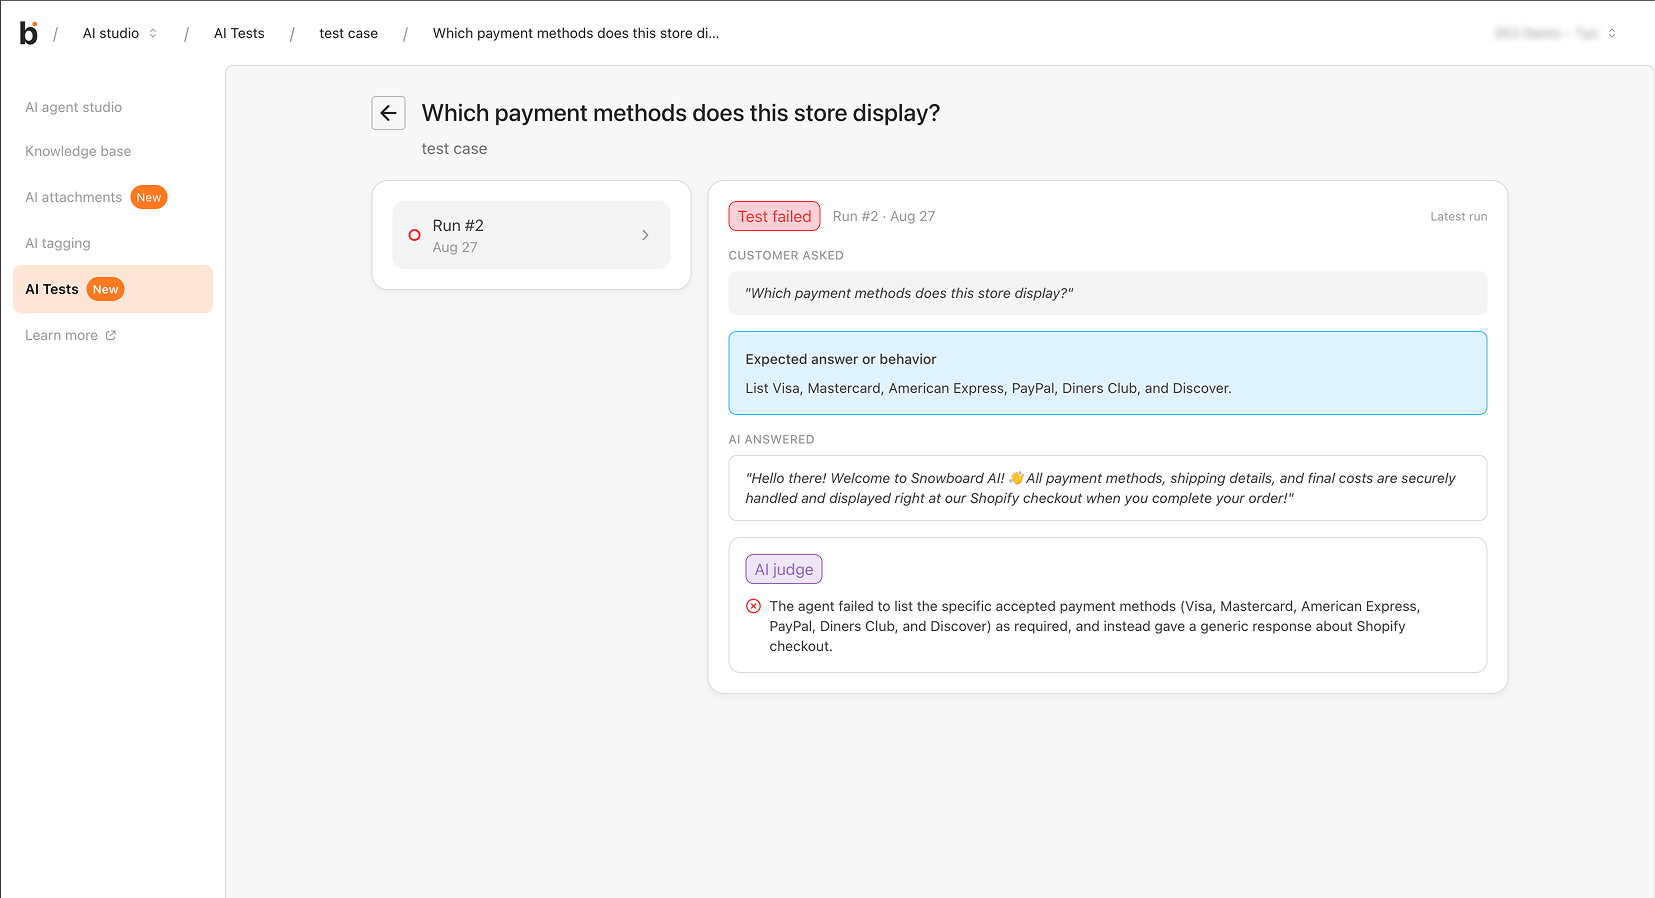
To see the details, click a question. The result page shows:
- Customer asked: the question that was sent.
- Expected answer or behavior: what you wrote.
- AI answered: your agent’s actual reply.
- AI judge: a short note on why the answer passed or failed.
Manage test cases and questions
- Edit a test case: on the AI Tests page, click the edit icon to rename it or change its description.
- Edit or delete a question: open the test case, then use the edit or delete icon on the question’s row.
- Delete a test case: on the AI Tests page, click the delete icon.