

Before you start
- Have your Appstle customer export files ready. To use the imported points on your Shopify storefront, connect your store to bitbybit and enable your loyalty program.
- Appstle is still installed on your store. You need it to export your files, and you uninstall it only after the import.
- You are on a laptop or desktop. The Get started guide is not shown on phone-sized screens.
Moving from Smile, LoyaltyLion, or another app? On the import selection page, choose Contact us under Other app so our team can help you check what can come over.
What comes over
After the import, set up your rewards and ways to earn in bitLoyalty.
Step 1: Prepare Appstle
Do this first so customers can’t earn or spend points in Appstle while you export. Otherwise their balance in bitLoyalty won’t match what they see in Appstle.- In Appstle, open Ways to earn and set the status of each earn rule to Disabled.
- Turn off the Appstle loyalty widget so customers can’t redeem points there.
- Keep Appstle installed until the import is done.
Step 2: Export your files from Appstle
Export your customers
- In Shopify admin, open Appstle Loyalty and choose Customers from the app’s menu.
- Click Export at the top right of the Customers page.
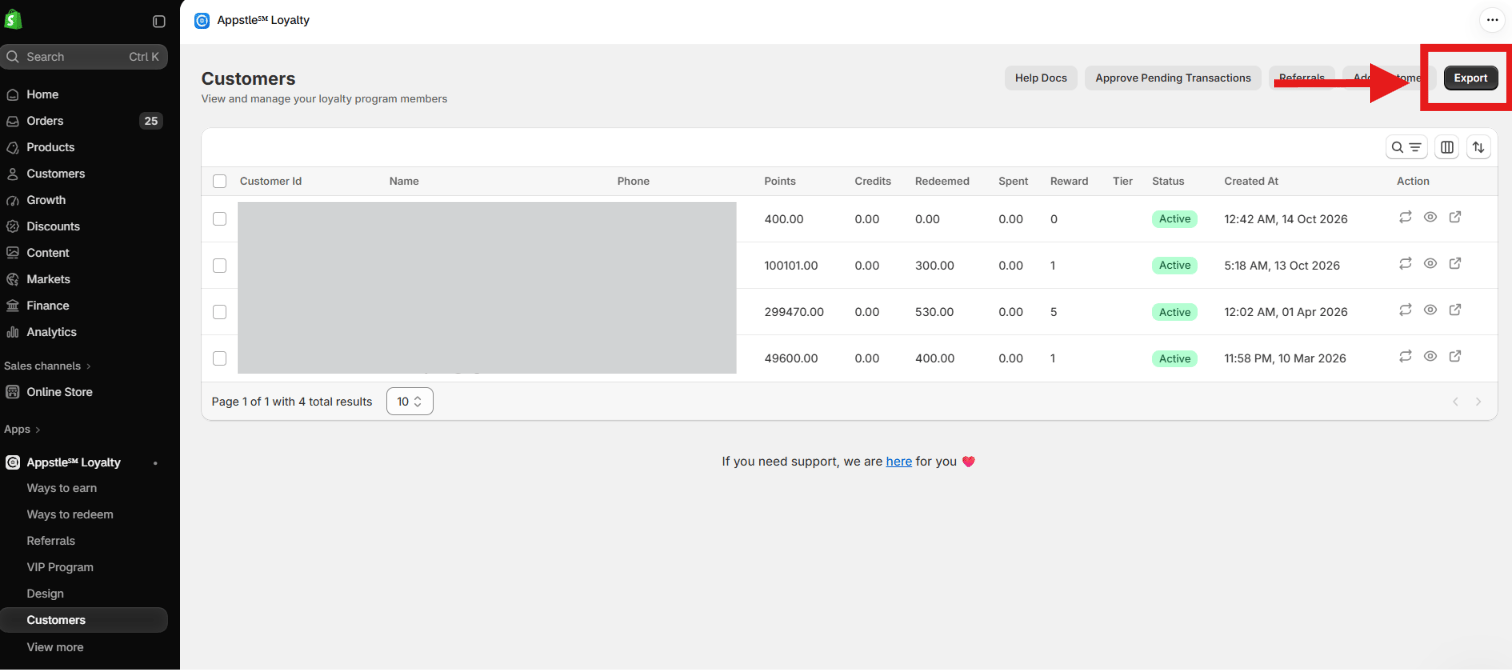
- Wait for the email from Appstle and download all the customer files. Big stores receive several parts, for example
CUSTOMER_DATA_export_1_of_2.csvandCUSTOMER_DATA_export_2_of_2.csv.
Export the activity log (optional)
Add the activity log if you want points expiry to count from each customer’s qualifying activity date in Appstle.- Open More in Appstle’s menu, then select Activity Logs.
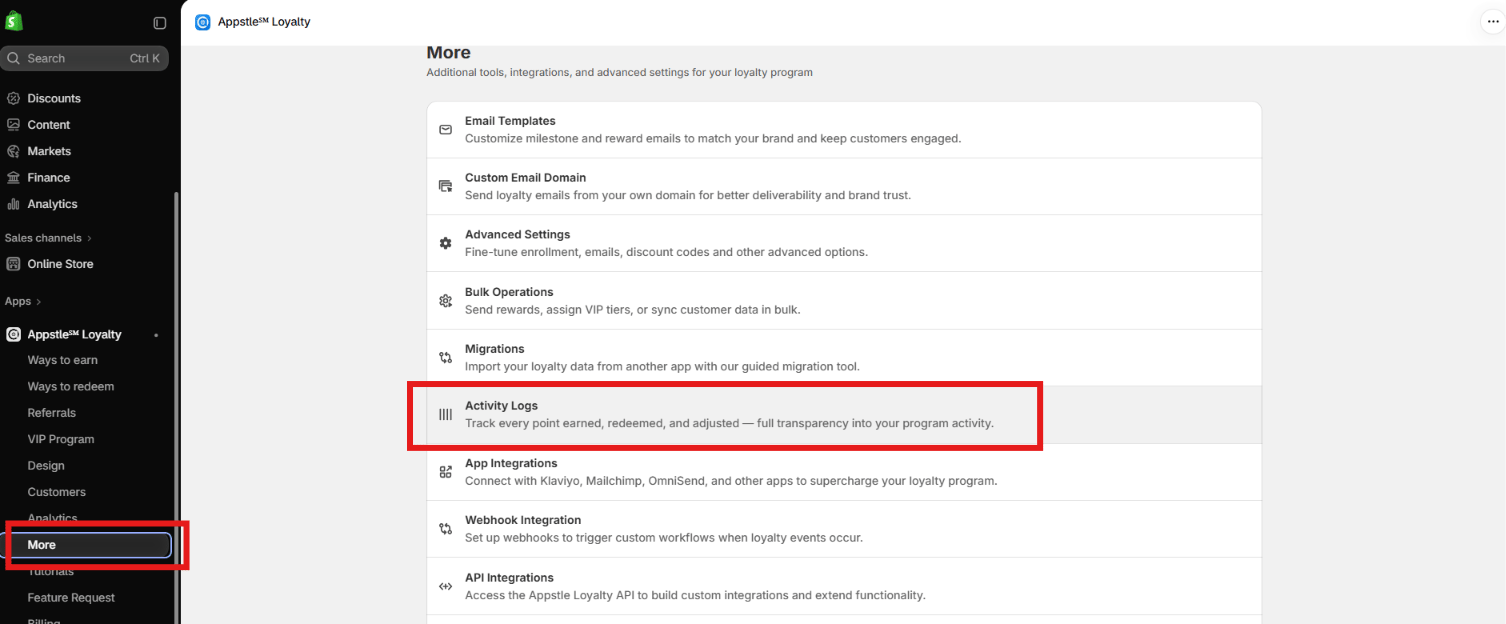
- On the Activity Logs page, click Export at the top right.
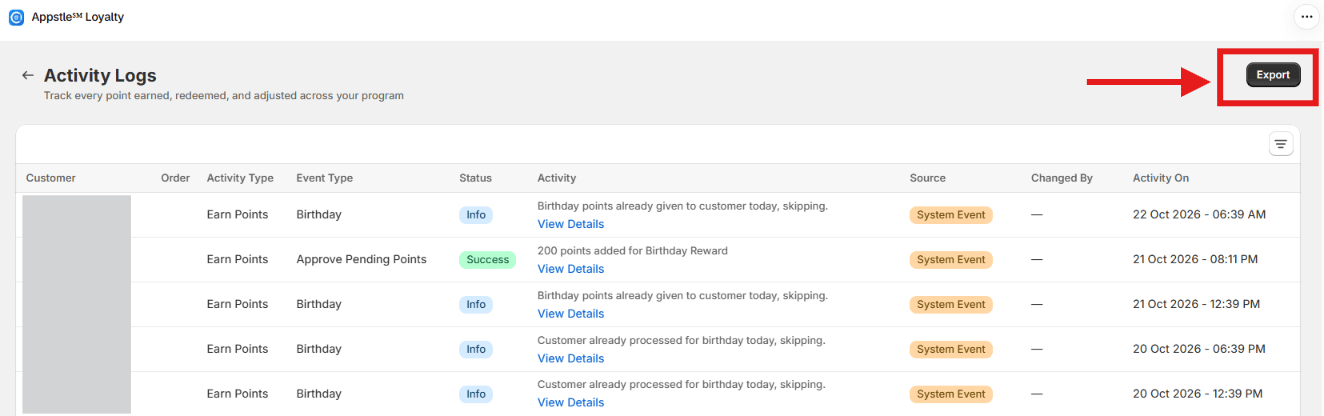
- Download the exported activity-log CSV when it is available. Keep it separate from the customer files; you will add it under Activity log (optional) in bitLoyalty.
Step 3: Open the import page
Choose one of these ways:- Open bitLoyalty > Get started, go to the Import from another app step, and click Start import next to Appstle.
- Open bitLoyalty > Earn points, click Import from another app, and click Start import next to Appstle.
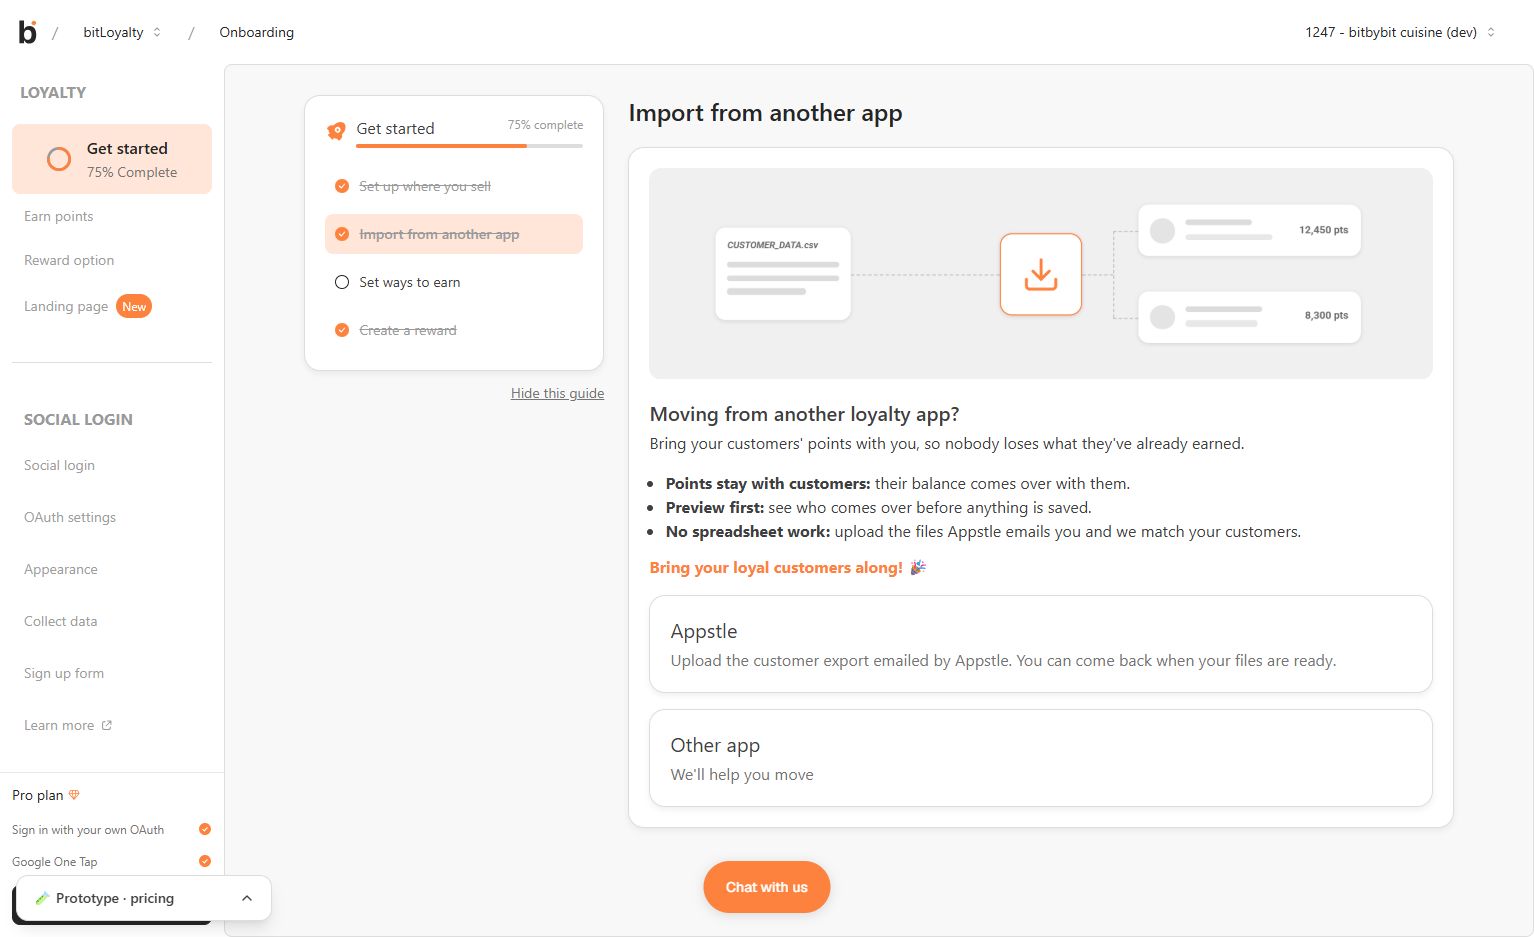
Step 4: Upload your files
- Drag your customer files into Upload your files, or click the area to choose them.
- Optional: add the activity log under Activity log (optional).
- Click Check my files.
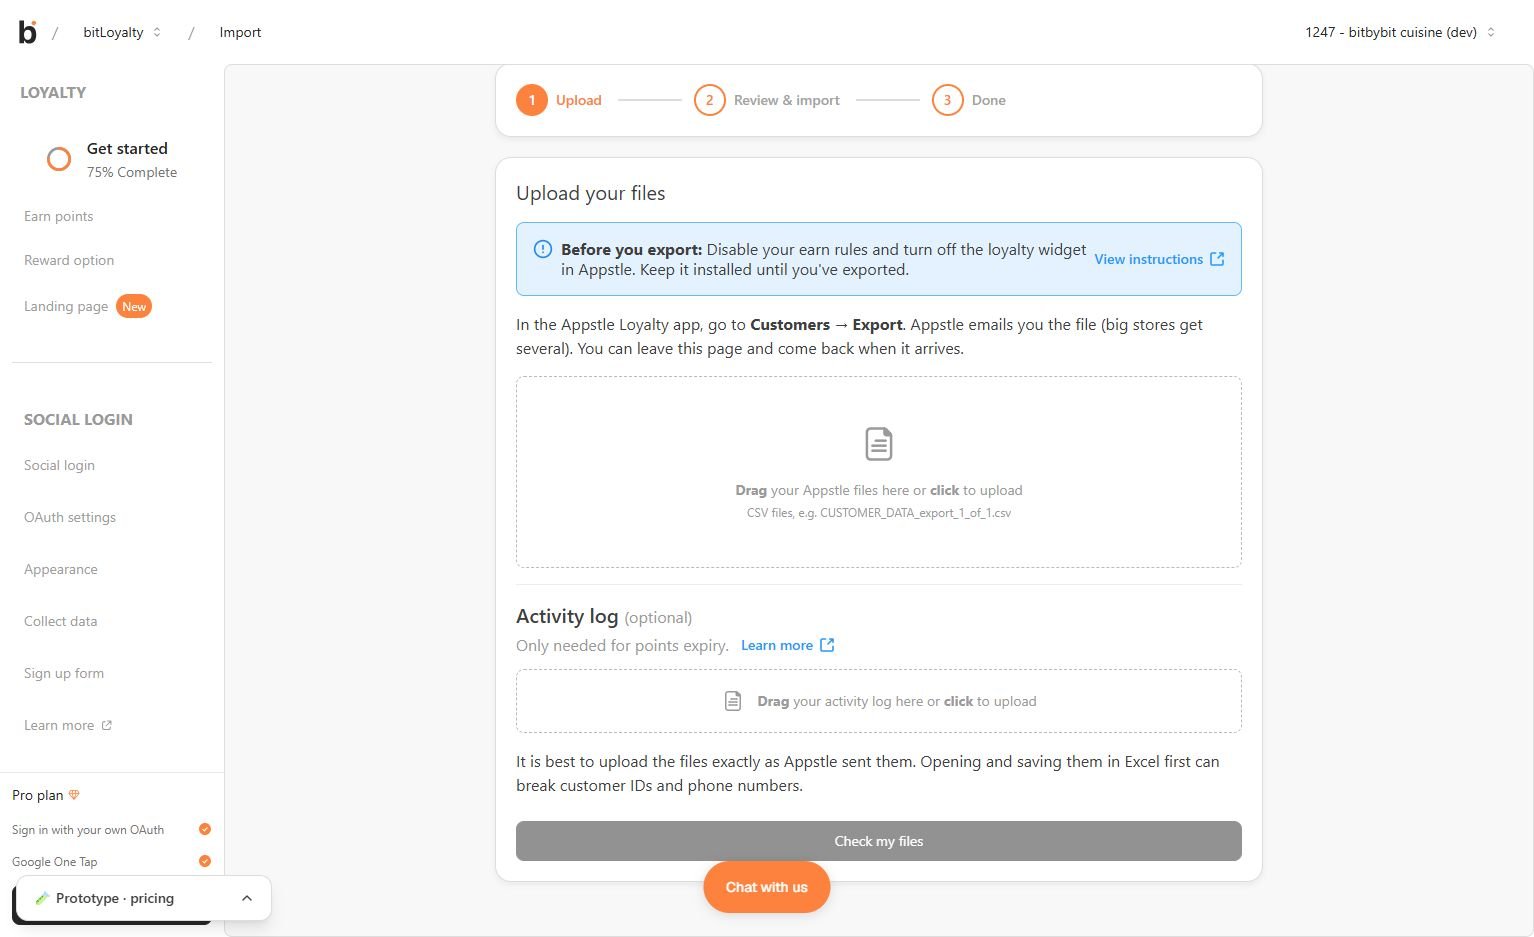
.csv files are accepted. The activity log can’t be uploaded on its own, because it has no points to import.
If a file isn’t an Appstle export, you see We couldn’t read followed by the file name, with a Contact us button. Remove that file, upload the right one, and click Check my files again.
Step 5: Review the preview
The Review your Appstle points page shows what will happen. Nothing is saved yet.- Here’s what we found shows how many customers and how many points come over.
- If nobody is left out, the Customers table marks each listed customer Matched (already in bitbybit) or New to bitbybit (created during the import).
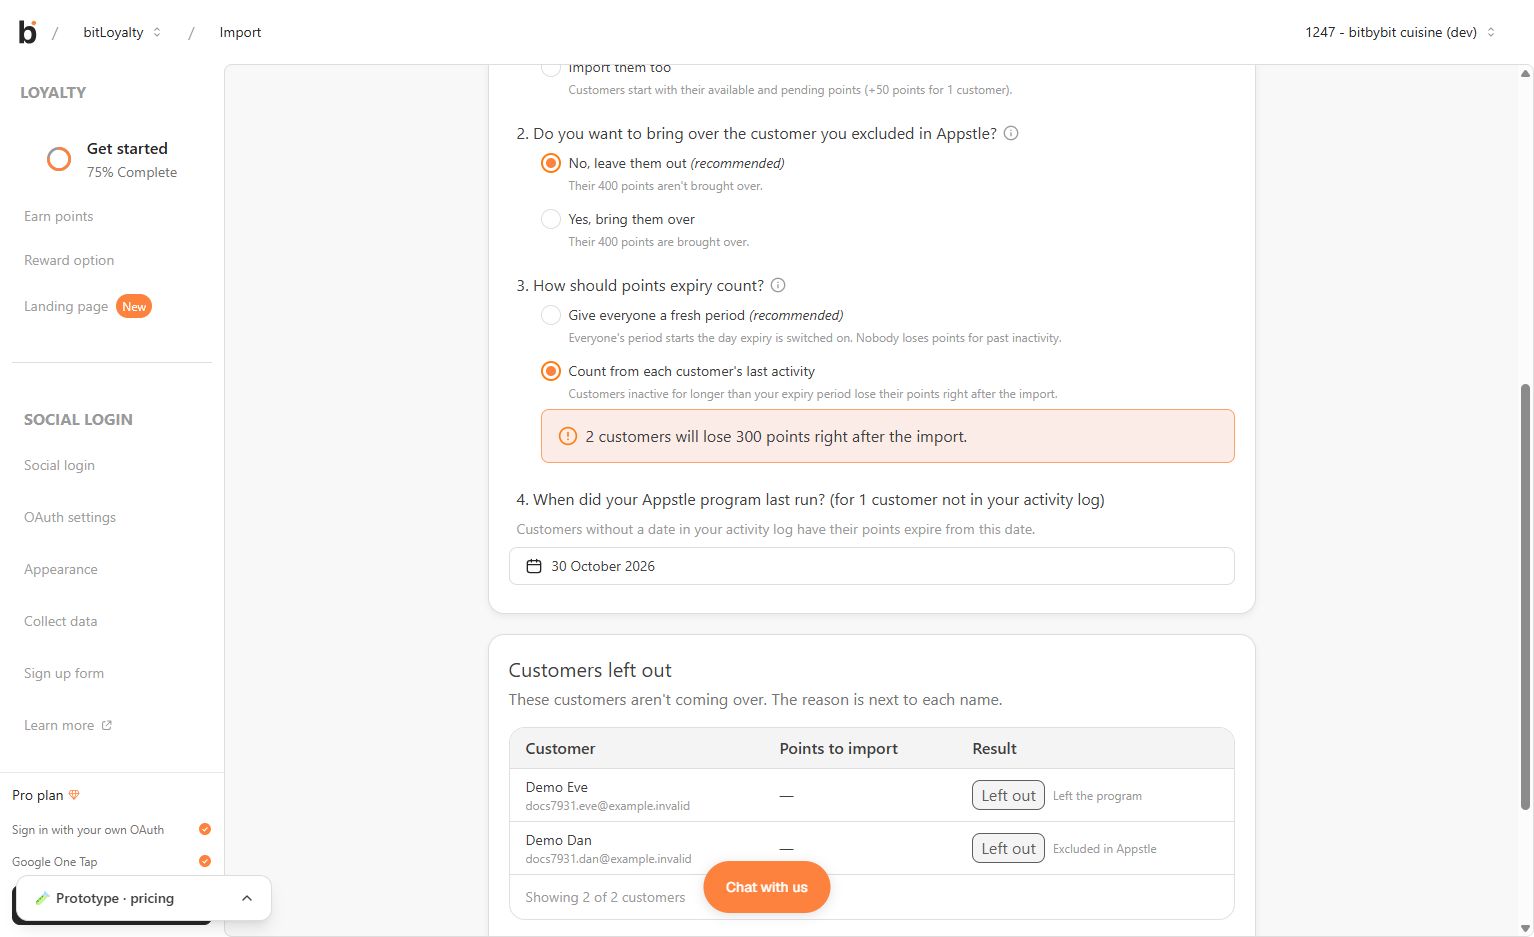
- If anyone is left out, the table shows Customers left out instead, with a reason for each customer: Excluded in Appstle, No email or phone, Left the program, Unknown Appstle status, or Points value looks wrong.
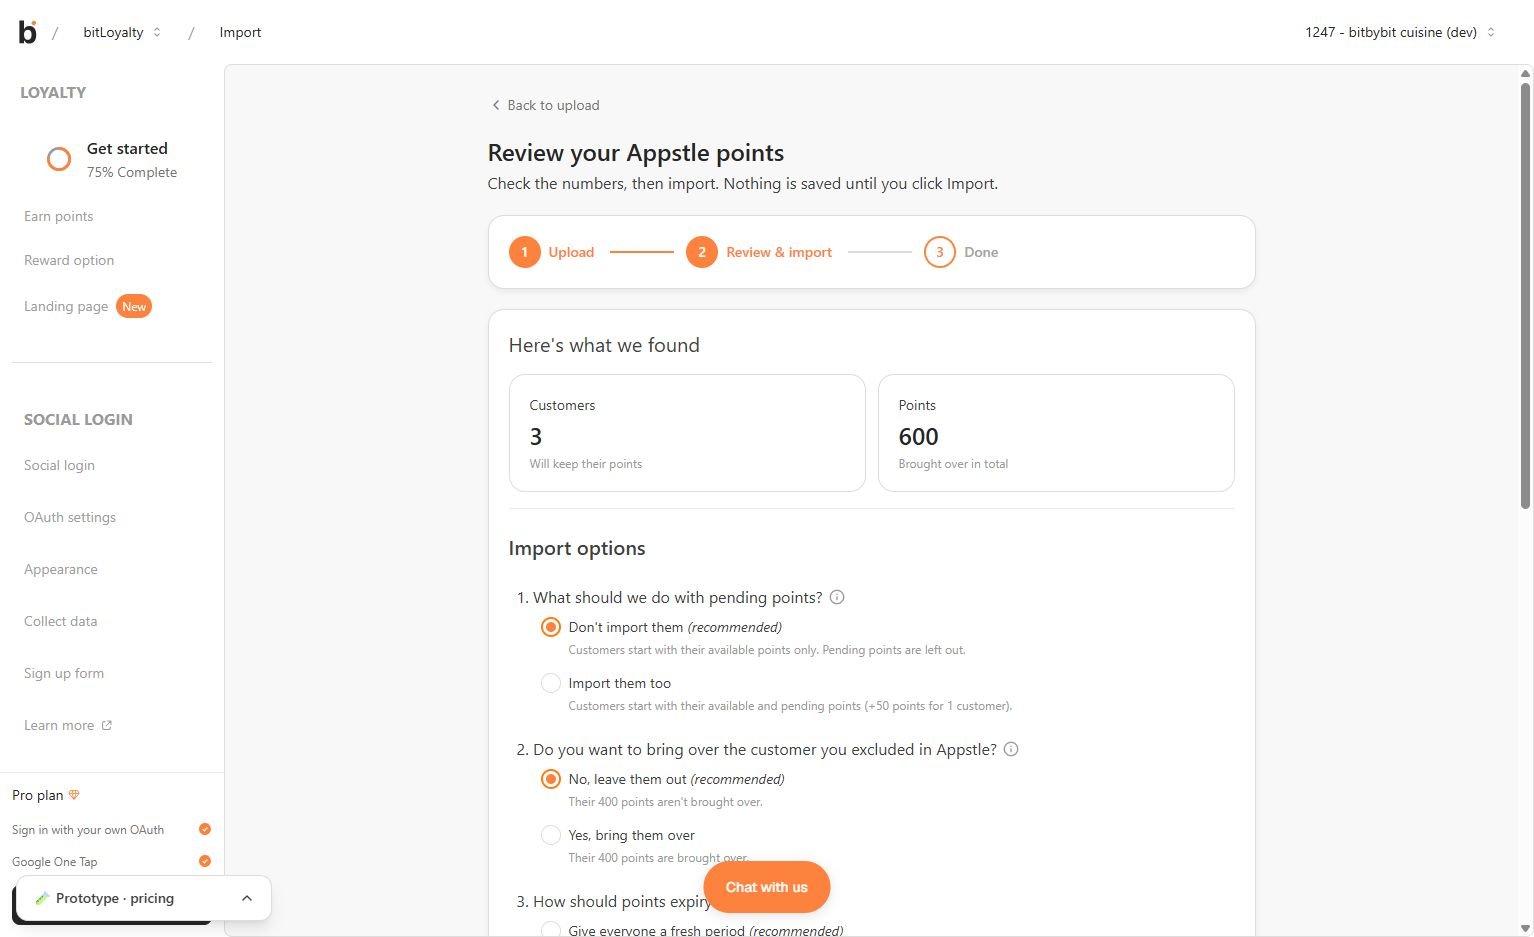
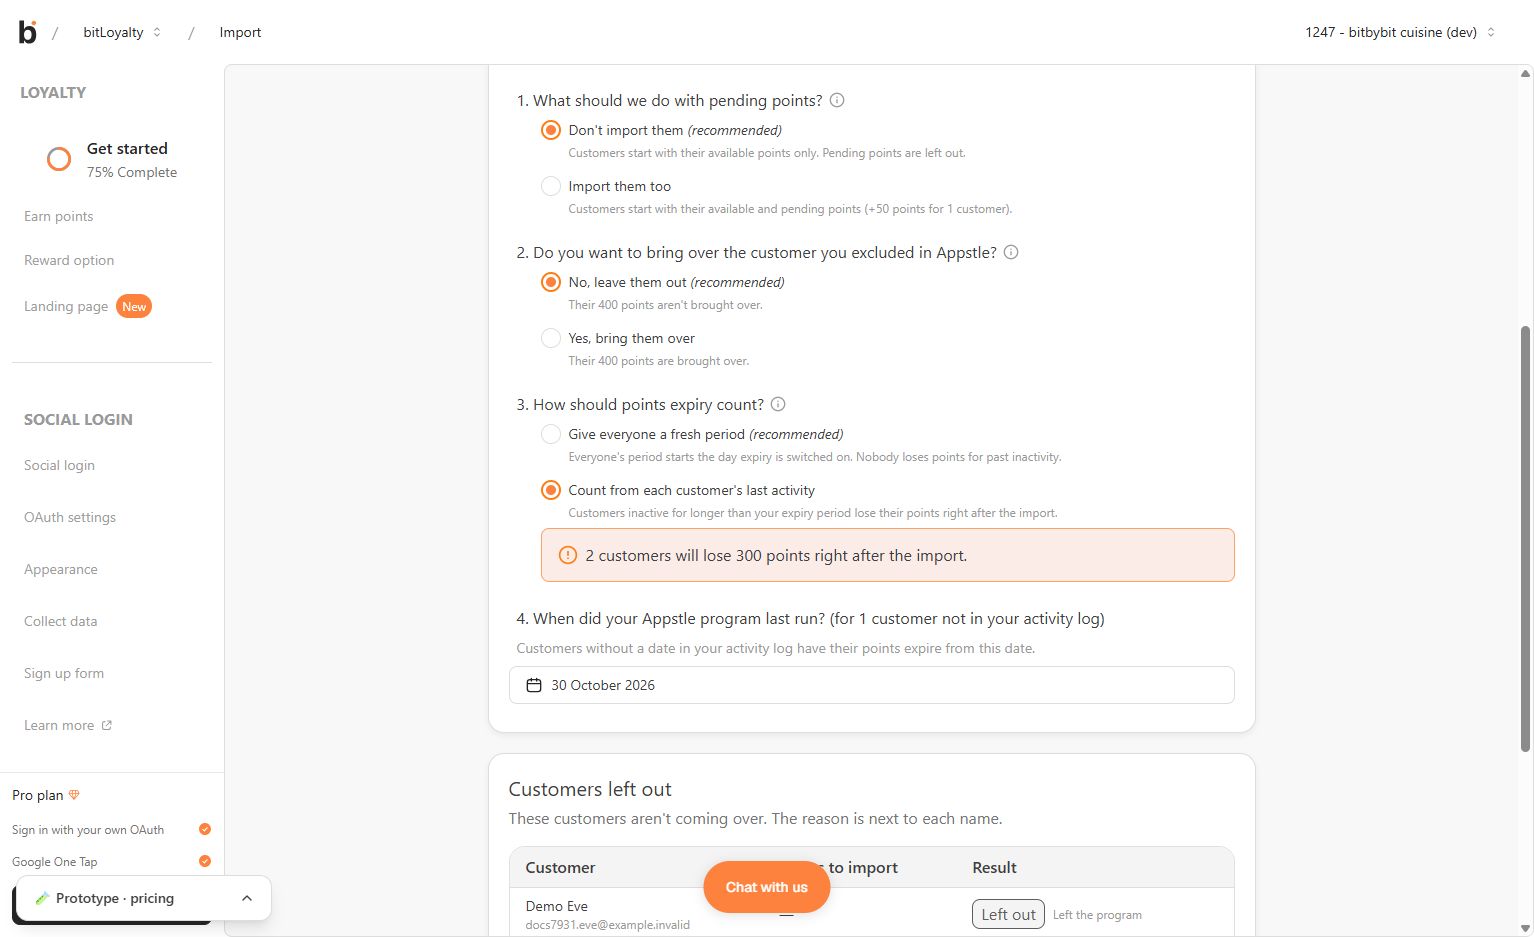
- Pending points. Points a customer earned that Appstle was still holding. Don’t import them (recommended) is selected by default. Choose Import them too to add them to the available points.
- Customers you excluded in Appstle. No, leave them out (recommended) is selected by default. Choose Yes, bring them over to include them. Customers who left the program or have no email or phone can’t come over either way.
Choose how points expiry counts
Under How should points expiry count?, choose:- Give everyone a fresh period (recommended). Customers do not lose points because of activity before the fresh period started. You do not need to choose an Appstle last-run date.
- Count from each customer’s last activity. Use the activity log to carry over each customer’s qualifying activity date. Without an activity log, this option reads Count from the date below.
Fix points values that look wrong
Points value looks wrong means an available-points or pending-points value cannot be imported safely. Values above 1,000,000,000,000 or written in scientific notation, such as1.2E+15, are left out.
Get a fresh export from Appstle and upload it without opening and saving it in Excel. The other valid customers can still be imported.
Step 6: Start the import
- Click Import points for N customers.
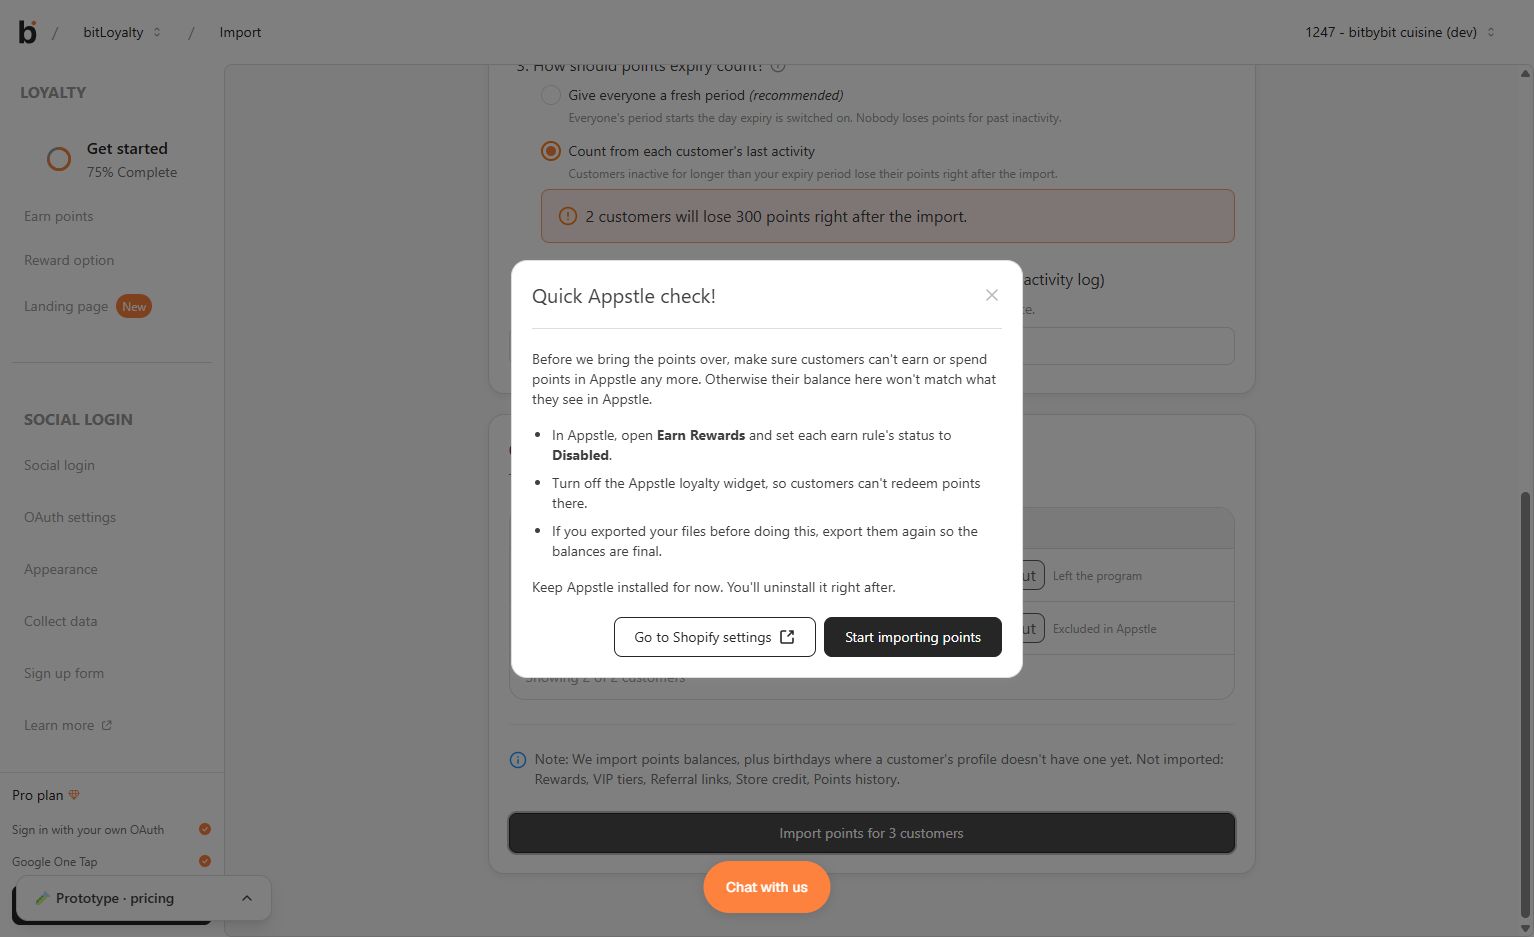
- In the Quick Appstle check! pop-up, confirm you turned off Appstle’s earn rules and widget. Click Go to Shopify settings if you still need to, or click Start importing points.
- Wait while the progress screen runs. The progress bar moves in steps of 500 customers.
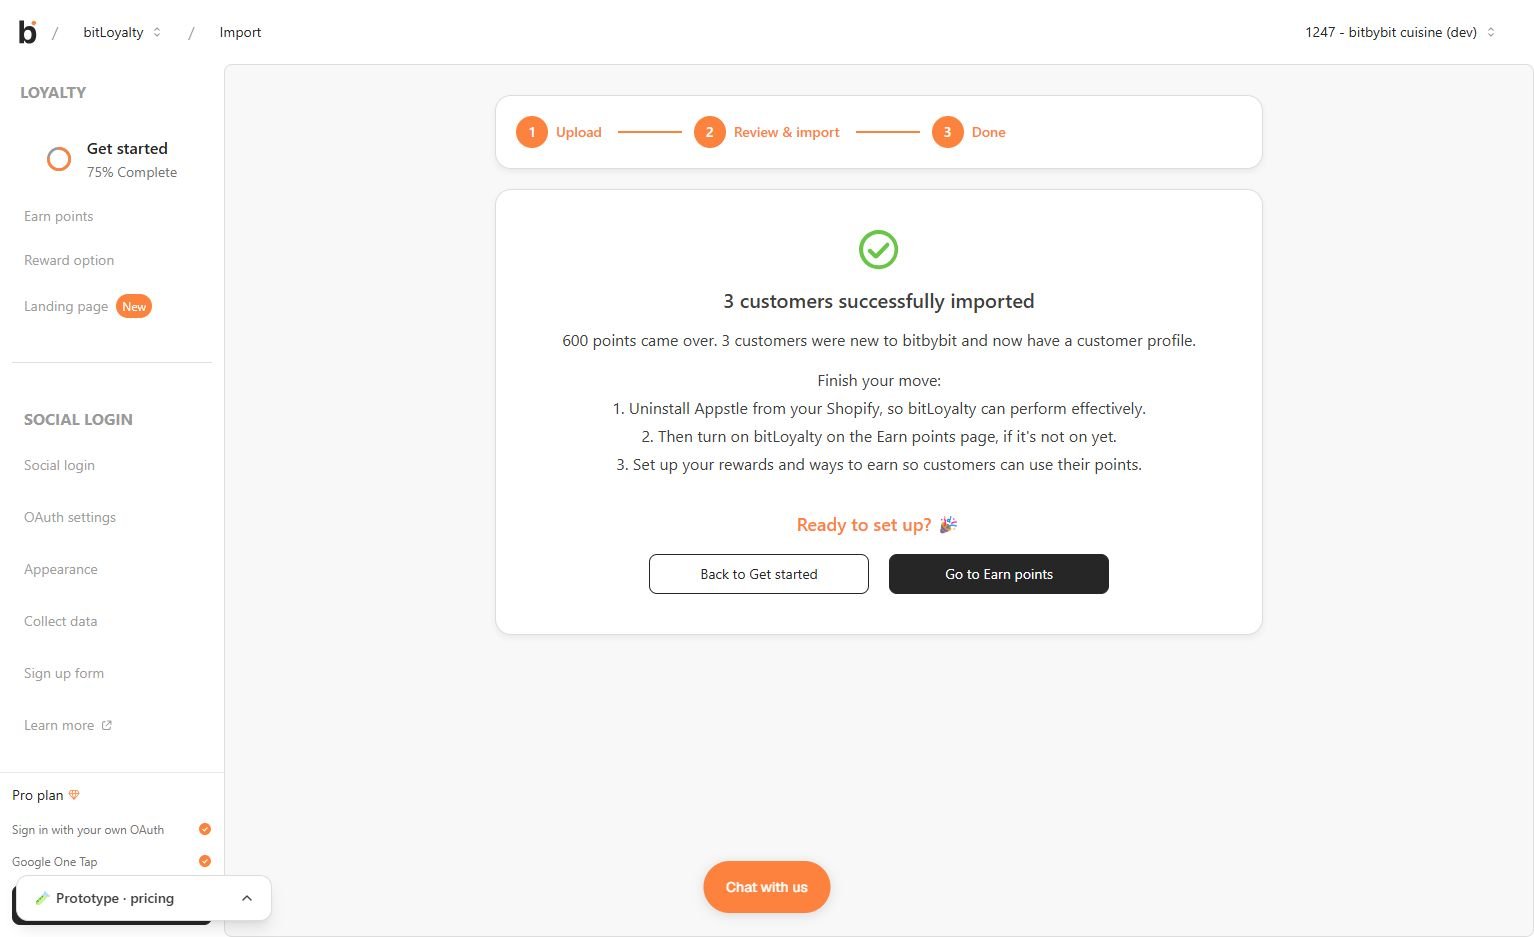
- Uninstall Appstle from your Shopify, so bitLoyalty can perform effectively.
- Turn on bitLoyalty on the Earn points page, if it’s not on yet.
- Set up your rewards and ways to earn so customers can use their points.
How the import treats your customers
- Matching. Each row is matched to an existing customer by Shopify ID first, then by email, then by phone. The first match is used.
- Existing customers keep their details. A matched customer keeps their own name, email, and phone. The import never overwrites them.
- Birthdays. An empty birthday is filled from the file. A birthday that already exists is never changed.
- New customers. Customers who aren’t in bitbybit are created from the file, then receive their points. Their Source is bitLoyalty import.
- Existing balances. On a first import, the points are added on top of any balance the customer already has in bitLoyalty.
Import again with a corrected file
You can upload a corrected file for the same customers. The new numbers replace the earlier Appstle numbers and are never added twice. For each customer, only the difference is applied, so a balance can go up or down. The Review your Appstle points page tells you when this applies: “N customers you’re importing now came over in an earlier import. Their balance is replaced with the one in this file, not added to it.” Points a customer earned or spent in bitLoyalty since the first import stay as they are.Check a customer’s points after the import
- Open Customers and search for a customer.
- Open their profile and look at Loyalty balance. If points expiry is on, Expires on and a date appear under the balance.
- Click View points history next to Points. The import shows as Balance imported from the previous loyalty app.