

Requirements before you start
- Verified Meta Business Manager. Your business must be verified by Meta with legal documents.
- Admin access to Meta Business Manager. You must have full control access in your Business Manager account.
- A clean, unused phone number:
- Not currently used on any WhatsApp account, personal or business.
- Able to receive SMS or phone calls for verification.
- Business details ready: business name, address, website or social media page, and email, plus legal documents (NPWP, SIUP, or equivalent).
Create a Meta Business Manager
Skip this section if you already have a Meta Business Manager account.- Go to business.facebook.com and create a new Business Account.
- Complete your business information and verify your email address.
Verify your Business Manager
- In Business Settings, go to Security Center → Business Verification.
- Submit your legal business documents, such as NPWP, SIUP, or other equivalent documents as required.
Step 1: Access Integrations
Navigate to the Integrations dashboard and select WhatsApp Cloud API.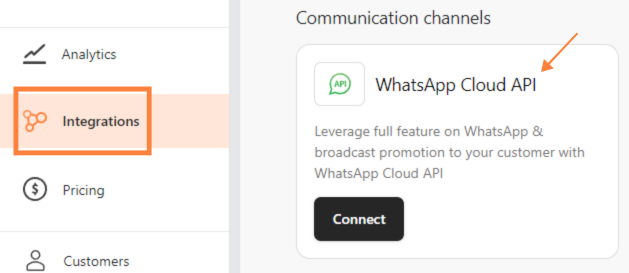
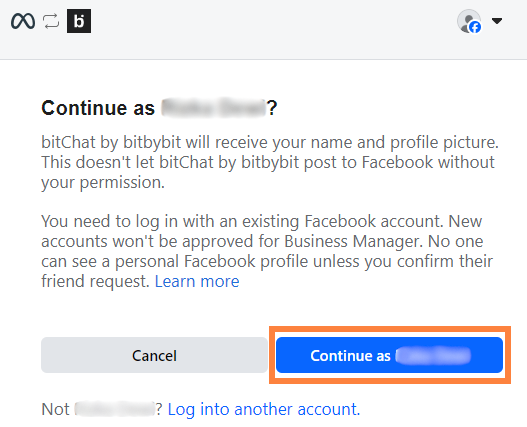
Step 2: Connect your Facebook account

- Click “Continue as your Facebook Account”.
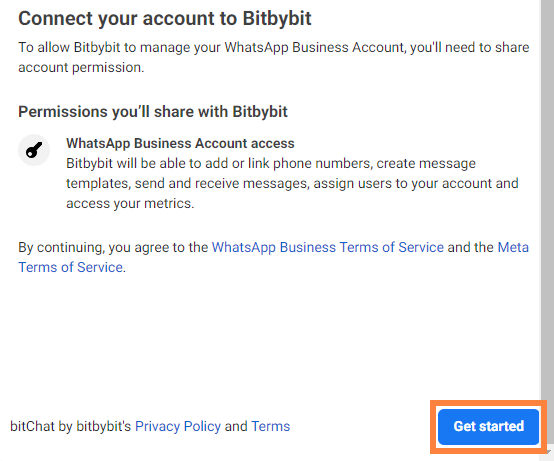
- Click “Get started”.
Step 3: Fill in your business information
This step is only necessary if you are creating a new Facebook Business Manager account.
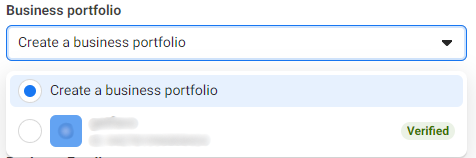
- Create a business portfolio, then fill in “Business name”, “Business email”, “Business website or profile page”, and “Country”.
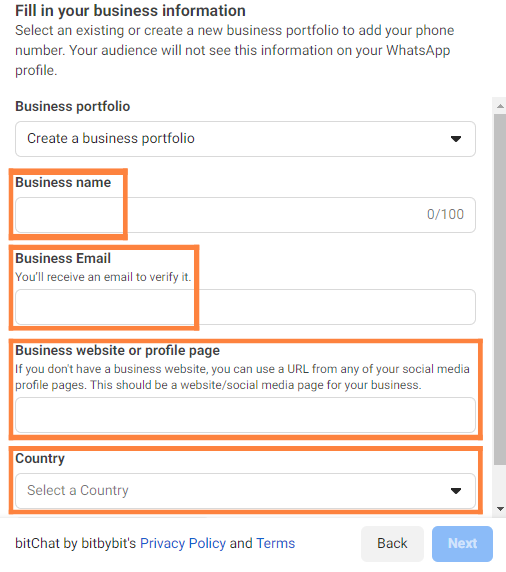
- Or select an existing business portfolio from the dropdown, which auto-fills the form.
Create or select your WhatsApp Business Account
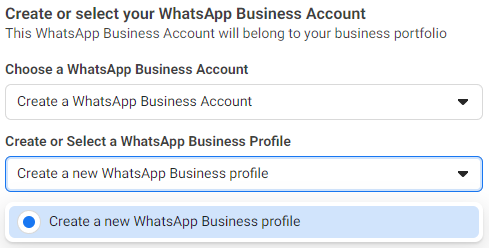
On “Create or select your WhatsApp Business Account”, use the “Create a WhatsApp Business Account” and “Create or Choose WhatsApp Business Profile” dropdowns to choose one of the following.- Choose “Create a WhatsApp Business Account”, then “Create a new WhatsApp Business Profile”.
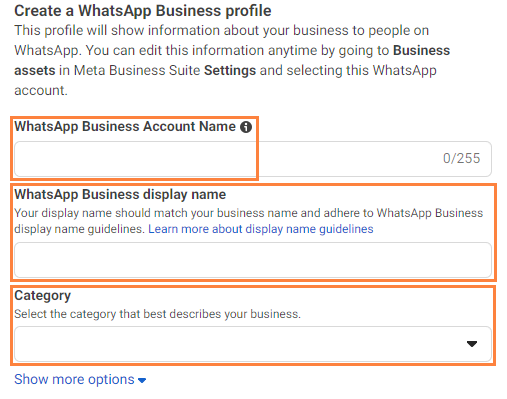
- Fill in “WhatsApp Business Account Name”, “WhatsApp Business display name”, and “Category”, then click “Next”.
- Or select an existing “WhatsApp Business account”, then in the “Create or choose WhatsApp Business Profile” dropdown, choose “Create a new WhatsApp Business profile”.
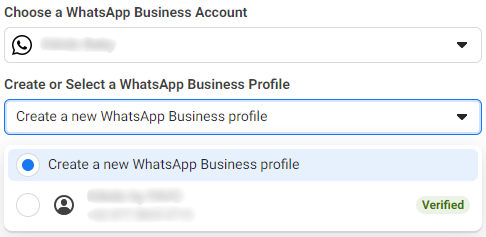
You can create multiple profiles on your WhatsApp Business account.
Step 4: Add a phone number for WhatsApp
Add the phone number you will connect to bitbybit. This number cannot be used simultaneously in the WhatsApp Business or WhatsApp consumer app. Alternatively, get a free WhatsApp number: WhatsApp generates a +1 555 number to use exclusively for sending messages. It cannot start or receive calls or texts, and no verification is required. This option is available for selected accounts. Enter a phone number to receive the verification code in “Add a new or existing number”, then click “Next”.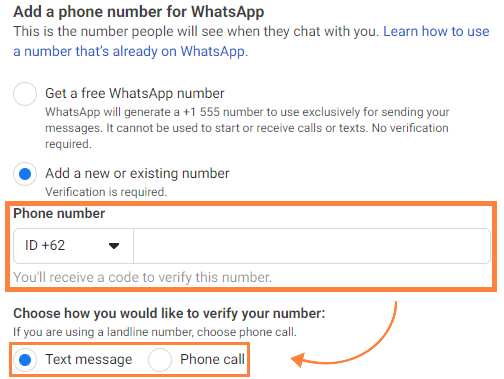
If the number is active on one of the WhatsApp apps, delete it from the app first. Follow steps 3–5 of this process.
Step 5: Insert the verification code
Enter the verification code sent to your phone number.
Step 6: Add a payment method
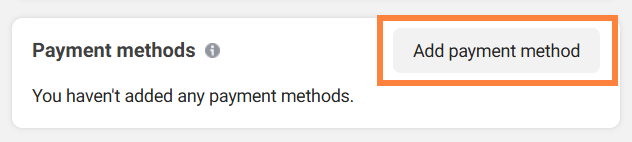
Complete the process by clicking “Add payment method”. To fully activate your WhatsApp Cloud API and unlock all messaging features, add a payment method in Meta Business Manager:
- Go to Business Settings at business.facebook.com.
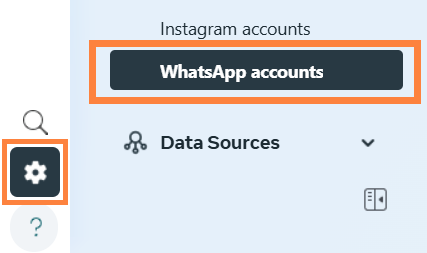
- In the left sidebar, select Settings and click WhatsApp Accounts.
- Select the WhatsApp Business Account you just connected.
- Scroll down and click Payment Settings.

- Click Add Payment Method and complete the required billing details.
- Fill in all business information as requested, including name, legal entity, and billing address.
- After saving, make sure there are no alerts or warnings on the payment settings page.
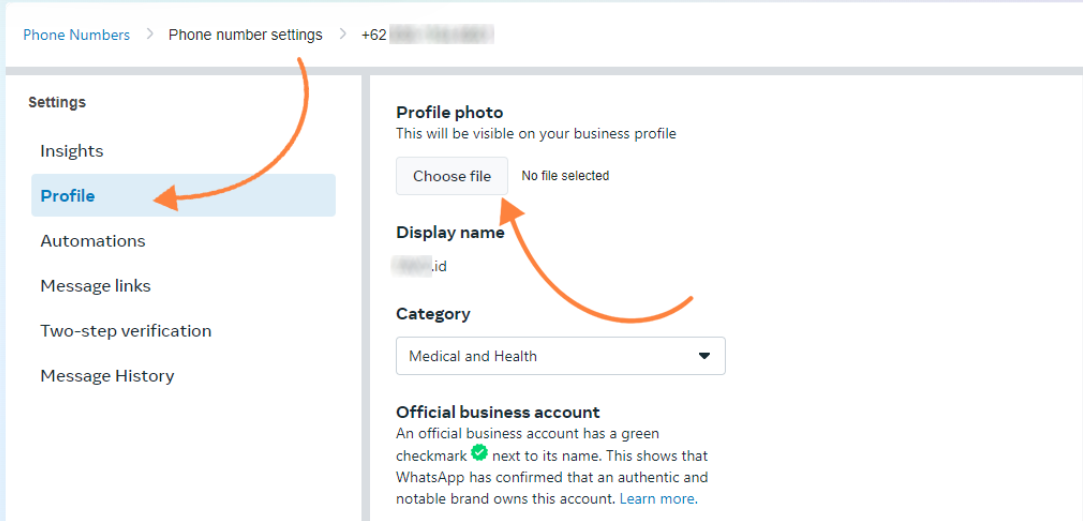
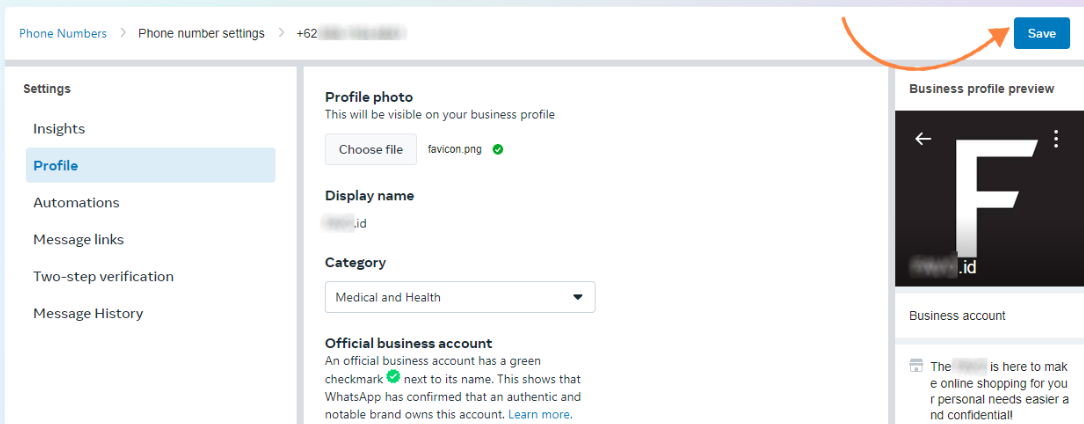
Step 7: Add a profile picture
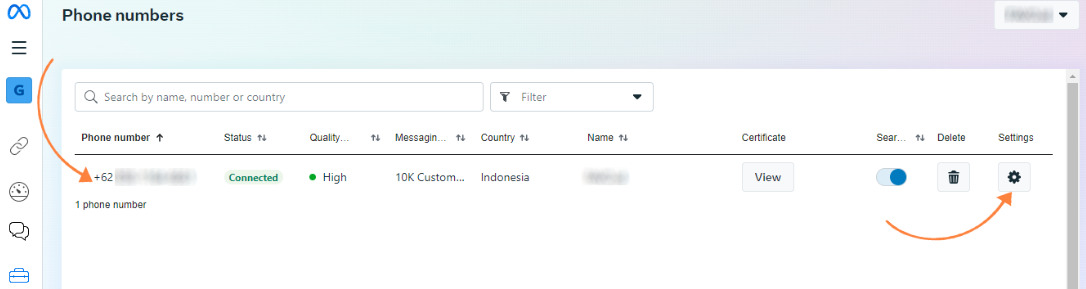
Your profile picture is the first impression customers get when they message you. Many businesses use their logo to convey professionalism and trust; others show a signature product. You can add it either from bitbybit or from Facebook Business Manager.- From the bitbybit app
- From Facebook Business Manager


Test your WhatsApp Cloud API connection
After setting up WhatsApp Cloud API and adding a payment method, send a test message using a Campaign, Automation, or Chat Initiation template. Follow these guides to create your template:- Campaign: Create a Message Template Campaign
- Automation: Choose a Message Template for Automation
- Chat Initiation: Create a chat initiation template
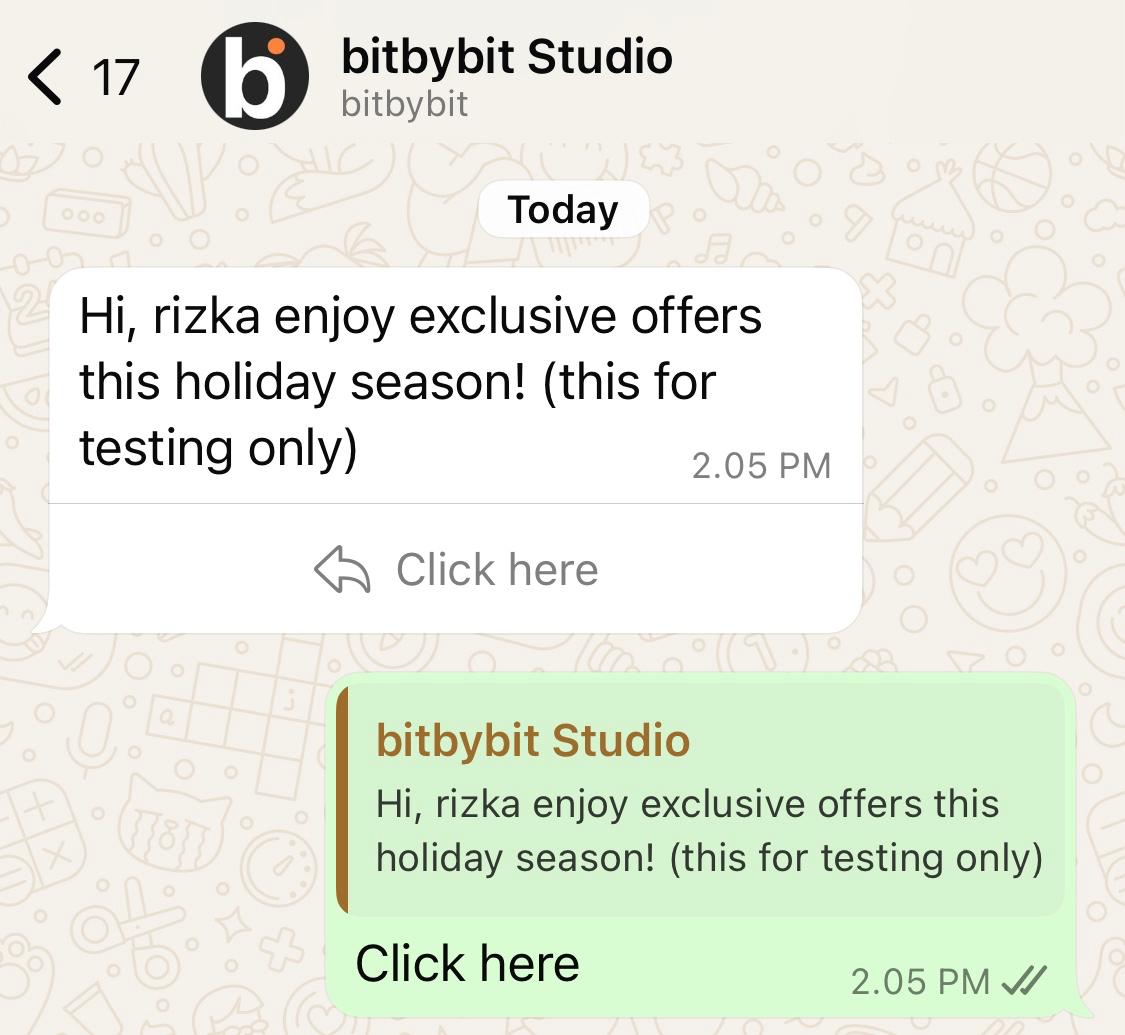
If the message delivers successfully, your integration is complete.
Related
- WhatsApp Business App — keep using your WhatsApp Business App alongside the Cloud API
- WhatsApp Sandbox — test features with your own number
- Fix “phone number is already linked”