

- Tailor product recommendations: We analyze your preferences to tailor product recommendations and marketing messages to your specific interests.
- Enhanced Customer Support: Your data helps us provide efficient and personalized customer service.
- Enhance marketing campaigns: We analyze and create targeted marketing campaigns that are relevant to your interests.
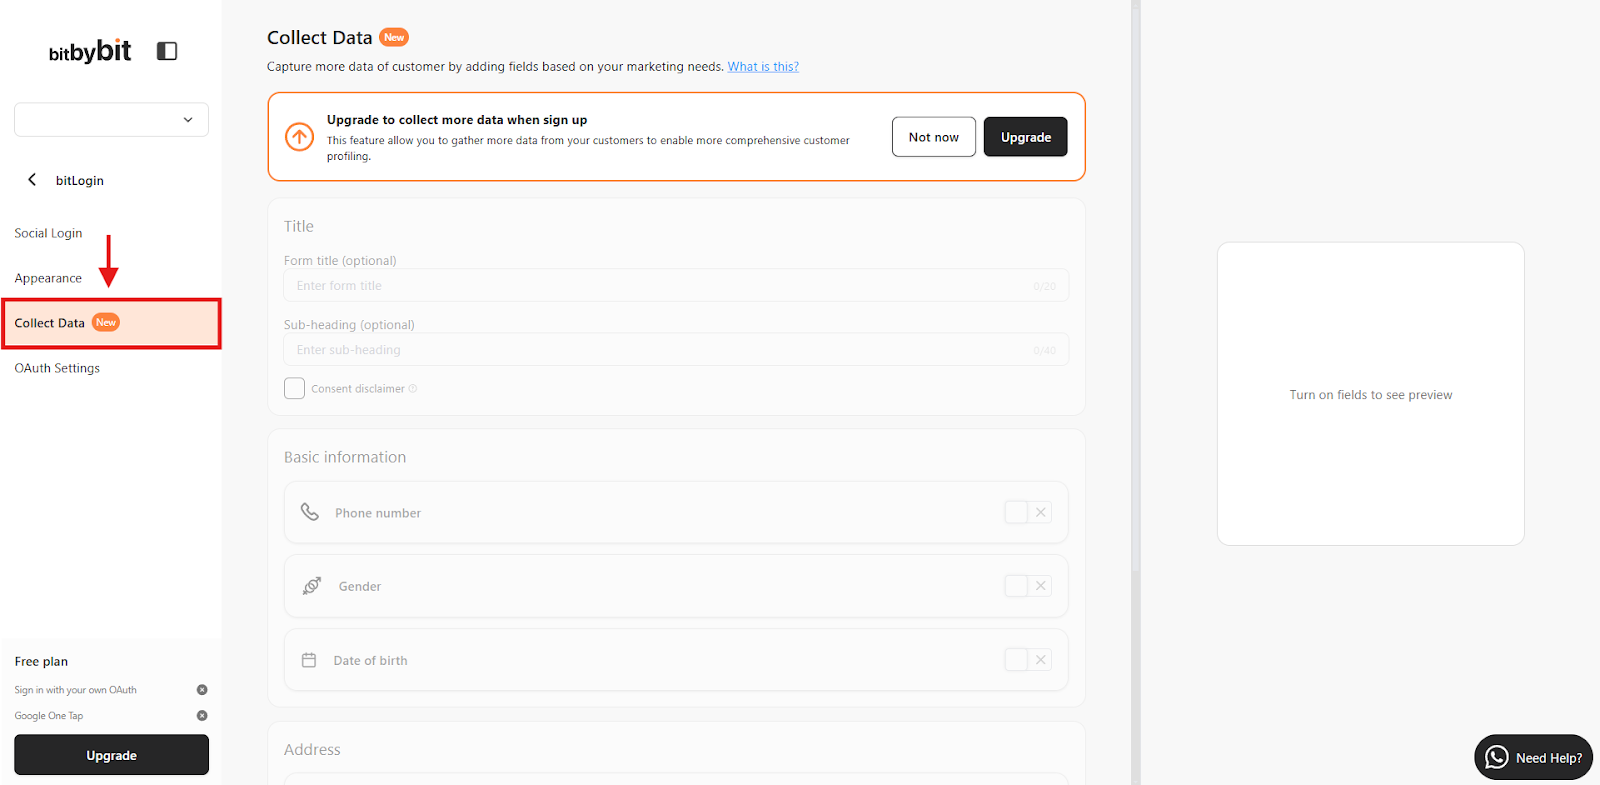
Step 1: Access Collect Data settings
- Go to “Collect Data” settings in bitLogin here.
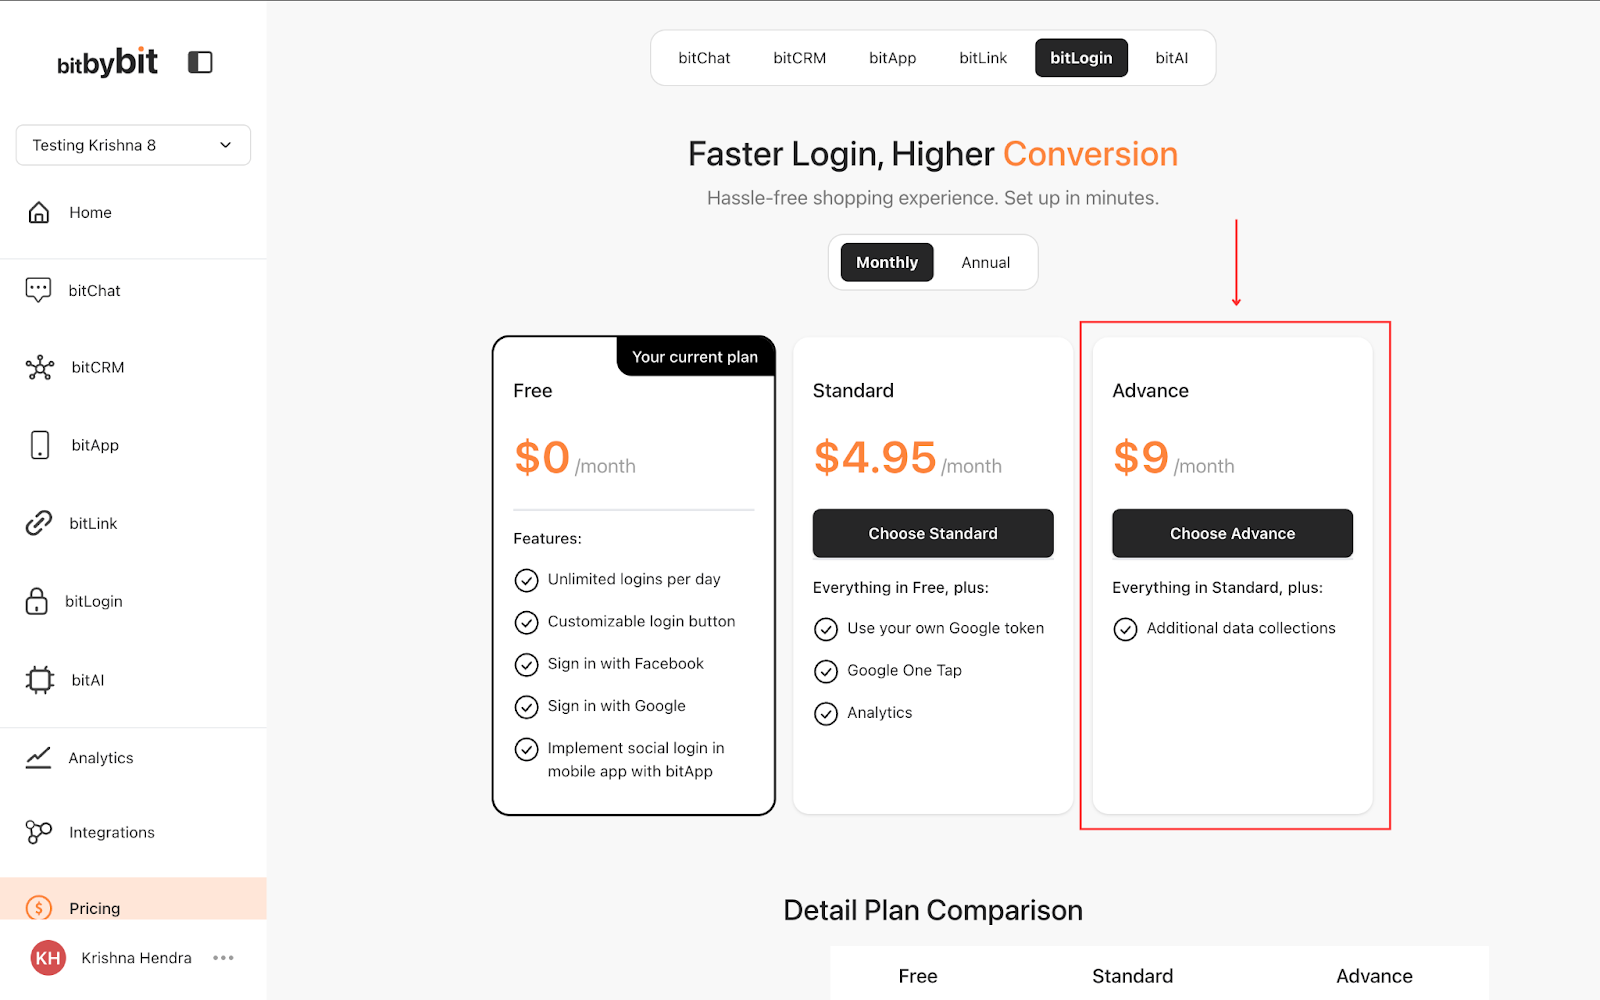
Step 2: Verify Your Plan
- Ensure you’re on the Advanced plan. If not, click “Upgrade” or visit the Pricing page.

- Click “Upgrade”
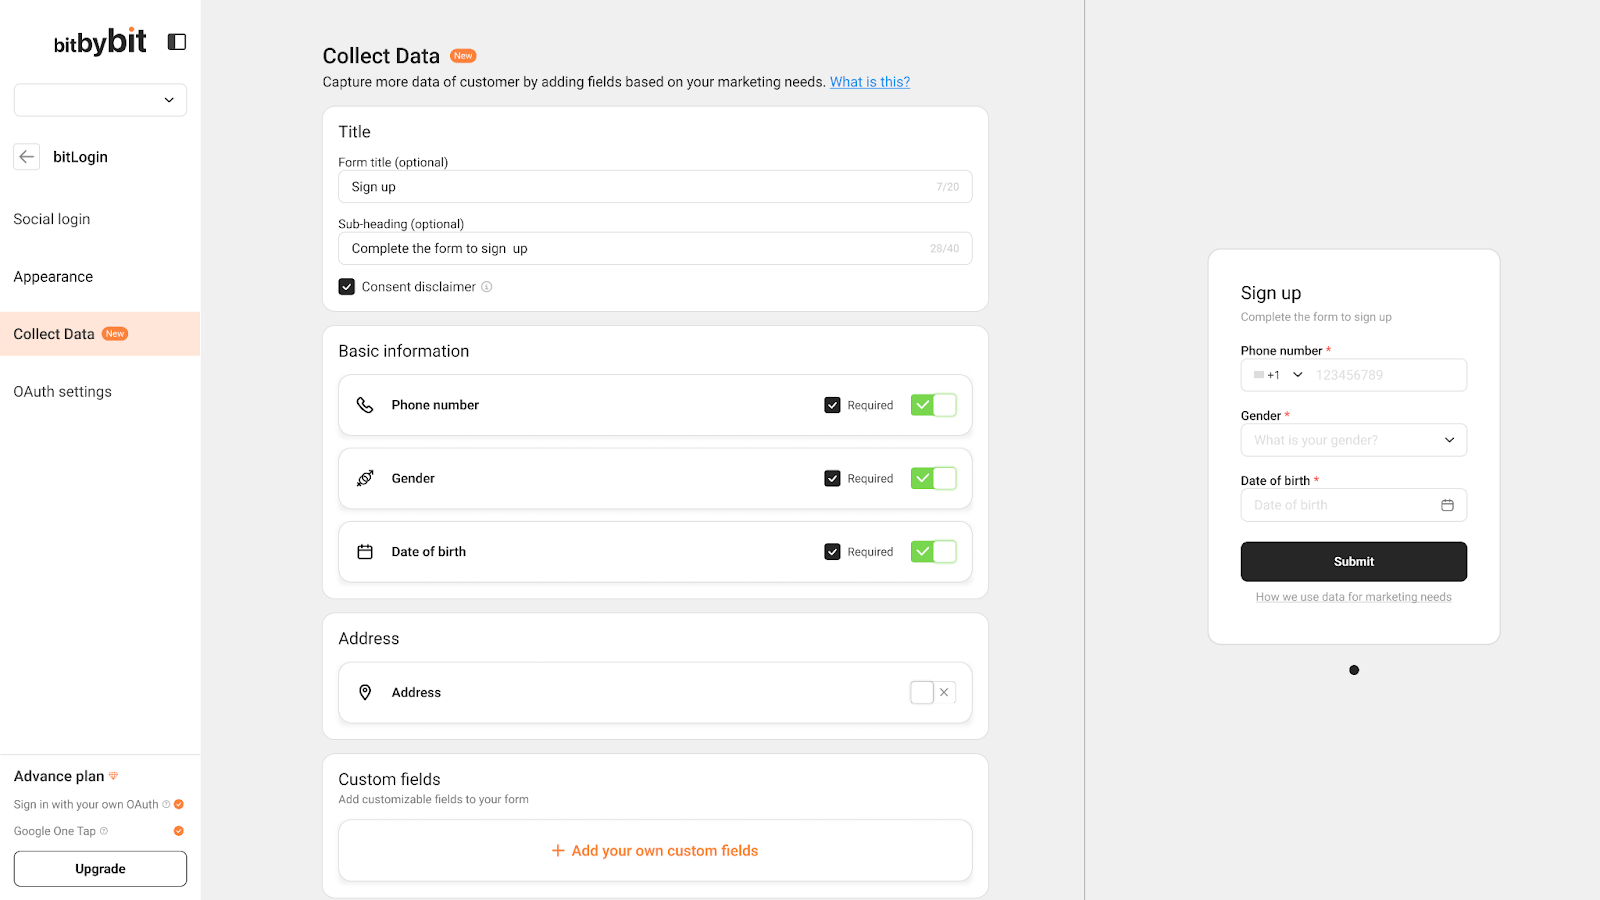
Step 3: Activate the Feature
- If you are on the Advanced plan, the feature will be available and you can use it right away.
Step 4: Activate data fields
- Choose any of the fields to activate. Field will automatically be applied to the form.
- Select the “Required” checkbox to make the field mandatory.
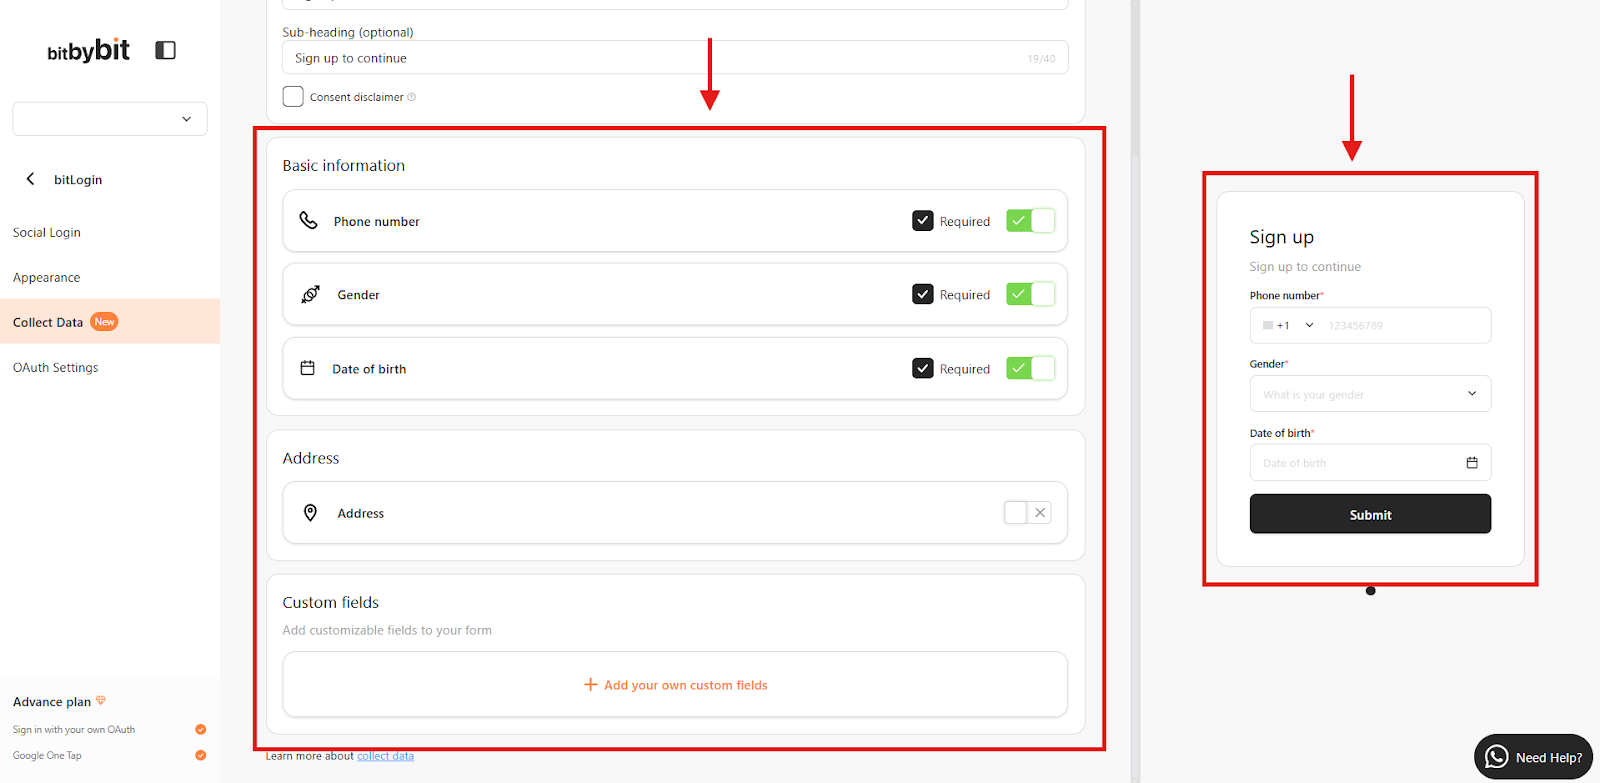
Step 5: Customize custom data fields
- Choose custom fields options according to your business needs

- Add and customize custom fields according to your business needs.
 Note: The feature will auto-apply to new customer sign-ups.
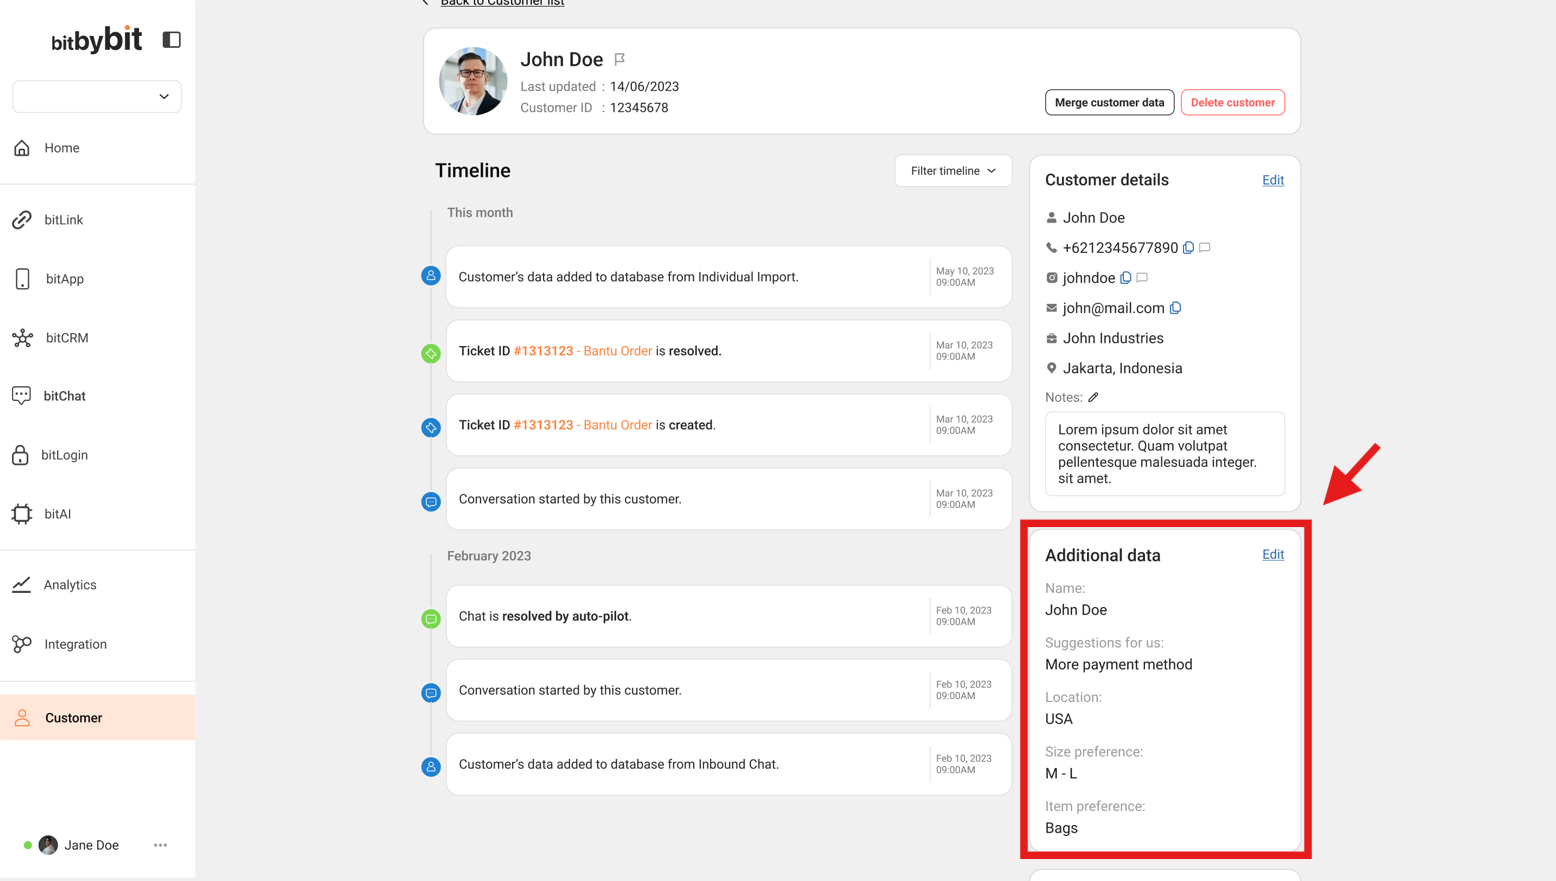
Step 6: Open Customers page to see obtained data
- To see obtained data, go to Customers page and open customer’s details
 Congratulations! The Collect Data feature is now active on your store. Here’s a preview of how it appears in a screen recording.
