

Prerequisites
- You already created an AI agent in AI Studio. See Set up your AI agent in AI Studio.
- You have the web address (URL) of your MCP server. It must be a public
https://address on port 443. - If your server needs a login, you have its bearer token or API key ready.
- Your role can manage AI Studio settings.
Open the Connectors tab
- Go to AI Studio.
- Open the AI agent you want to connect a server to.
-
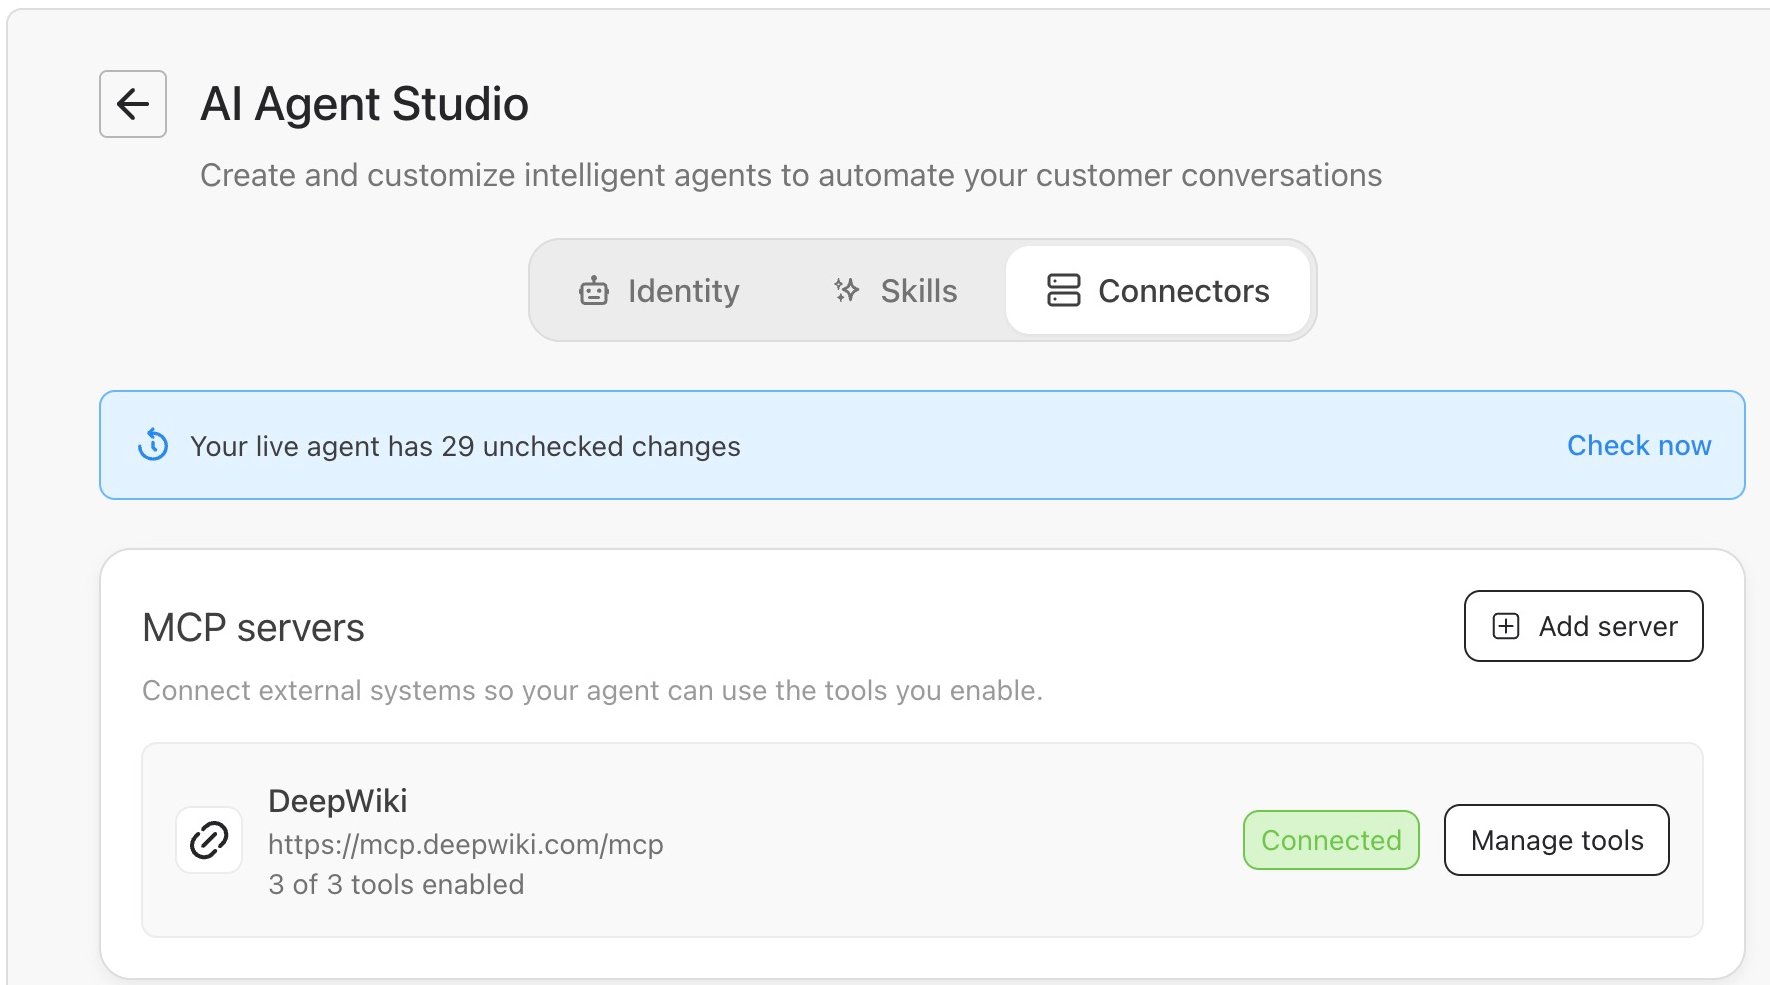
Open the Connectors tab.
Connect a server
- Click Add server. If you have not connected a server yet, select Connect your first MCP server instead.
-
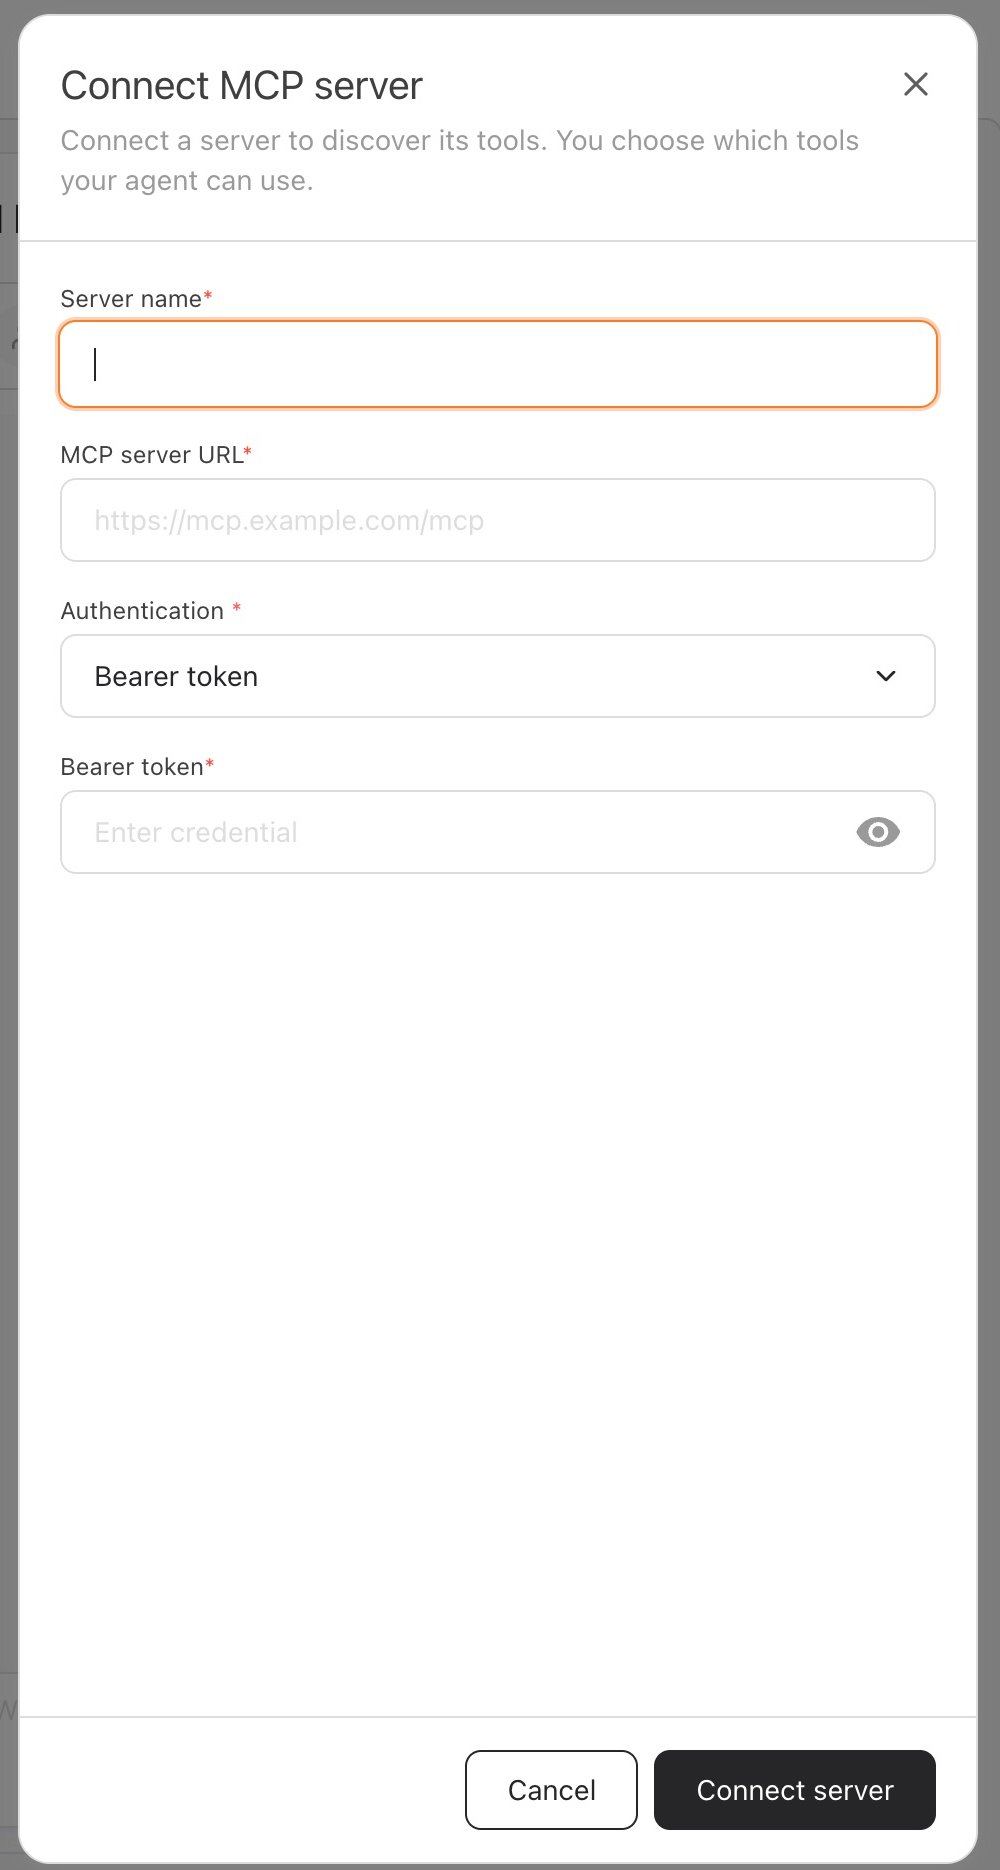
Enter a Server name so you can recognize it later, for example
Bloom loyalty. -
Enter the MCP server URL, for example
https://mcp.example.com/mcp. -
Choose how the server checks who is connecting in Authentication:
- No authentication — the server is open and needs no login.
- Bearer token — enter the token in Bearer token.
- API key header — enter the header name in Header name (for example
x-api-key), then enter the key in API key. API stands for Application Programming Interface.
-
Click Connect server.
bitbybit only connects to public
https:// addresses on port 443. If you enter another kind of address, you see an error under the URL field.Choose the tools your AI agent can use
Each server appears as a card with its address, its status, and a count such as 3 of 4 tools enabled.
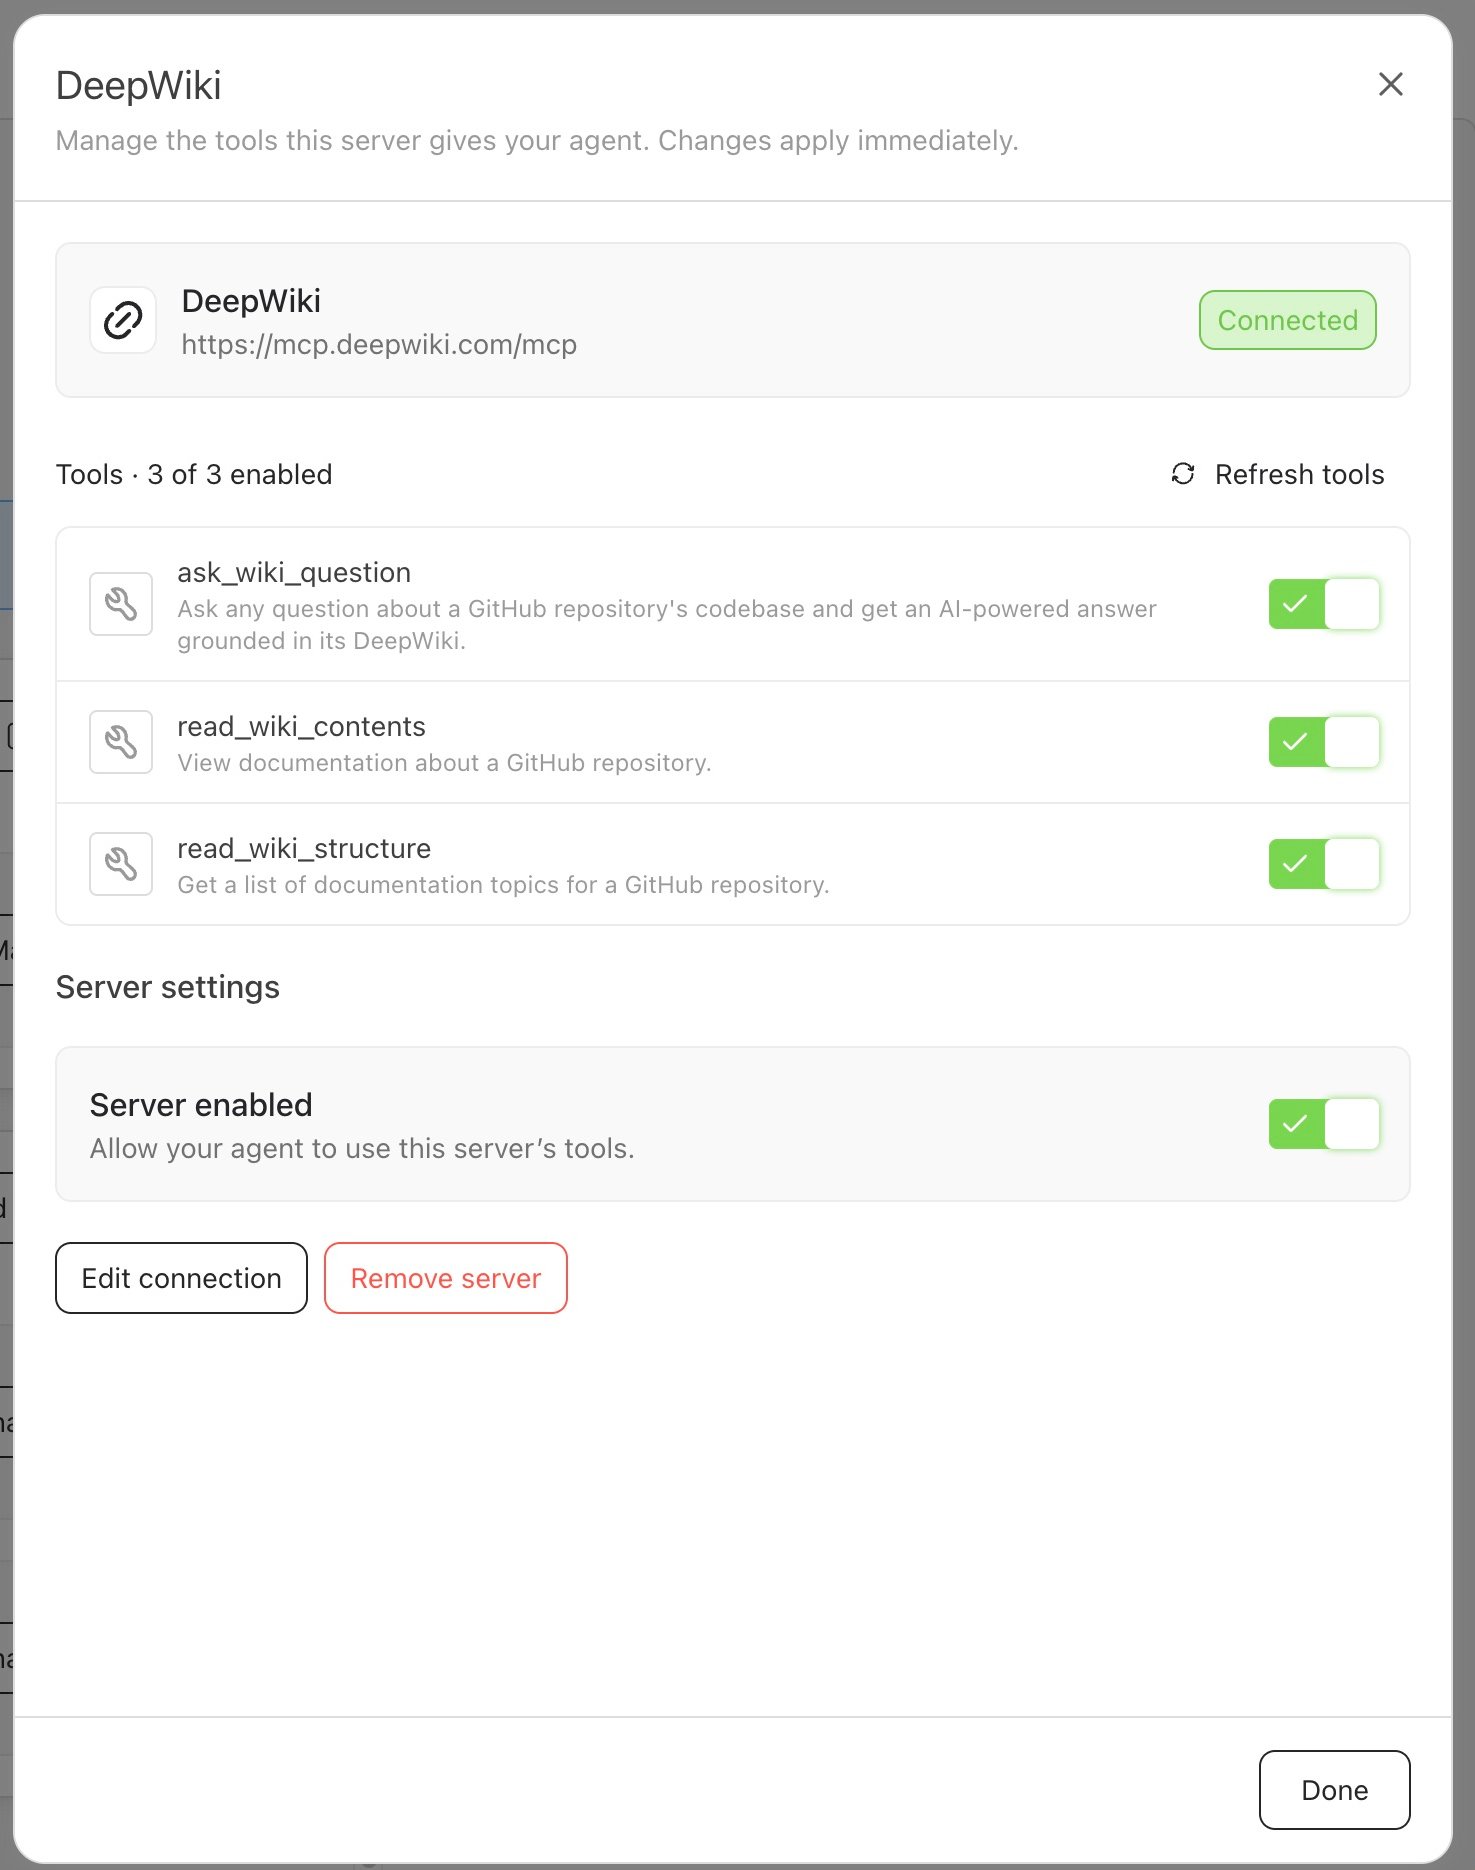
- Click Manage tools on the server card.
- Use the switch next to each tool to turn it on or off. Each tool shows a short description from your server.
-
Click Done when you finish.
If two servers offer a tool with the same name, your AI agent uses only one of them. The other tool shows a warning and does not count as enabled. Turn off one of the two tools, or ask your server’s owner to rename it.
Refresh the tool list
Refresh the list when your server adds or removes tools.
- Open Manage tools for the server.
- Click Refresh tools.
Turn a server off or back on
- Open Manage tools for the server.
- Under Server settings, use the Server enabled switch.
Edit a connection
- Open Manage tools for the server and click Edit connection.
- Change the name, URL, or authentication.
- Leave the token or key field blank to keep the one you saved. If you change the URL, enter the token or key again.
- Click Save changes.
Remove a server
- Open Manage tools for the server and click Remove server.
- Confirm in the window that opens.
Check a server’s status
Fix connection problems
If a server shows Error, click View details on its card. Your last successfully discovered tools and selections stay in place while you fix the problem, but your AI agent cannot use those tools until the server reconnects.Couldn’t reach the server
Cause: The server address is wrong, or the server is not running. Fix:- Check the MCP server URL with Edit connection.
- Make sure your server is running.
- Click Retry connection.
Authentication failed
Cause: The server rejected the token or key. Fix:- Click Edit connection.
- Enter the token or key again, and check that the Authentication type matches what your server expects.
- Click Save changes.
Couldn’t discover tools
Cause: The server answered, but bitbybit could not read its tools. The URL may not point to an MCP endpoint. Fix:- Check that the URL points to your server’s MCP endpoint.
- Click Retry discovery.
No tools found
Cause: The server connected, but it did not return any tools. Fix:- Check that your server has tools set up and returns them from its MCP endpoint.
- Click Refresh tools.
Couldn’t refresh tools
Cause: bitbybit could not reach the server when you refreshed. Fix:- Check the URL and credentials with Edit connection.
- Click Refresh tools again.