This procedure ensures the accuracy of voucher code delivery to customers, minimizes data errors during the upload process, and standardizes the message template creation on the bitbybit platform.
1. Prepare Your Upload File (CSV)
The first step is to ensure your spreadsheet structure allows the system to read unique variables automatically.- Access the Template: Go to the Customers page in your bitbybit dashboard.
- Initiate Import: Click on Add New Customer and select the Bulk Import from File option.
- Download Template: Click Download Template to obtain the official CSV structure provided by bitbybit.

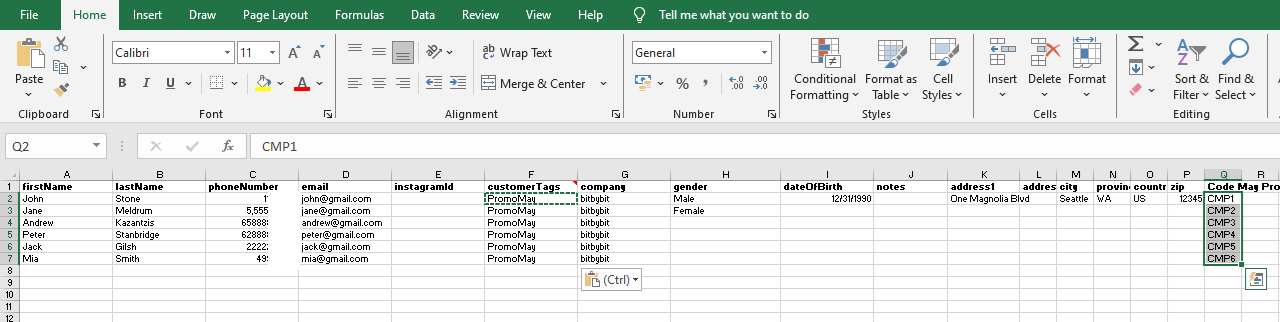
- Data Placement: Move all voucher code data to the empty column on the far right of your spreadsheet.
- Header Naming: Name the first row (header) of that column using the standard format: “CODE + [Category/Tag]”.
- Example: If your campaign is “MAY PROMO”, the header should be: “CODE MAY PROMO”.
- File Format: Once organized, save or download the file in CSV (Comma Separated Values) format.
2. Upload to bitbybit & The Overwrite Feature
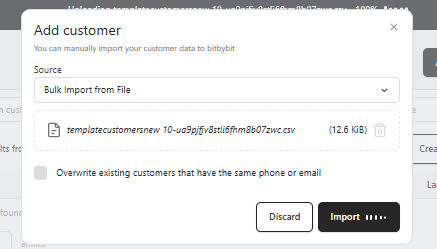
This process updates customer profiles with the specific data prepared in your file.- Import Data: Go to the upload menu on the bitbybit platform and select your prepared CSV file.
- Overwrite Setting: You will see an option to “Overwrite existing customers that have the same phone or email.”
When to Check “Overwrite”:
- Voucher Distribution: Always check this when adding new voucher codes to customers who are already in your database.
- Updating Information: Check this if you are correcting existing names, addresses, or updating Additional Data fields.
- Avoiding Duplicates: This ensures the system updates the current profile rather than creating a second, identical entry for the same customer.
When NOT to Check “Overwrite”:
- Purely New Leads: Leave this unchecked if you are uploading a list of completely new customers and do not want to risk changing any existing data.
- Data Safety: If you want the system to skip or reject any row where the phone or email is already registered to prevent accidental data changes.
3. Verify Upload Results
Always perform a quality check before sending bulk messages.- Sample Check: Go to the Customers page and randomly open one customer profile.
- Validation: Check the Additional Data section in the profile.
- Confirmation: Ensure the voucher code is uploaded and correctly matches the header created in Step 1.

4. Segmentation & Message Template
Define who will receive the message and what it will look like.- Customer Segmentation: Create a segment of recipients by following our detailed guide here: How to Create a Customer Segment.
- Message Template: Create your message campaign template by following this guide: How to Create a Message Template Campaign for WhatsApp API.
- Variable Synchronization: When creating your message template, use the variable that exactly matches the header in your CSV file.
- Example: If your header is “CODE MAY PROMO”, select the variable option with that identical name in the template settings.

5. Campaign Testing (Internal Trial)
Verify that the variables are calling the correct data through a test run.- Internal Test: Do not send messages directly to real clients before testing.
- Testing Procedure: Send a test message to your team’s internal numbers first to ensure the layout and codes appear correctly.
- Execution: If the test result is successful, proceed with the broadcast to the actual client segment.
6. Advanced Procedures (Updates & Multiple Codes)
- Updating Existing Codes: Add new code data to the corresponding customer row and re-upload with the overwrite option checked.
- Structure Preservation: Do not change the header name in the first row (Row 1), as the system relies on it to identify the data field.
- Adding Multiple Codes: If a customer requires two different codes, create a new column with a New Header (e.g., “CODE BIRTHDAY”), fill in the data, and call both variables within your single message template.