Carousel and Catalog are now Template type choices you pick during Template setup — they are no longer button options. To set those up, see How to Create a Message Template Campaign for WhatsApp API.
Step 1: Open your campaign template
Go to the WhatsApp API settings dashboard. Before adding buttons, make sure you have created a campaign template first — see:- How to Create a Message Template Campaign for WhatsApp Cloud API
- How to Create a Message Template Automation for WhatsApp Cloud API
- How to Create a Chat Initiation Template
Step 2: Add a button
In the Message content step, click Add button, then select the button type you want from the dropdown. Buttons are now added directly through this action — there is no separate on/off switcher to enable first.
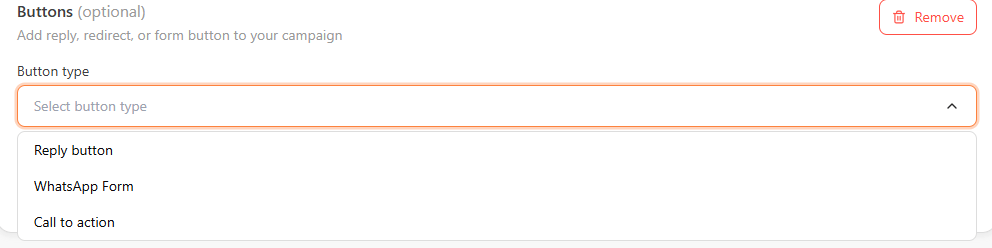
Step 3: Choose a button type
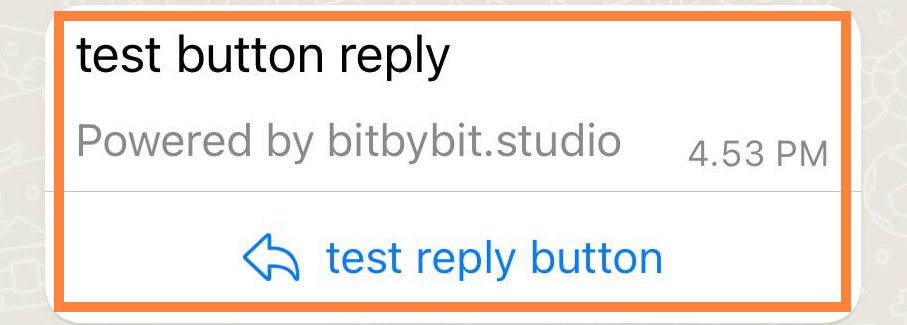
Reply button
Enable instant replies. Example triggers: “Menu Utama,” “promo.” Fill in the Reply button text.
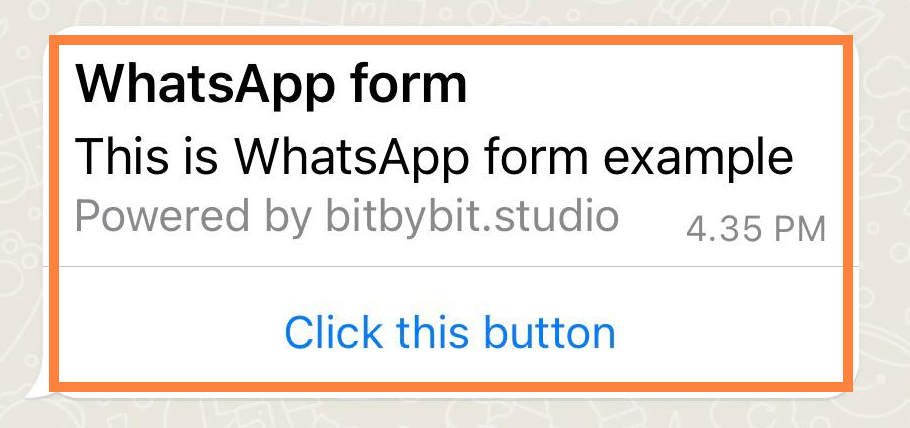
WhatsApp Form
Collect data like surveys or reservations within WhatsApp. Select WhatsApp Form (or Create new WhatsApp Form) from the dropdown and fill in the Button text.
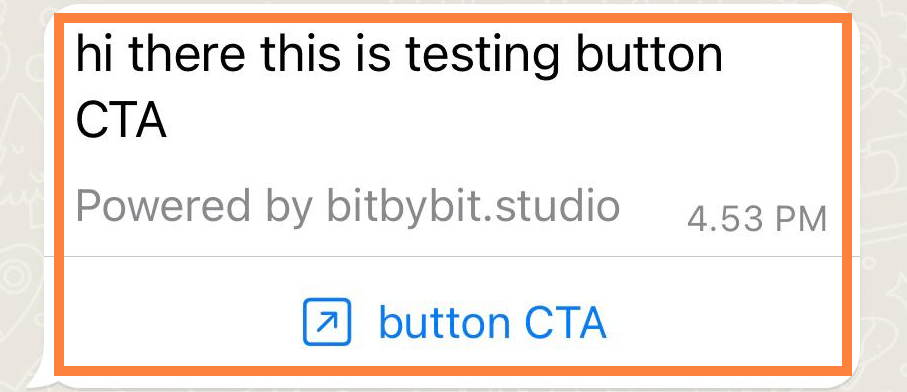
Call to Action
Direct users to a website or landing page. Select Web URL, Specific product, or Specific collections from the dropdown, then fill in the URL and Button text.