Step 1: Go to Campaign Dashboard
Navigate to your bitCRM Campaign dashboard and click “Create new campaign.”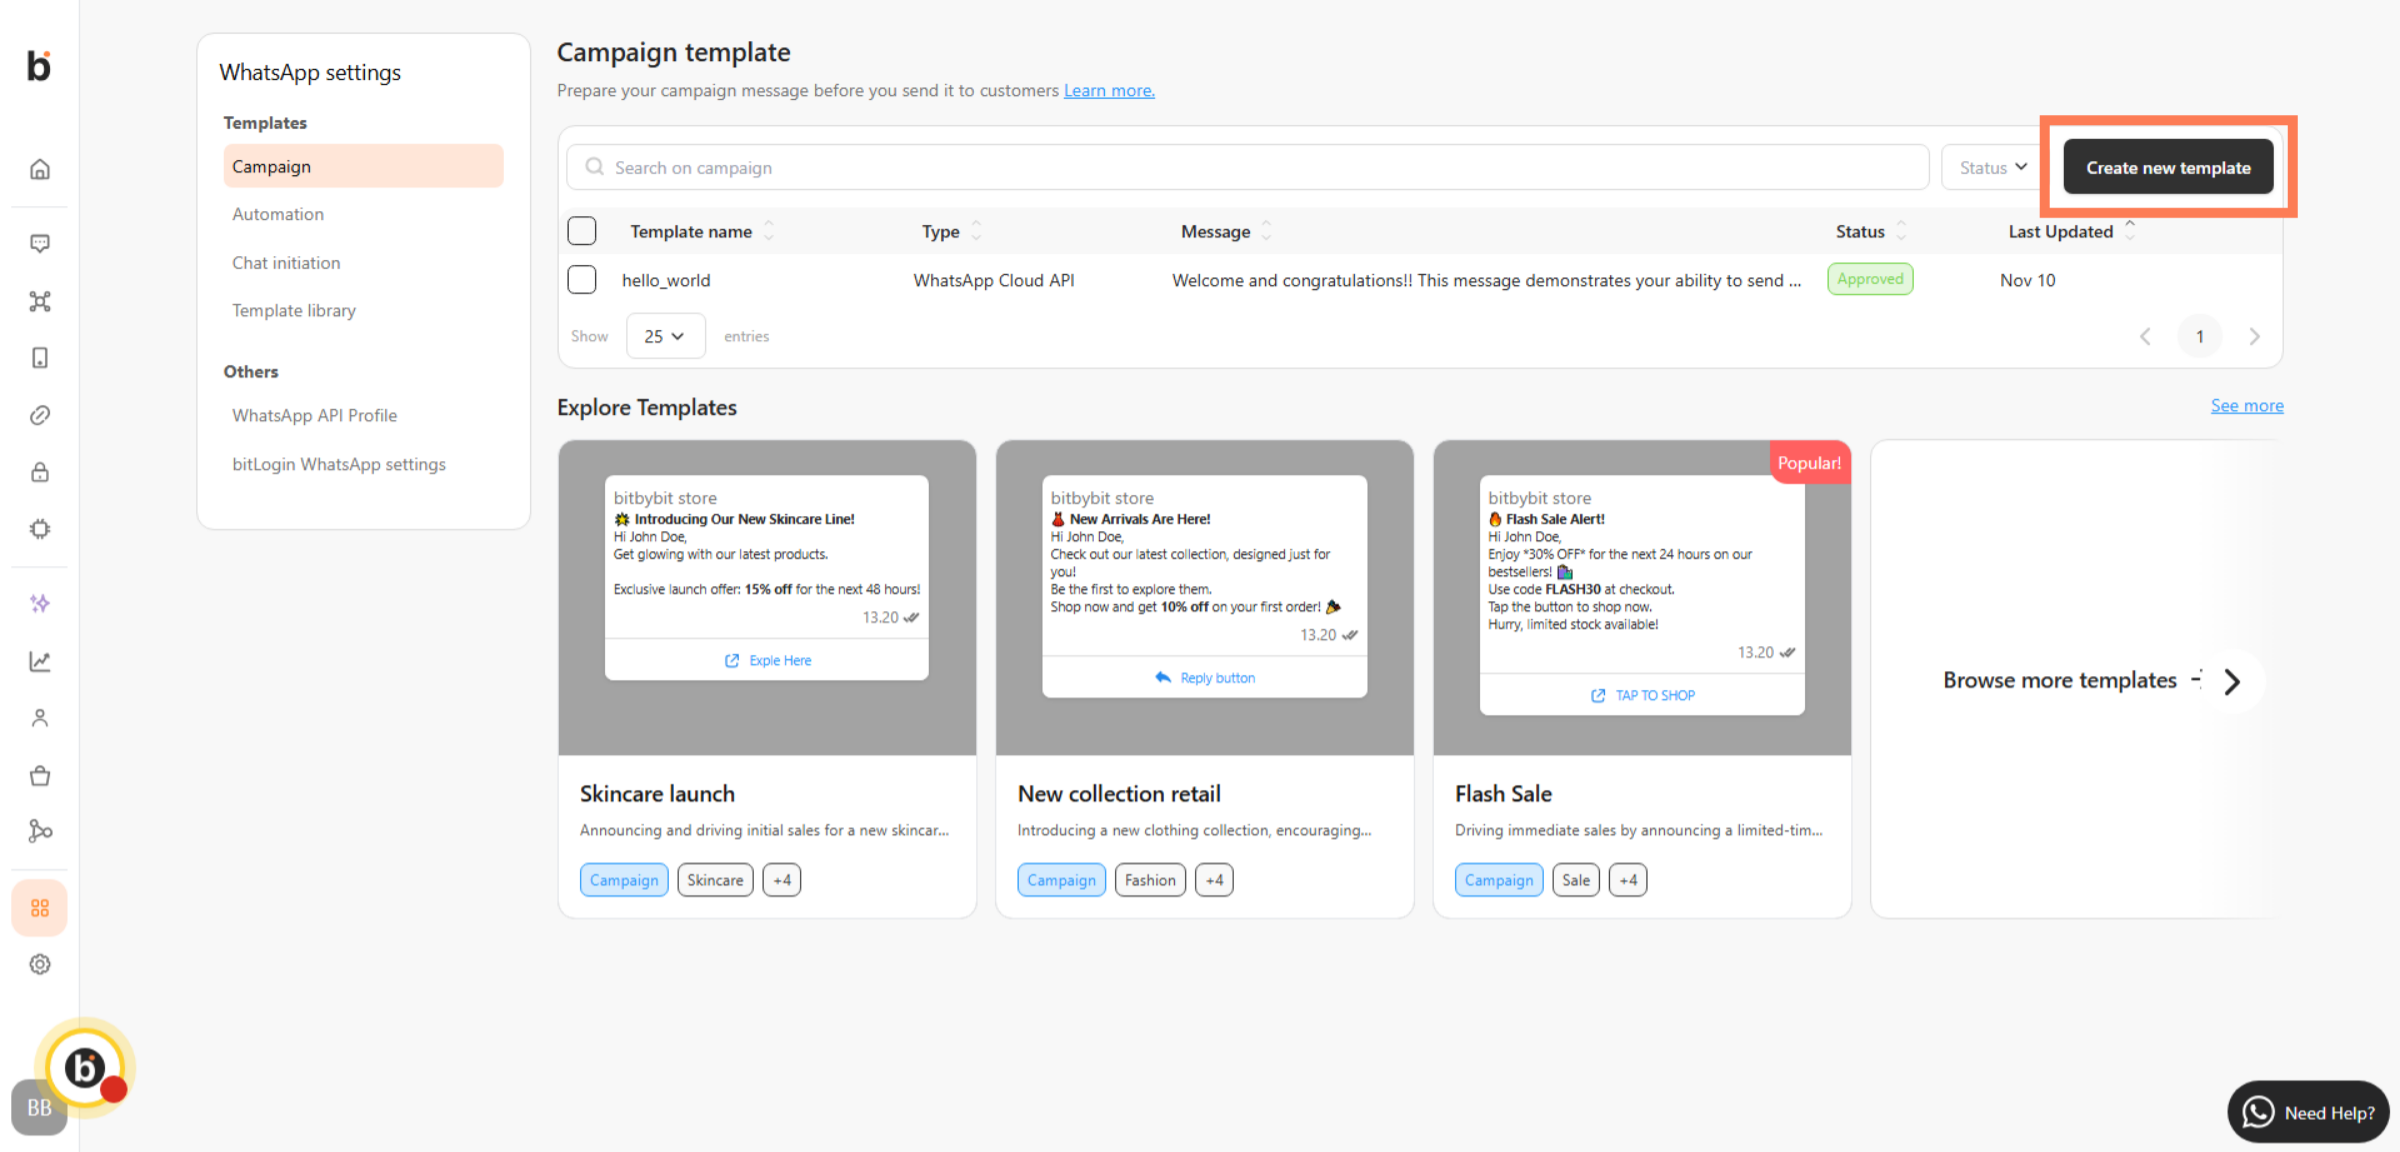
Step 2: Select Campaign Type
Choose “WhatsApp Cloud API” as your campaign type.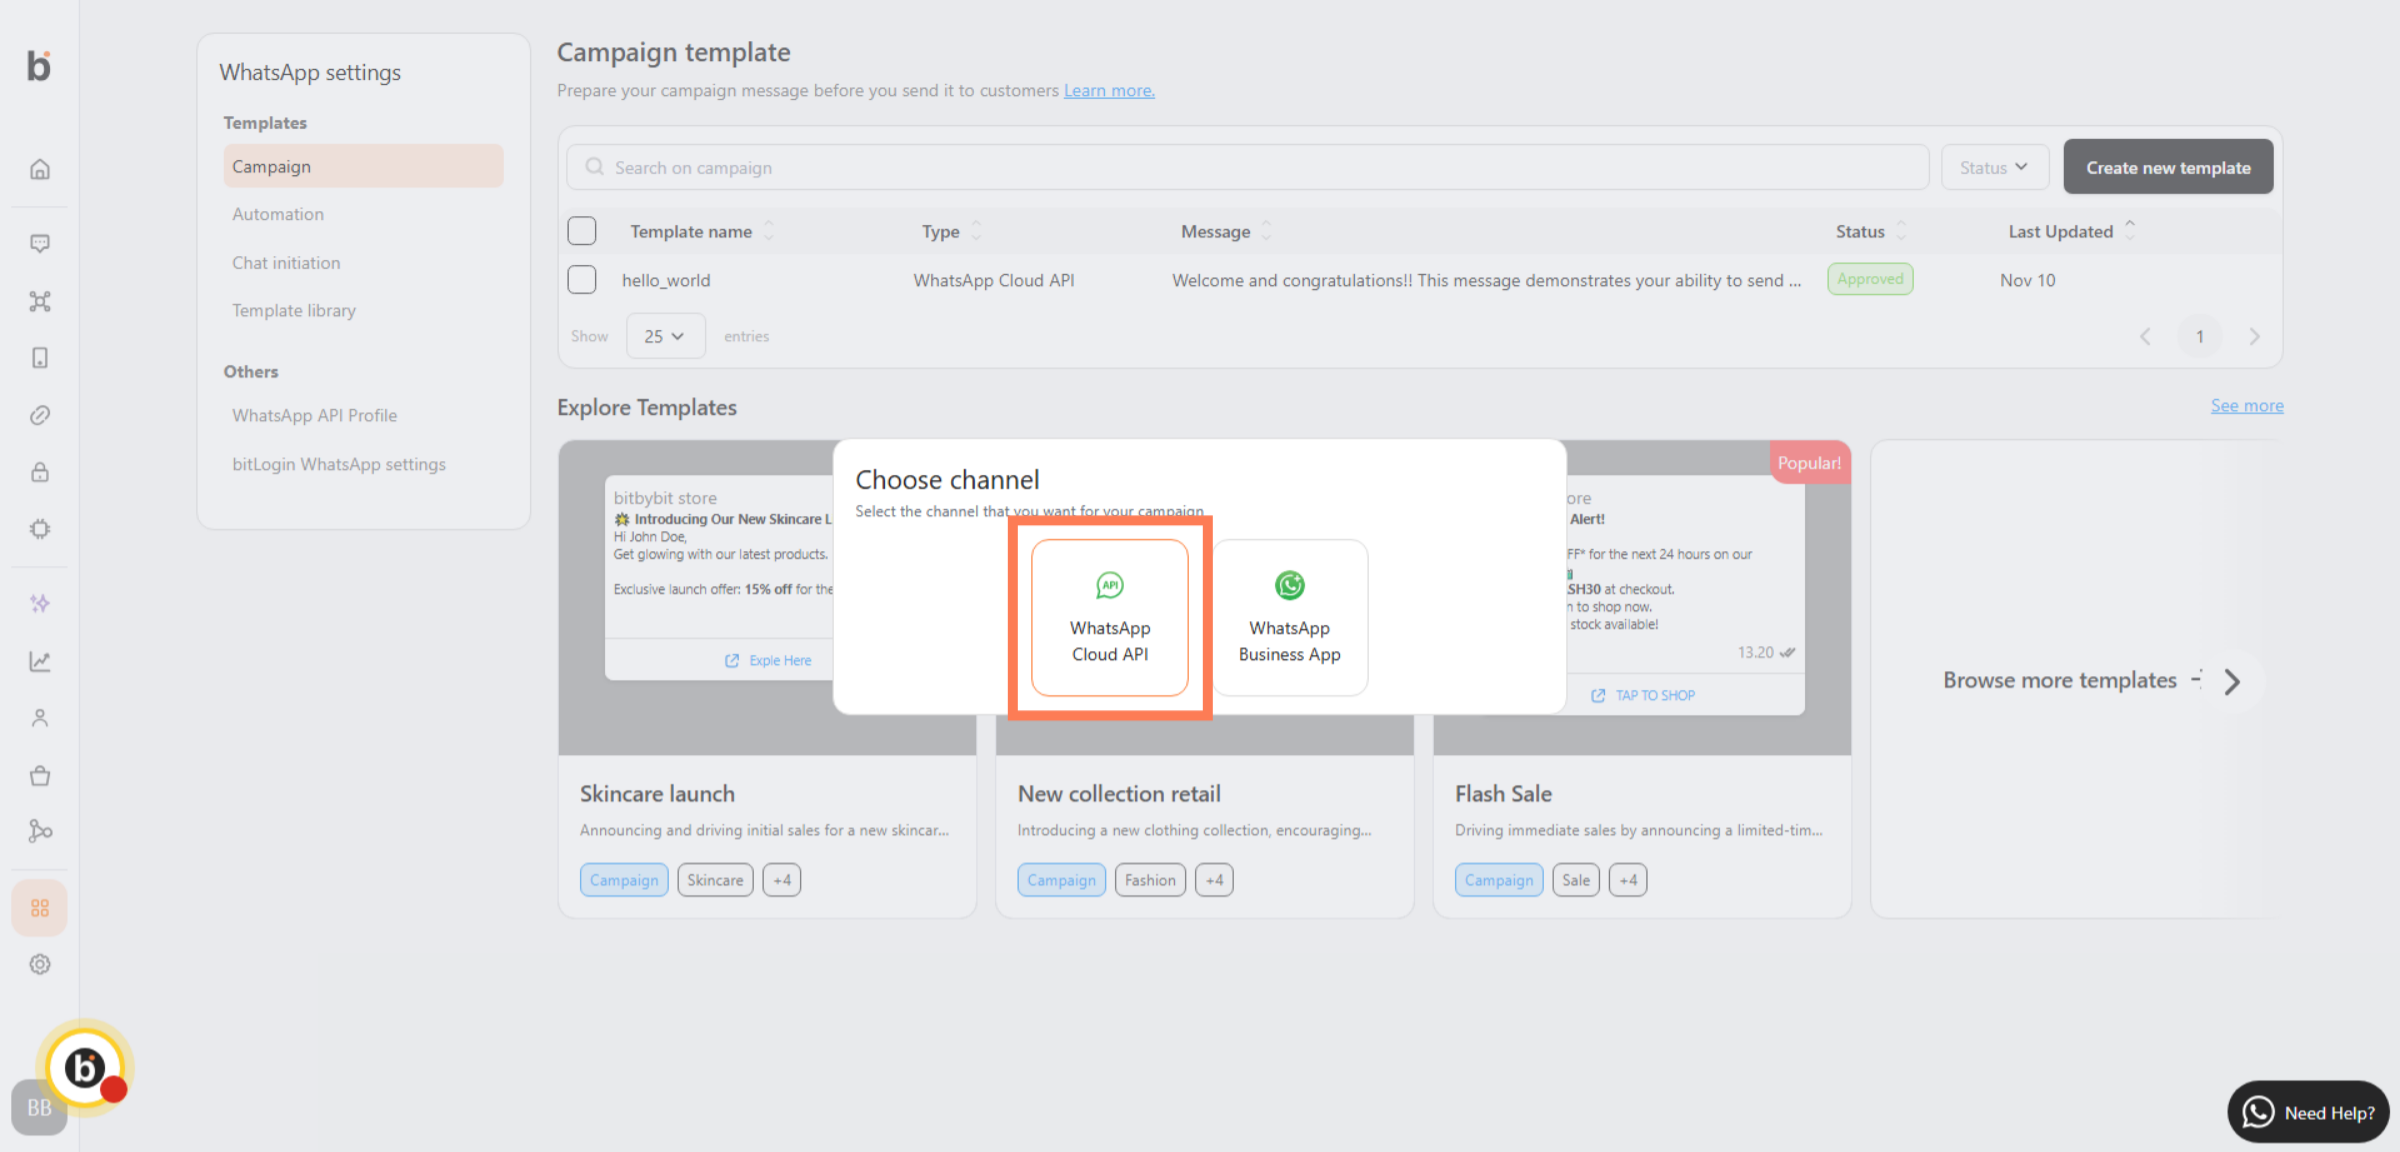
Step 3: Configure Campaign Details
Fill in the campaign details, including name, schedule, and target audience.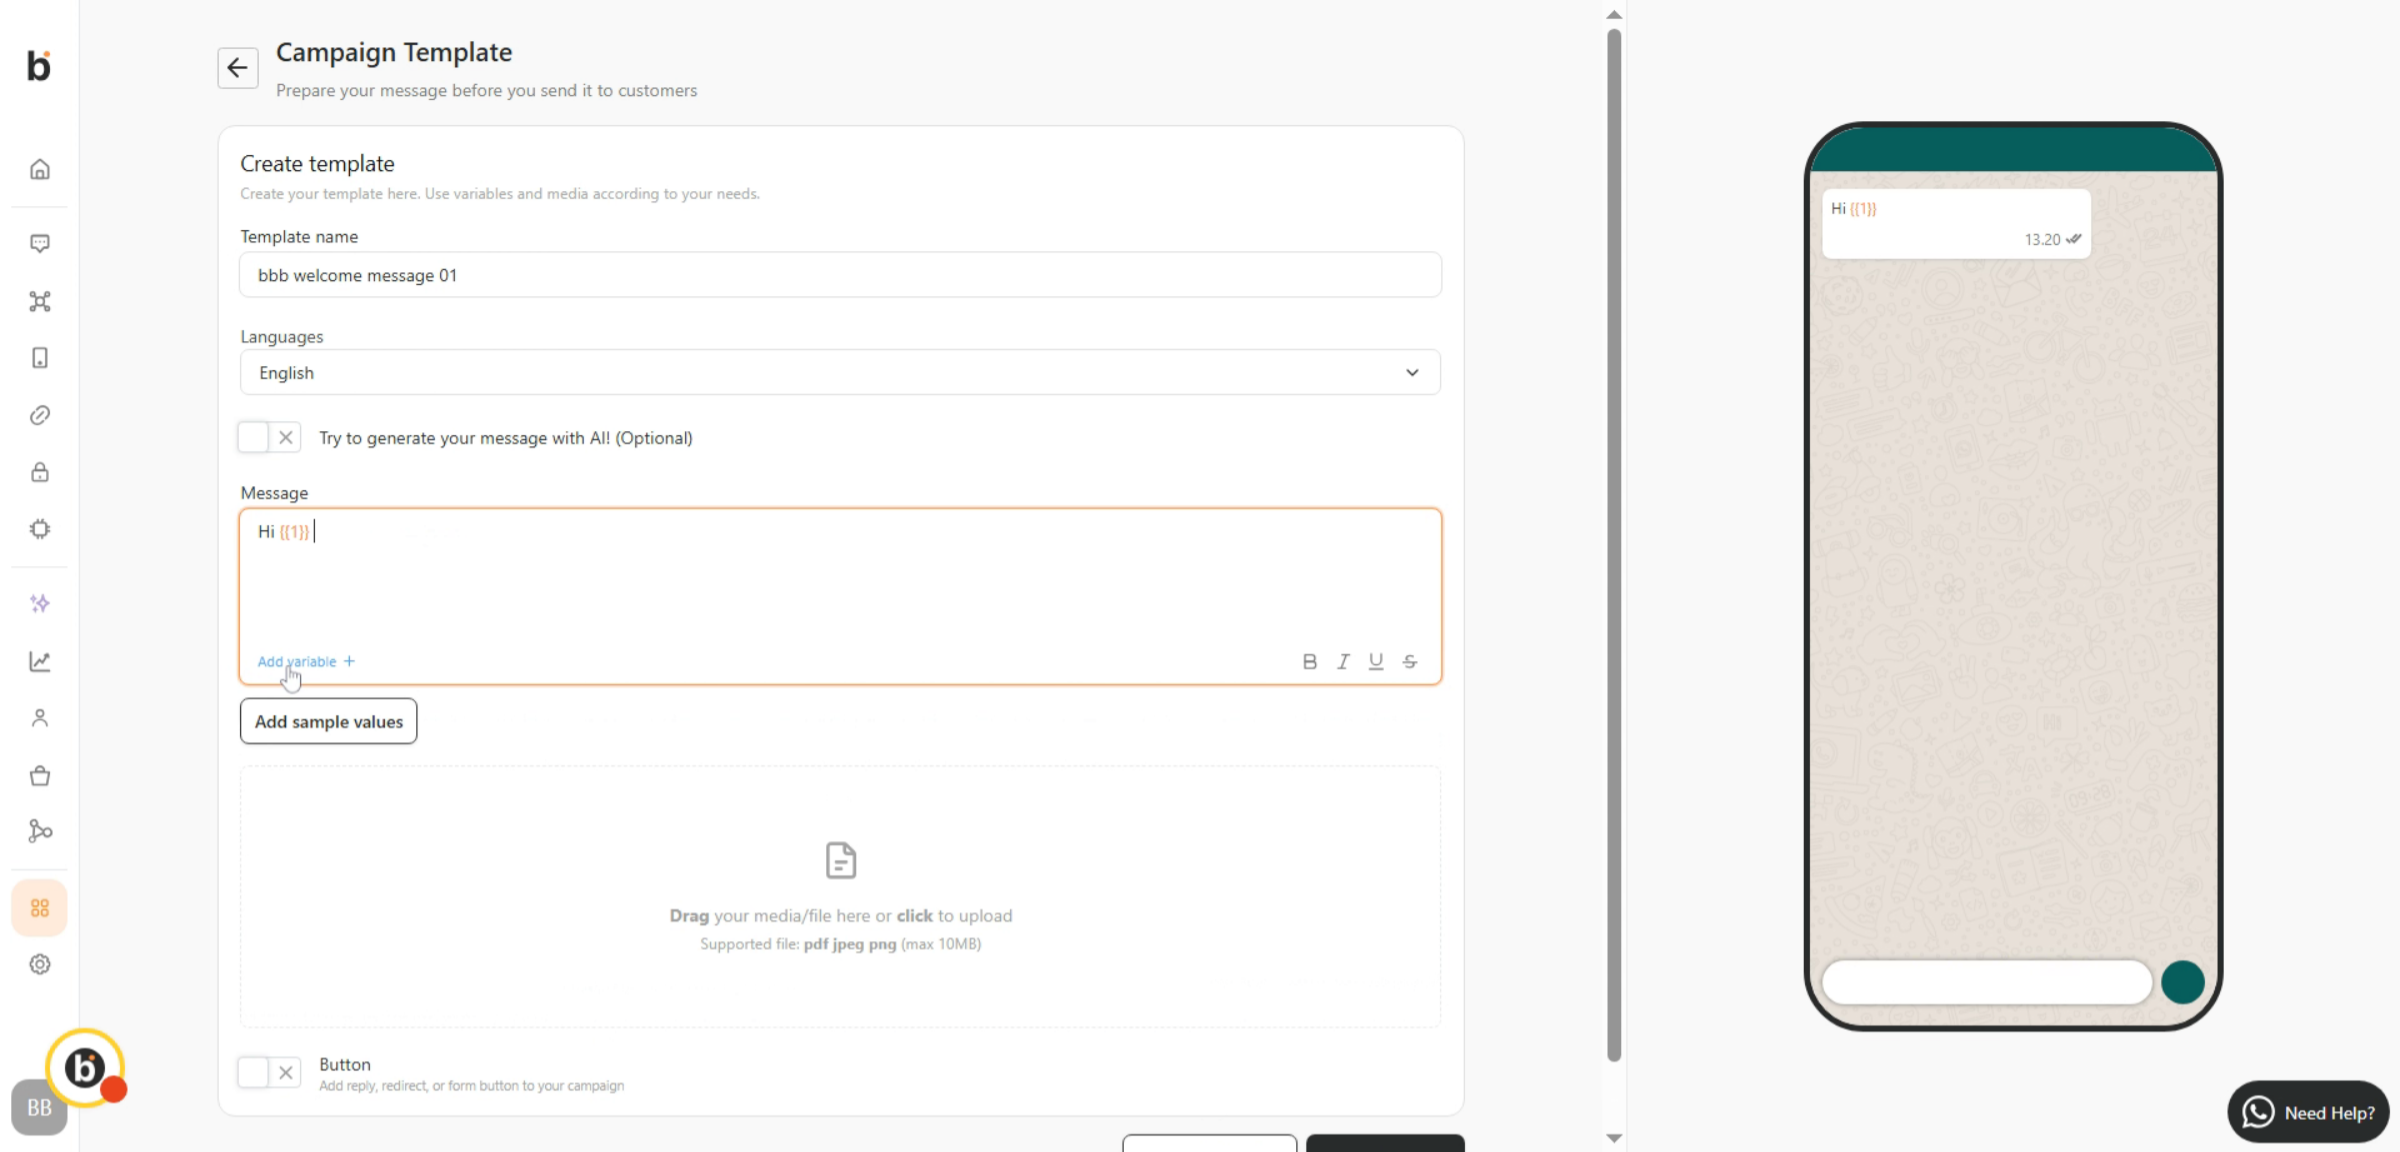
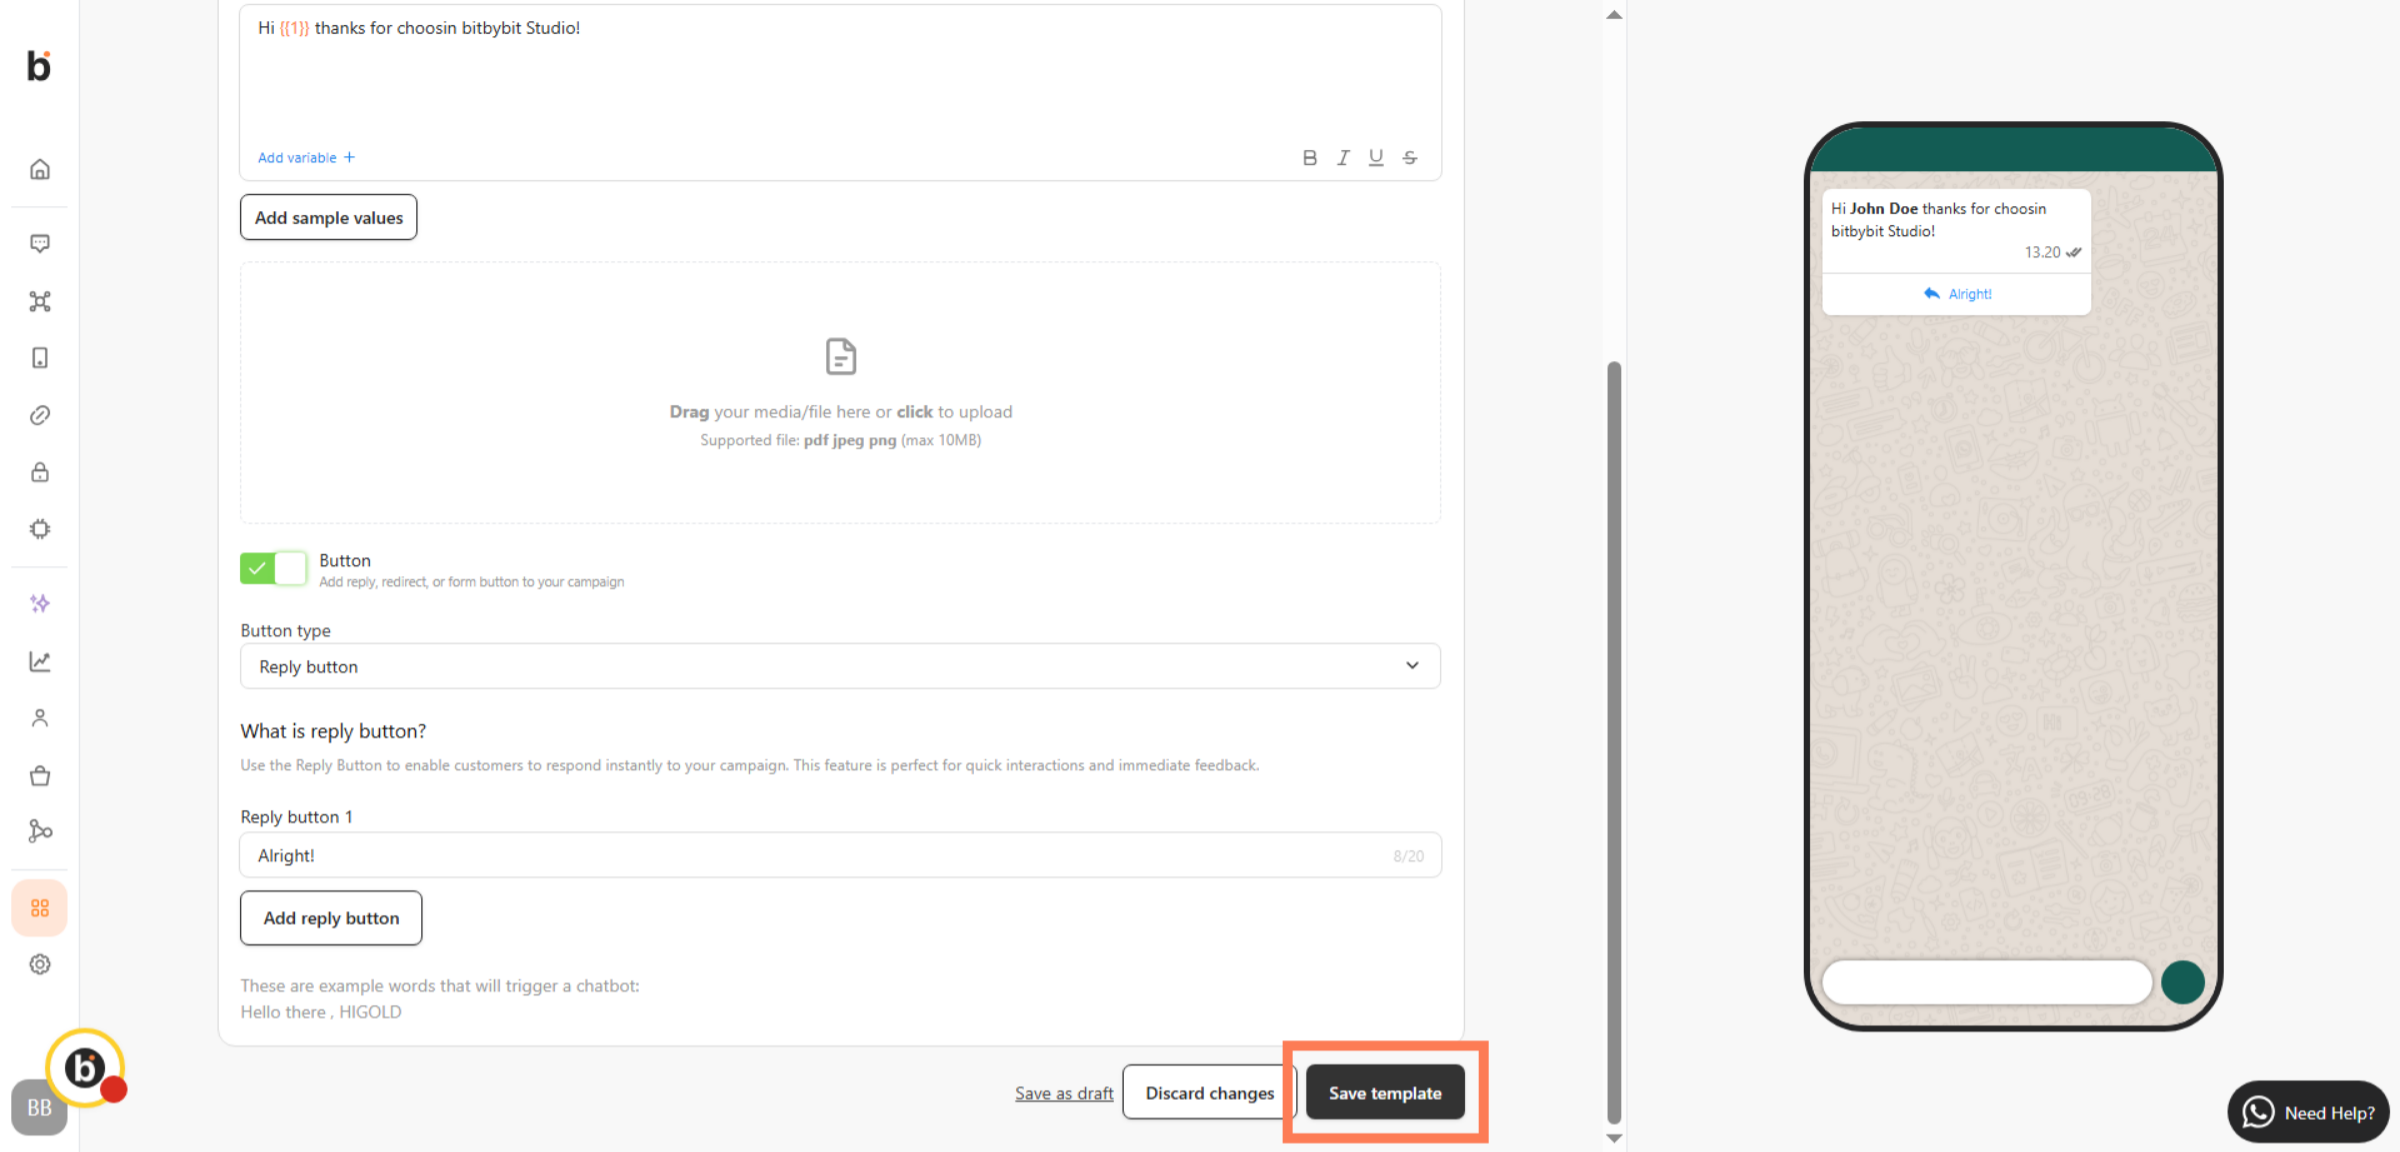
Step 4: Add Message Content
Compose your message content and customize it as needed.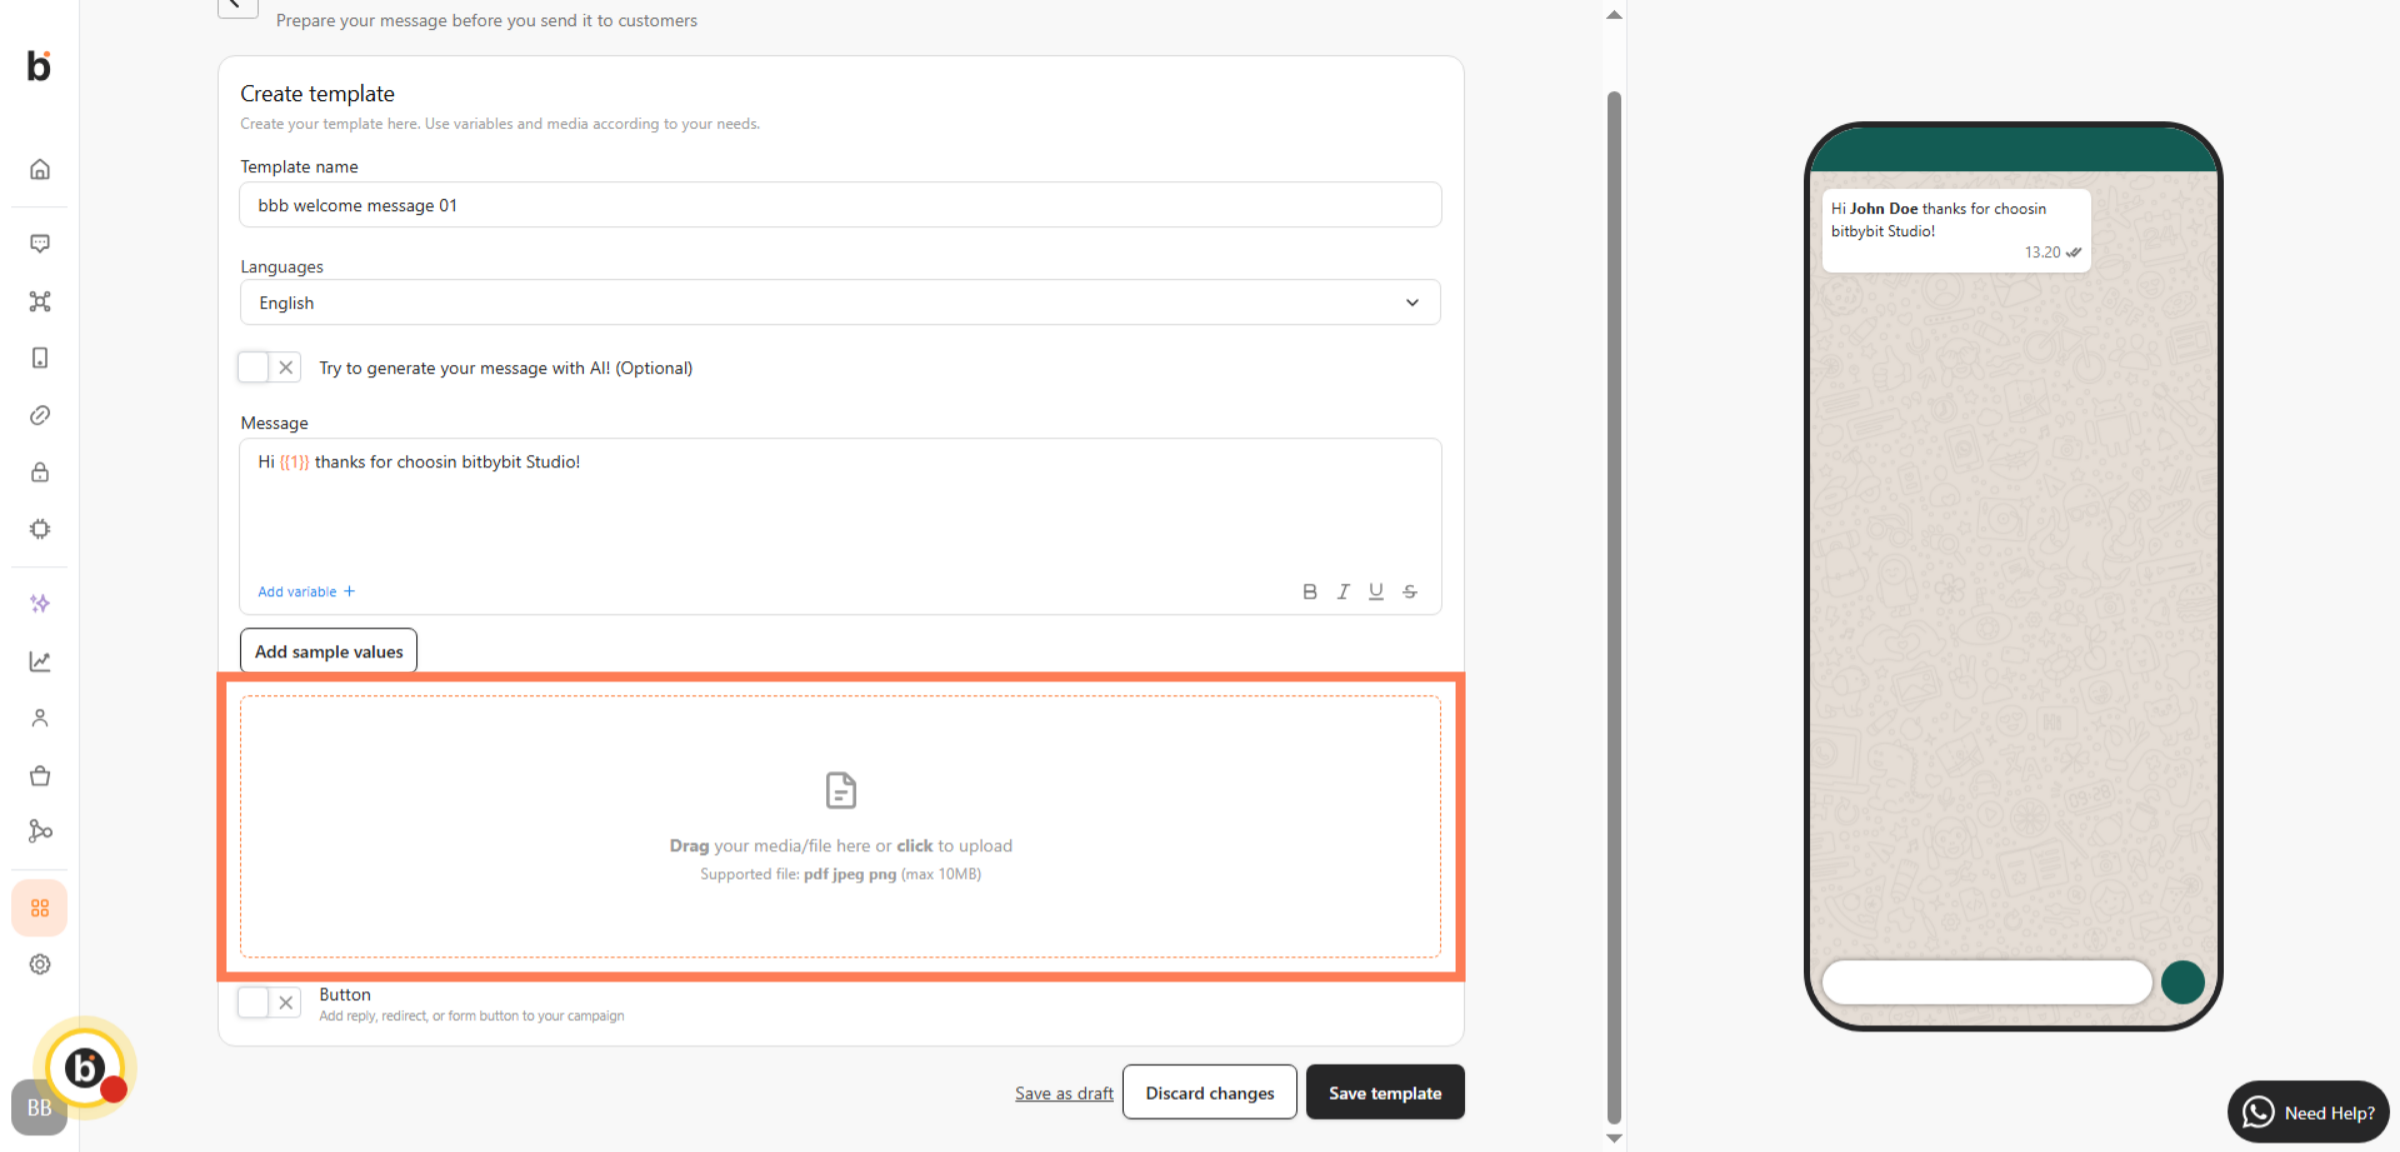
Step 5: Review and Schedule
Review your campaign settings and click “Schedule” to activate the campaign.