

Creating customer segments in bitbybit allows you to target specific groups with tailored messaging and offers. Follow these steps to create a customer segment:
Step-by-Step Guide
- Access the Customers Dashboard: Navigate to the Customers dashboard and click the “Create new segmentation” button. You will be redirected to the ‘Create segmentation’ page.
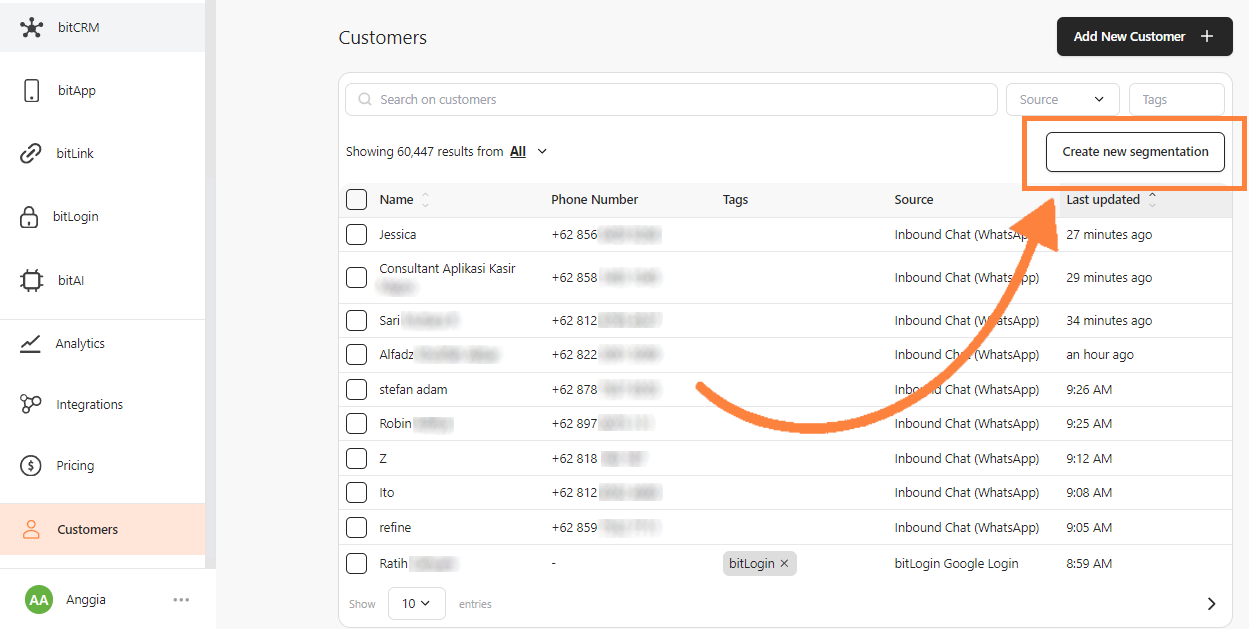
- Click ‘Create new segmentation’
- Create the Segmentation Name: Fill in the segment name in the provided field.

- Fill in the segmentation name
- Set the Conditions: In the ‘Condition’ section, choose the customers’ conditions you wish to include in your segmentation.
- On the first dropdown menu, select either ‘Have’ or ‘Not have’.

- Select ‘Have’ or ‘Not have’
- In the second dropdown menu, choose the parameter you wish to filter your segmentation by. Parameters are grouped into two sections: Loyalty & commerce (shown first) and Customer data (customer tags, ticket tags, visited pages, and custom fields).
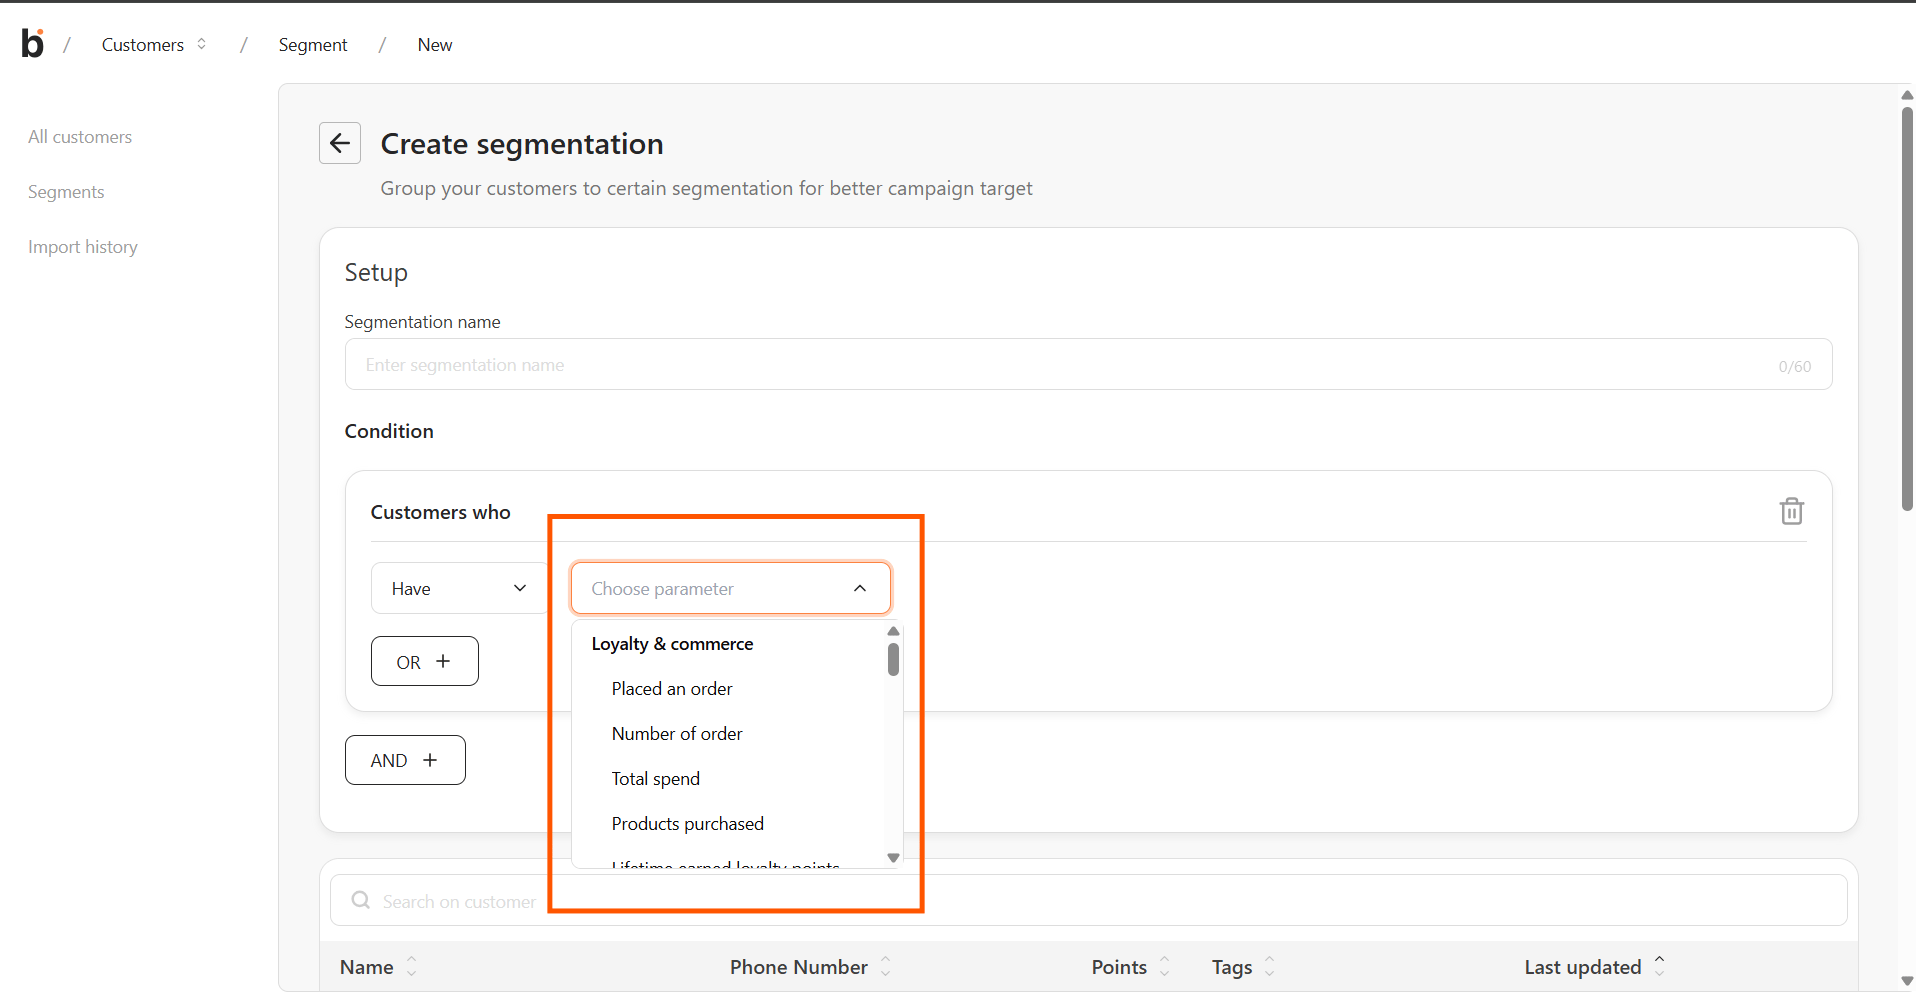
- Choose the filter parameter from either group
- For a Customer data parameter such as customer tags, the next dropdown lets you scroll down to find the tag or type in the field to search. Click to select.
- Scroll down or search to find the tag
- For a Loyalty & commerce parameter, the fields that appear next depend on the parameter — see Step 4.
- Filter by loyalty and commerce parameters: The Loyalty & commerce group adds seven parameters for behavior-based segments: order frequency, recency, spend, product purchases, and loyalty point balances.
- Number of order: Choose a comparator — More than, At least, Less than, At most, or Exactly — then enter a number. For example, Exactly 0 targets customers who have never placed an order.
- Placed an order (recency): Choose a direction — In the last (recent) or More than … ago (lapsed) — enter a number, then choose a unit: Days, Months, or Years.
- Total spend: Choose a comparator and enter an amount. The field is prefixed with your store’s currency symbol. To change your store currency, click Change currency, which opens Settings → Time zone & currency in a new tab.
Total spend compares against each customer’s order total in your store’s currency. If a customer’s orders were placed in a different currency, that total isn’t converted before the comparison. Total spend is most reliable when all your orders are placed in the same currency as your store setting.
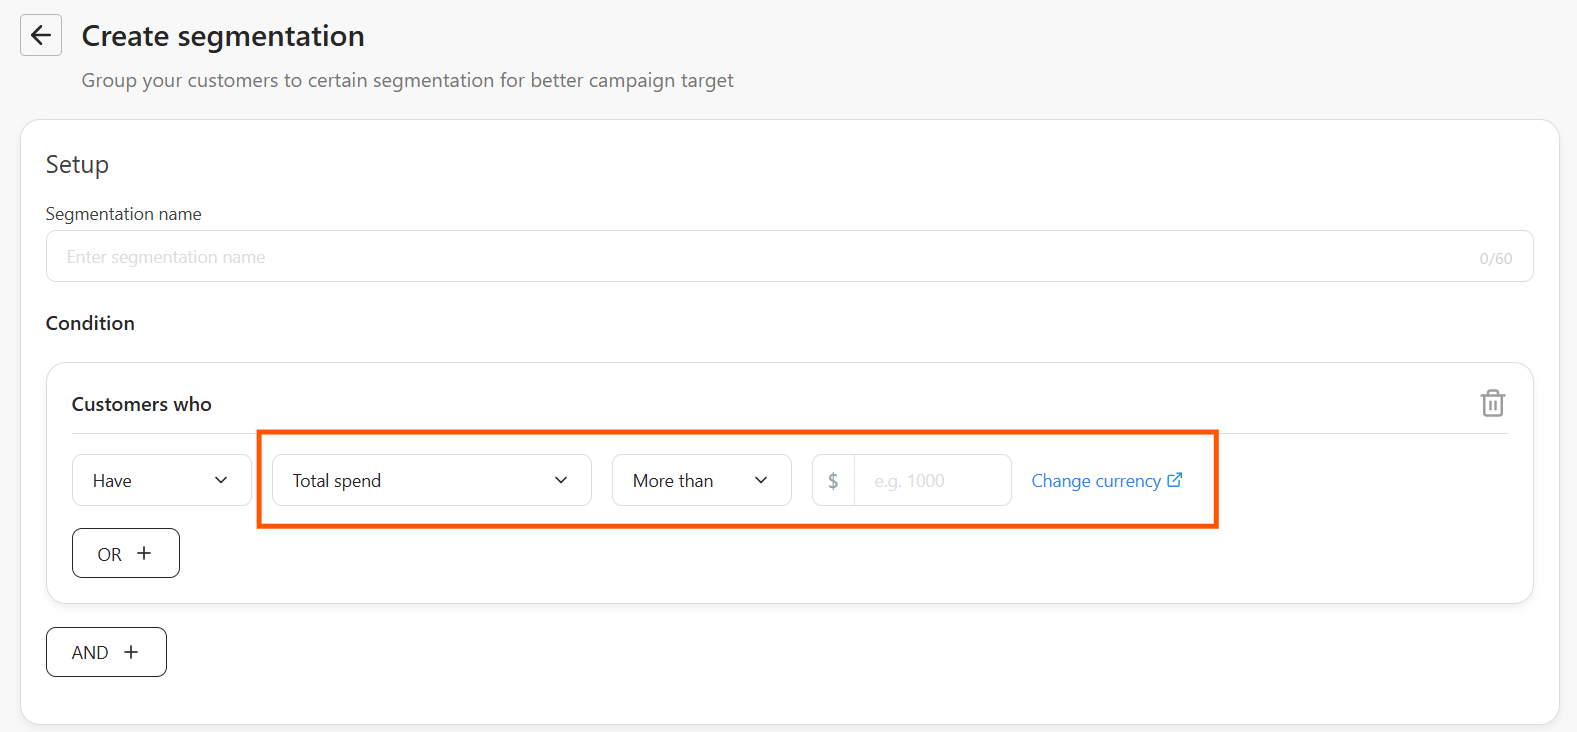
- The currency symbol and “Change currency” link on the Total spend field
- Products purchased: Search for a product by name and select one or more from the list. Each result shows the product thumbnail and name. Selected products appear as chips below the field. Have matches customers who bought any of the selected products; Not have matches customers who never bought them.
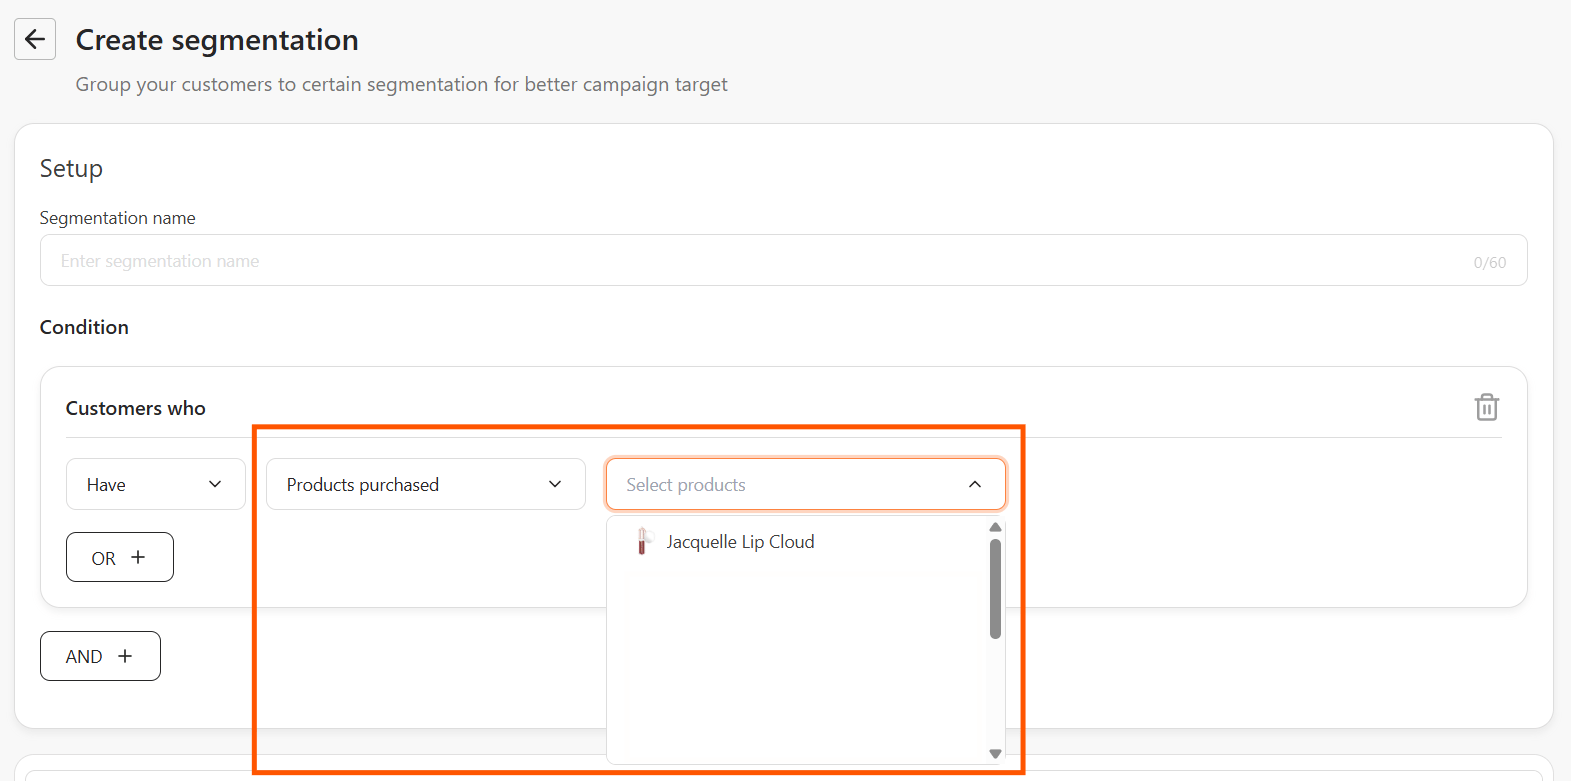
- Search for a product and select it from the results
- Lifetime earned loyalty points, Available loyalty points, and Lifetime redeemed loyalty points: Choose a comparator and enter a number for each. These three parameters each keep their own comparator, so you can combine them in one segment — for example, Available loyalty points More than 500 AND Lifetime redeemed loyalty points Exactly 0 to find customers who are sitting on points but haven’t redeemed any.
- Add Additional Filters: You can add another filter by clicking the “OR +” or “AND +” button. You can add multiple filters in this section.
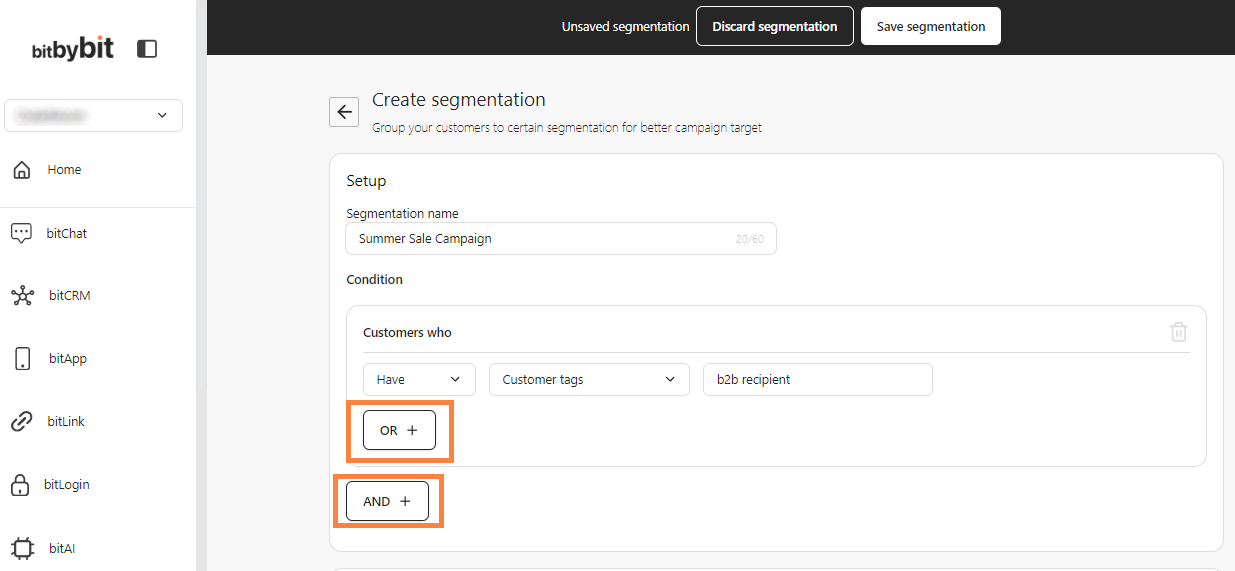
- Add another filter by clicking ‘OR +’ or ‘AND +’
- OR: Add an “or” filter to identify customers that meet at least one criterion within a set of filters.
For example, to identify customers that have “B2B sender” tags OR have “B2B recipient” tags, click “OR +” before adding the second filter.
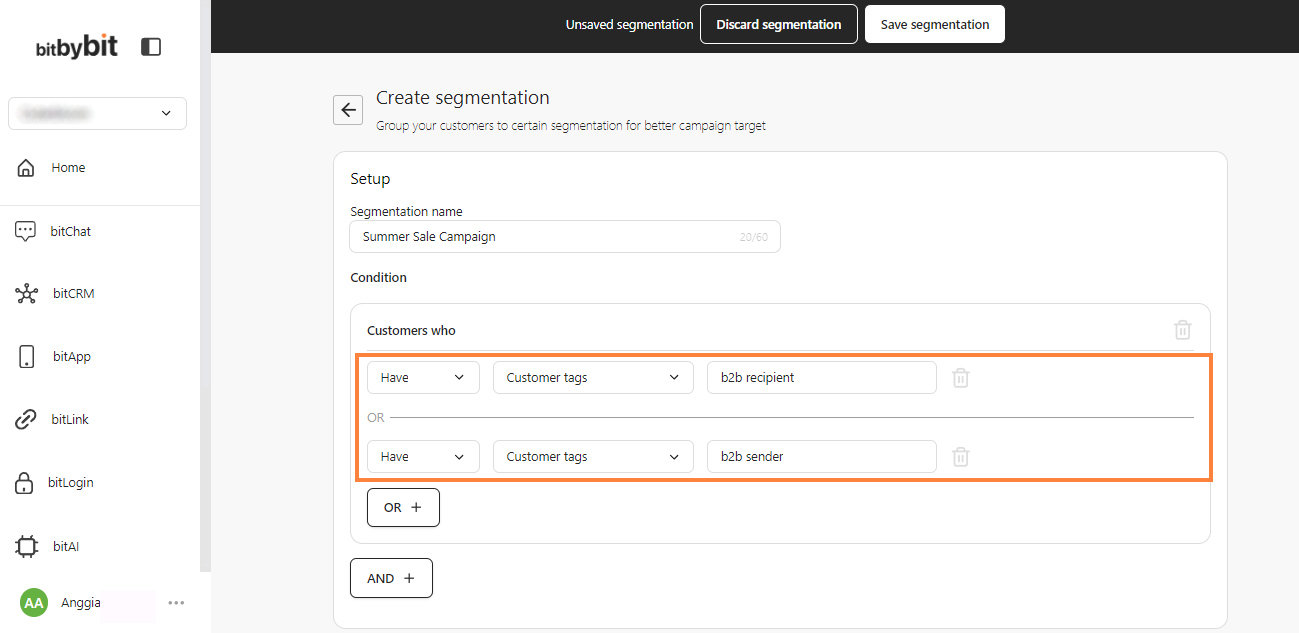
- Click ‘OR +’ to add an ‘or’ filter
- AND: Add an “and” filter to identify customers that meet all criteria within a set of filters.
For example, To identify customers that have “B2B recipient” tags AND do not have “Mother_Days” tags, click “AND +” before adding the second filter.

- Click ‘AND +’ to add an ‘and’ filter
- Delete Unwanted Filters: To delete a filter, simply click the Trash icon on the right side of each filter.
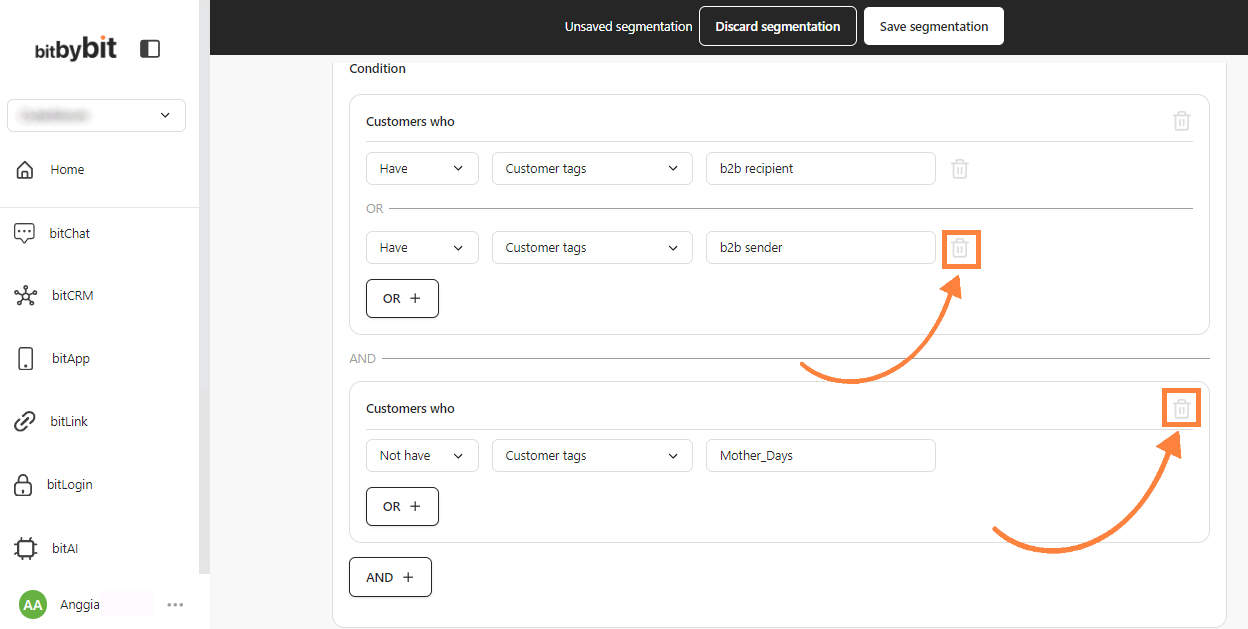
- Click the trash icon to delete a filter
- Review and Save: Scroll down to see your customer segmentation filter results and then click “Save segmentation” at the top of the page.
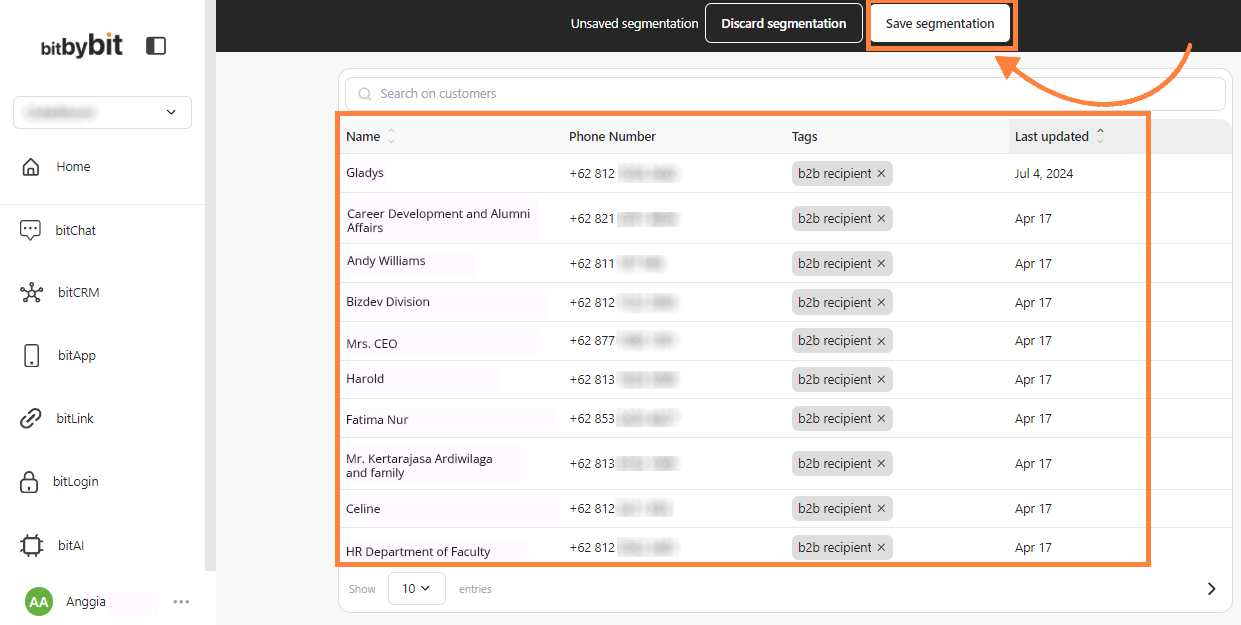
- Click ‘Save segmentation’ to save
Where segments can be used
- Use a saved segment as the audience for a bitCRM campaign.
- Use a saved segment as the audience for a Schedule trigger in Automation (Trigger → Schedule → Send to).
- Segments are not available as a live condition for event-based automation triggers (Shopify, Commerce, Web activity, bitLoyalty, and others) — those triggers evaluate their own event data, not saved segments.