

The Tags library covers tags applied manually, through import, or synced from Shopify. AI-generated tags (from AI Tagging) use a separate system and don’t appear here.
Why tags can duplicate
You can type any tag on a customer record, so two teammates can end up creating “VIP” and “vip” without meaning to — and a segment or campaign built on only one of them reaches part of your VIP customers, not all of them. To keep this from getting worse, bitbybit checks for an existing tag before creating a new one:- Casing is ignored (“VIP”, “Vip”, and “vip” all resolve to the same tag).
- Leading/trailing spaces and repeated internal spaces are ignored.
- Punctuation, emoji, and the tag’s original display casing are kept as-is — typing “VIP” when “vip” already exists tags the customer with “vip” (the tag keeps whichever casing was typed first).
Step 1: Open the Tags library
Go to Customers and click the Tags library tab.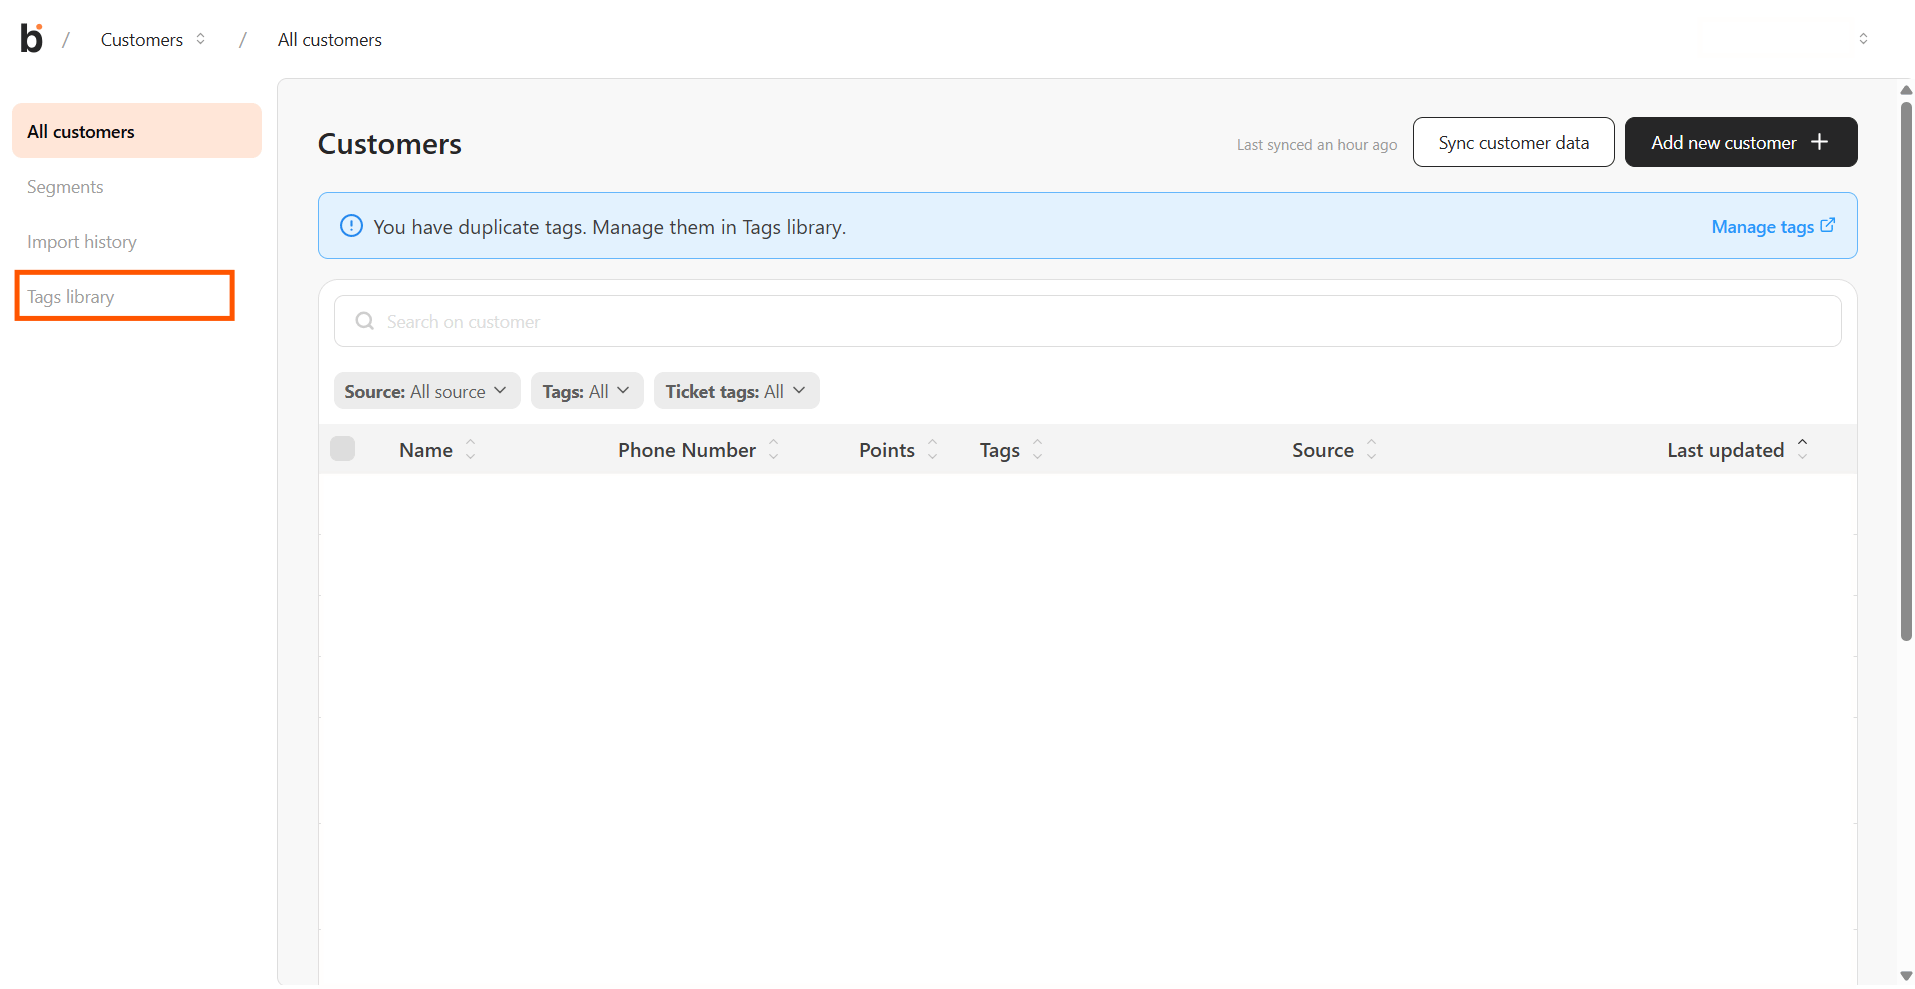
Step 2: Find a tag
Use the search field to filter the list by tag name. Each row shows the tag name, how many customers currently carry it, and when it was created.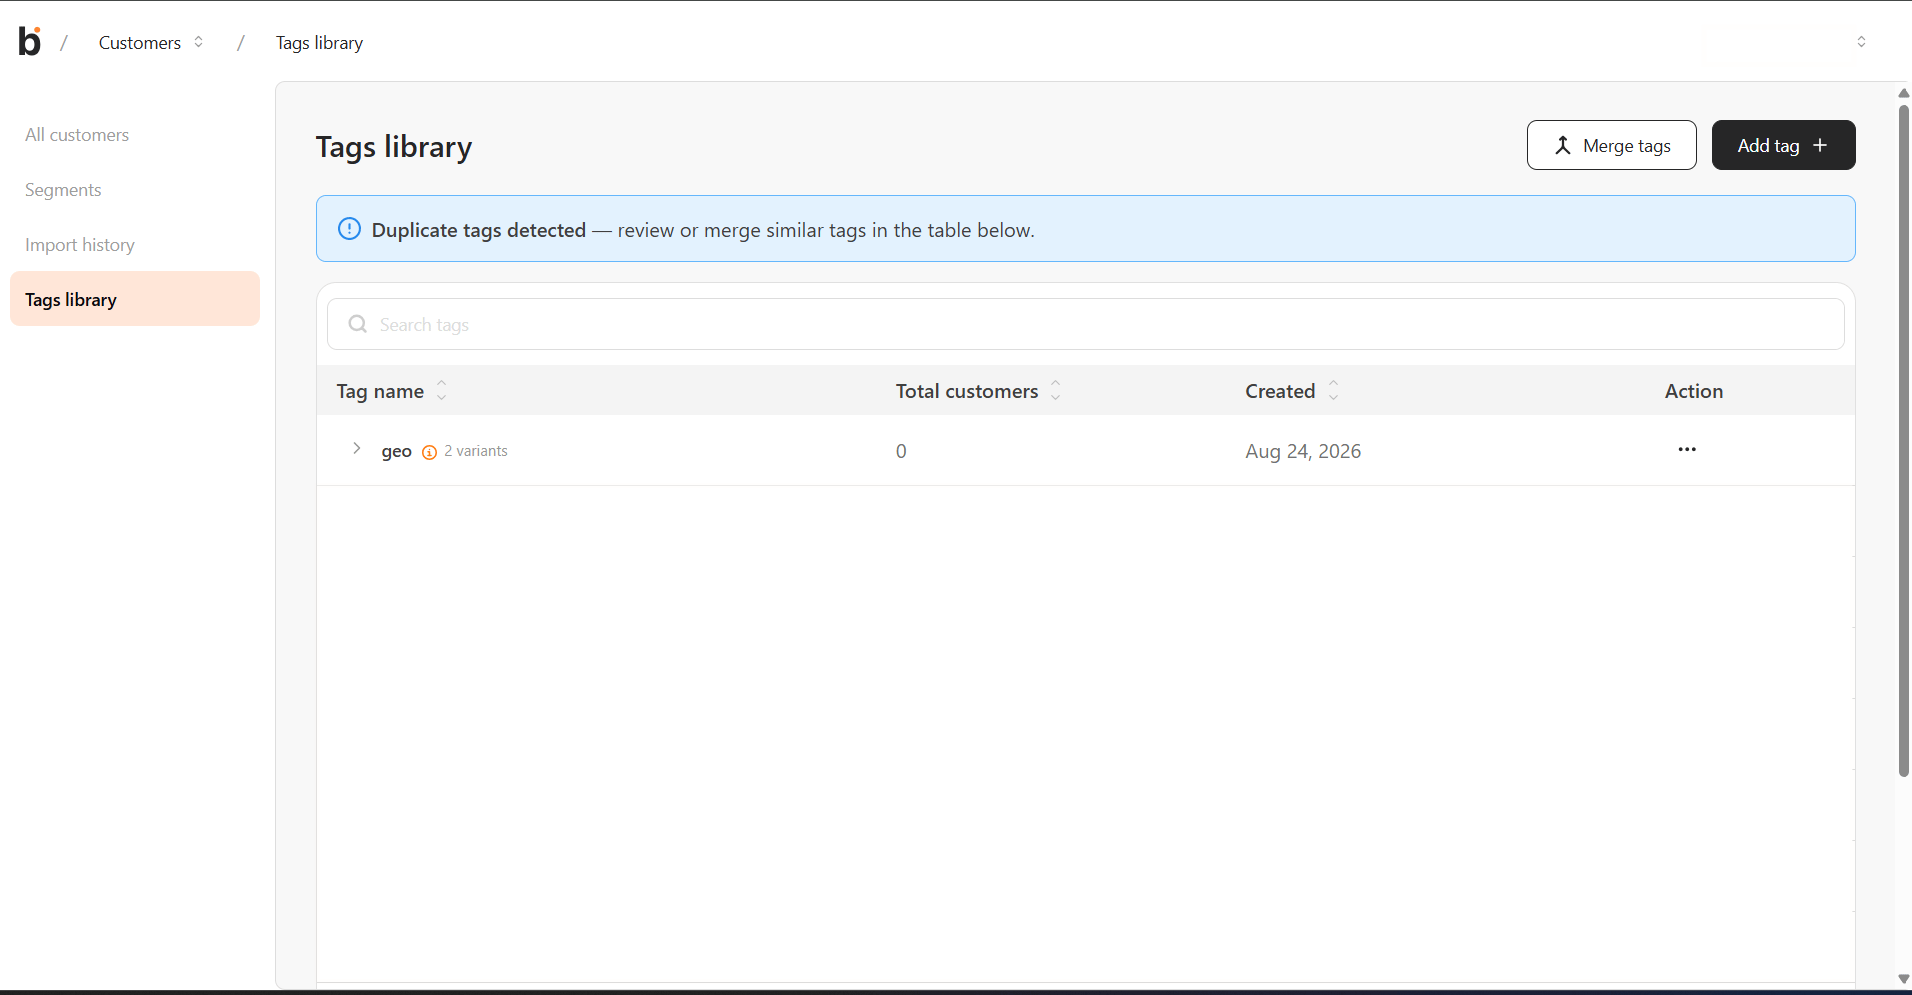
- Click a tag’s name to jump to the customer list, already filtered to that tag — a quick way to see exactly who’s behind the count.
-
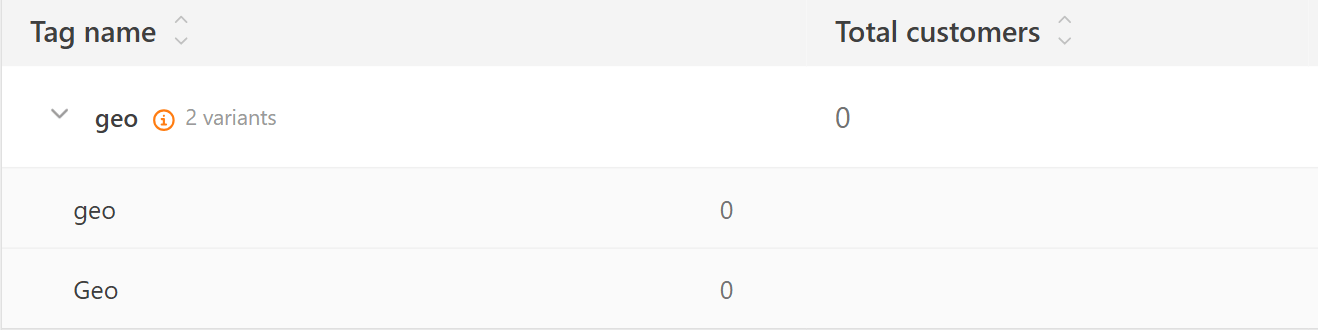
A duplicate group’s header row (the tag name followed by a “2 variants” label) names the cluster, not a single tag, so it isn’t clickable this way — expand the group first, then click an individual variant underneath it.
Step 3: Resolve a duplicate group
Tags that look like the same thing — different casing or spacing, like “VIP” / “vip” / “Vip” — are grouped together automatically and shown at the top of the list by default (until you resolve them, at which point the table returns to its normal order). For each group you can:-
Merge — combine two or more of the group’s variants into one. Check the variants you want to combine, choose which name survives, and confirm. Every customer on any checked variant ends up on the surviving tag, counted once even if they had more than one of the merged variants. A variant you leave unchecked is left alone and stops being grouped as a duplicate of the others.
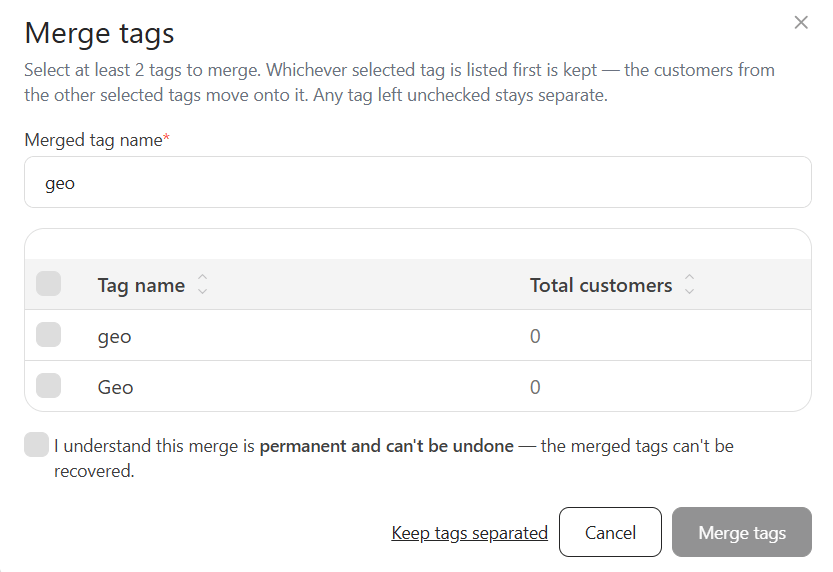
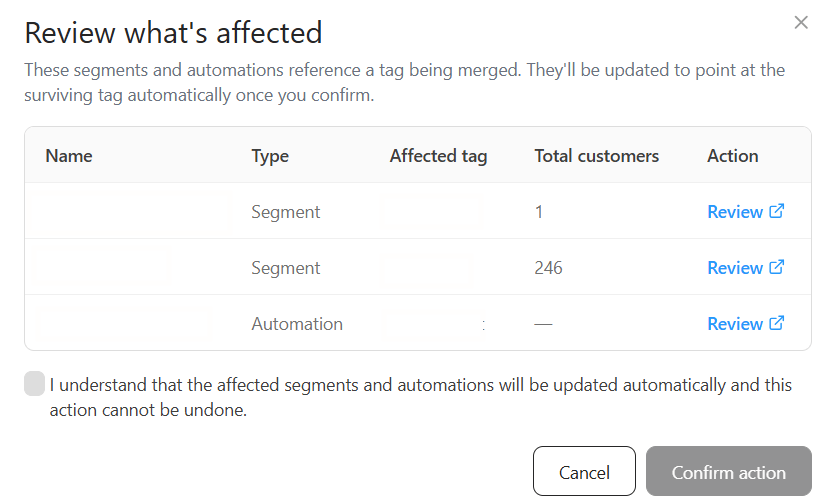
- Keep tags separated — dismiss the suggestion without changing anything. The tags stay exactly as they are and no longer show up grouped together.
Step 4: Rename a tag
Open a tag’s action menu and choose Rename. The new name applies everywhere the tag is already used — on every tagged customer, and in any segment that filters on it. Renaming a tag to a casing/spacing variant of itself (for example “vip” → “VIP”) just fixes the display name — it’s not treated as a merge, since it’s the same tag either way.Step 5: Delete a tag
Open a tag’s action menu and choose Delete. This removes the tag from every customer who has it.If an automation trigger depends on the tag, you’ll be blocked from deleting it (or warned about what will break, depending on what the automation is doing) so you can fix the automation first.