

Syncing is read-only. bitbybit only reads customer data from Shopify — it never writes back to your store.
What data is synced
Existing and new customers
- Existing customers (already in your Shopify store before you connect): these are synced only if Sync existing customers is checked when you connect. If you uncheck it, only customers created after you connect are synced.
- New customers: arrive automatically through Shopify’s customer and order webhooks after you connect.
Step 1: Connect Shopify
Go to Integrations and click Connect on the Shopify card for bitChat or bitCRM. This opens a Connect your store to bitbybit panel, which lists exactly what bitbybit will access — product catalogs, order history, and store profile — and why, before you authorize anything.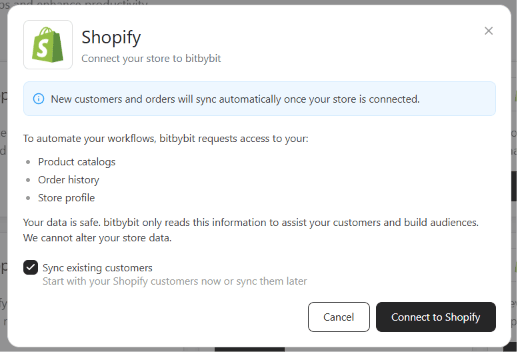
- The Shopify connection panel, with Sync existing customers checked by default
- Leave Sync existing customers checked (default) to pull in your current customer base as part of connecting.
- Uncheck it if you only want new customers going forward, without an initial backfill.
If another bitbybit app (for example bitChat) is already connected to the same store, the Sync existing customers checkbox won’t appear when you connect the second app (for example bitCRM) — both apps share one workspace-level customer list, so only the first connection needs to backfill it.
Step 2: Watch the initial sync
On first connect, a Syncing customer data modal opens, showing each stage of the process — connecting to Shopify, syncing customers, and finalizing.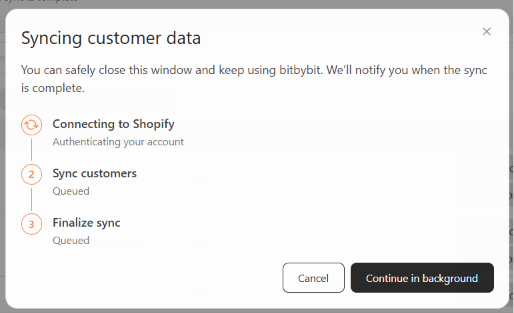
- The Syncing customer data modal
- Click Continue in background at any point to keep working elsewhere — the sync keeps running and collapses into a live progress card at the top of the Integrations and Customers pages, for example “Syncing 41 of 41 customers… 100%”. Click the status card to reopen the full progress view.
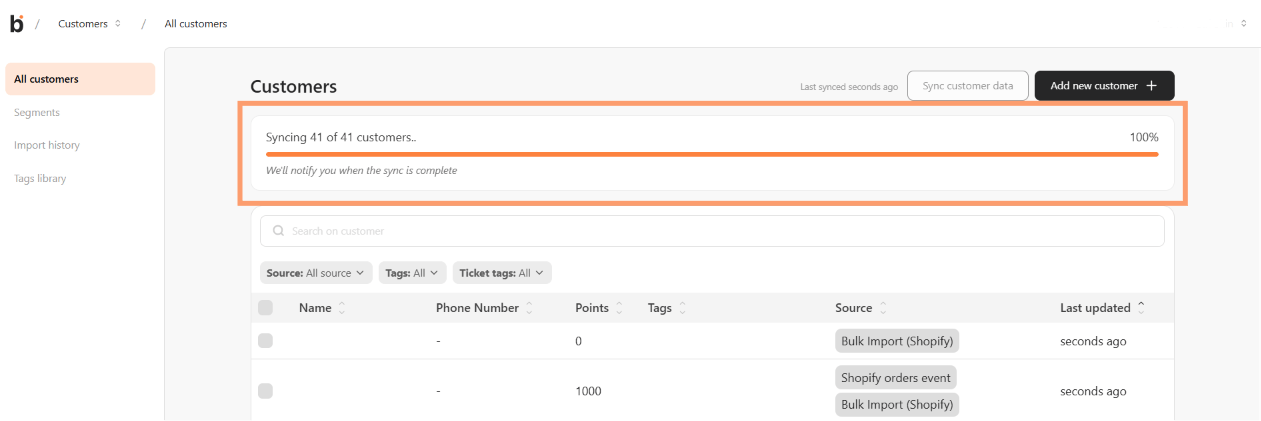
- The collapsed progress card at the top of the Customers page
- Once the sync finishes, the progress card is replaced by a Customer sync complete banner: “All your Shopify customers are now in bitbybit.”
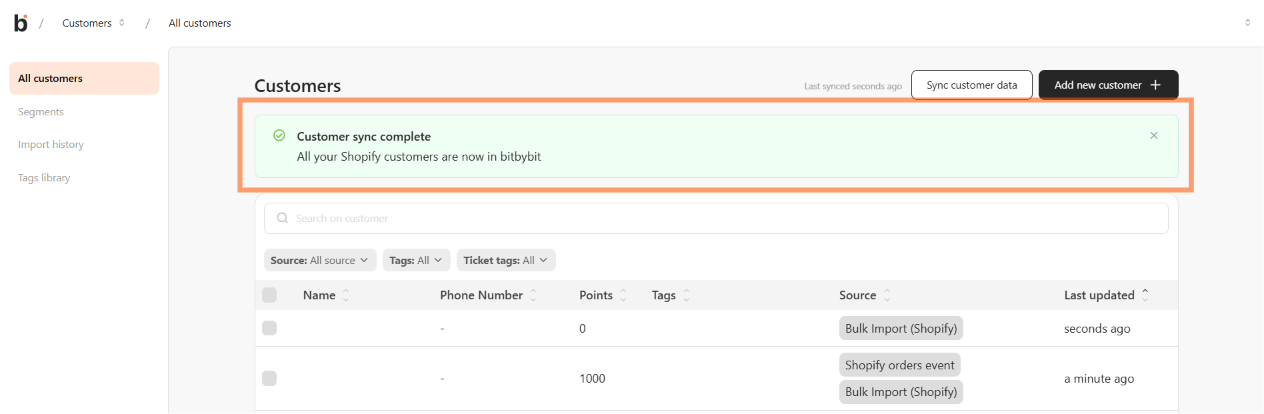
- The Customer sync complete banner
- On a large store this can take a while — Shopify builds the export before bitbybit can start reading it. You’ll get an email once it’s done, so you don’t need to keep the tab open.
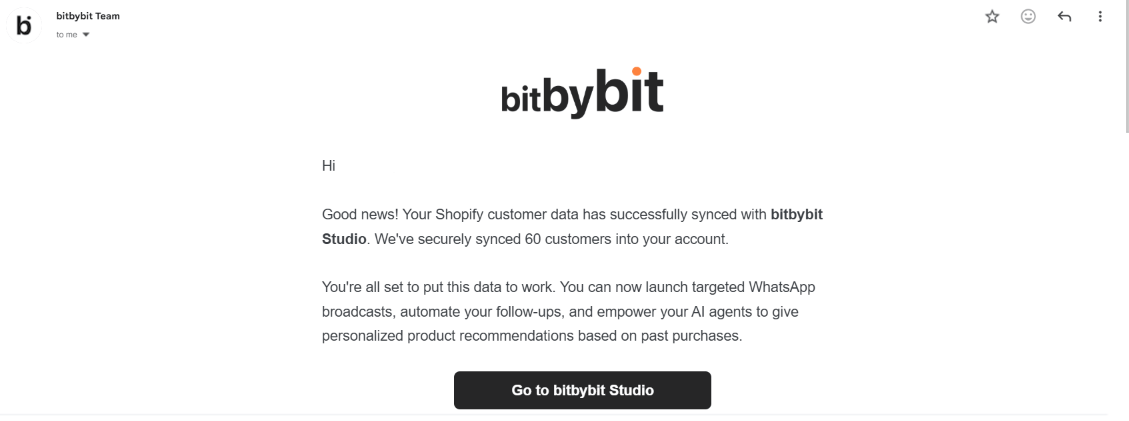
- The completion email
Step 3: Check your customers arrived
Once the sync finishes, go to Customers to see the imported list. The toolbar shows a Last synced X ago line — hover it for the exact timestamp.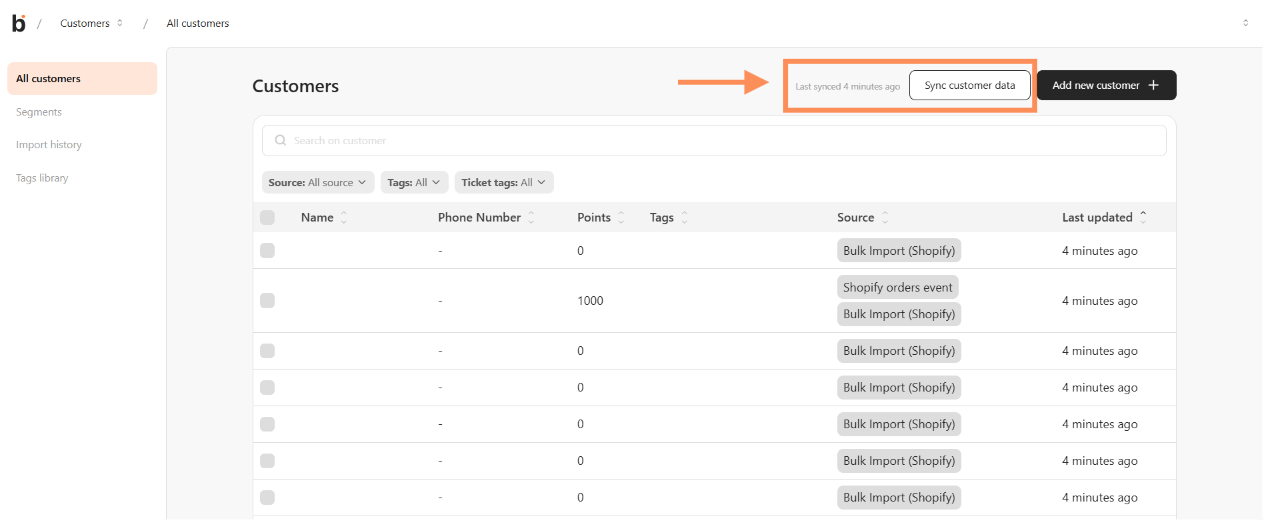
- The Last synced X ago line on the Customers toolbar
Step 4: Re-sync manually
Use the Sync customer data button on the Customers toolbar any time you want to refresh the record — for example after making bulk changes in Shopify. Choose a scope in the Customer data sync dialog:- Update all customers (recommended) — overwrites existing customer records with the latest Shopify data and adds anything new.
- Only add missing data — adds new customers and fills in empty fields, without changing details you already have.
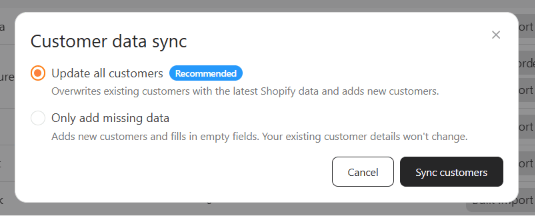
- The Customer data sync dialog
The Sync customer data button is disabled while a sync is already running or paused, since a second sync would just duplicate work the running one is already doing.
Customer metafields
The sync brings in all of a customer’s metafields from Shopify, so custom customer data you store in Shopify appears on the customer’s record in bitbybit. Metafields are read-only in bitbybit. To change a metafield value, edit it in Shopify, then run a manual sync (Step 4) to bring the new value into bitbybit.If a metafield uses a type that bitbybit doesn’t support, the customer’s data shows a notice for that field.