Prerequisites
- You can open bitChat > Chat Widget.
- You have access to your storefront theme or website code.
Step 1: Open Chat Widget
- Go to bitChat.
- Open Chat Widget.
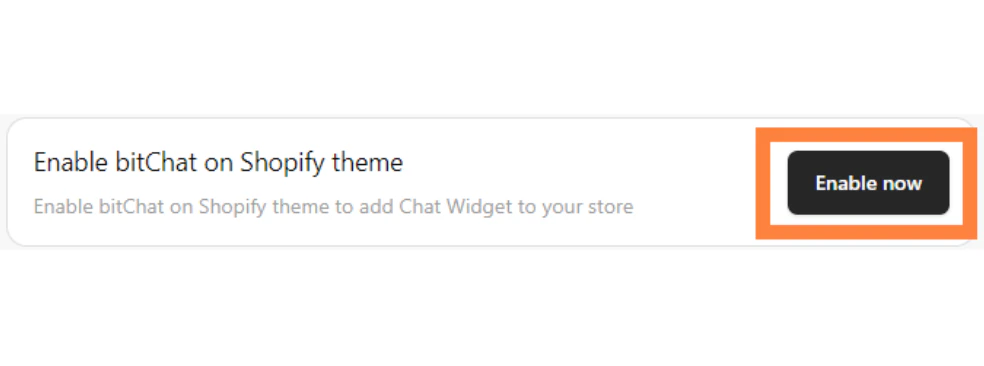
Step 2: Install the widget on Shopify
-
Click Enable Now.
- In the Shopify Theme Editor, search for bitChat.
-
Enable bitChat: Live Chat Widget app embed.
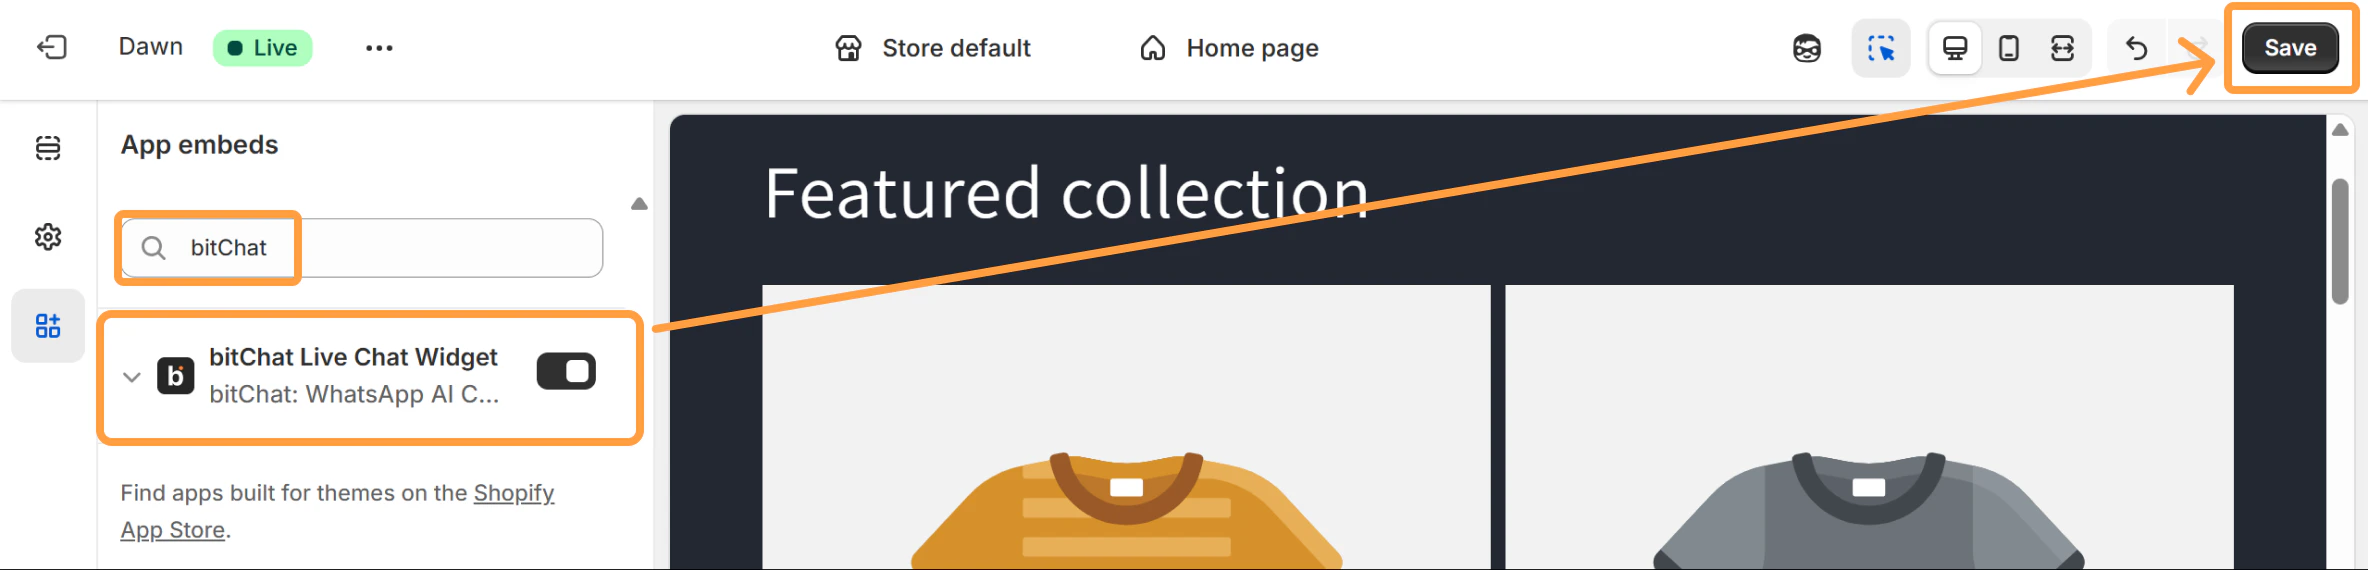
-
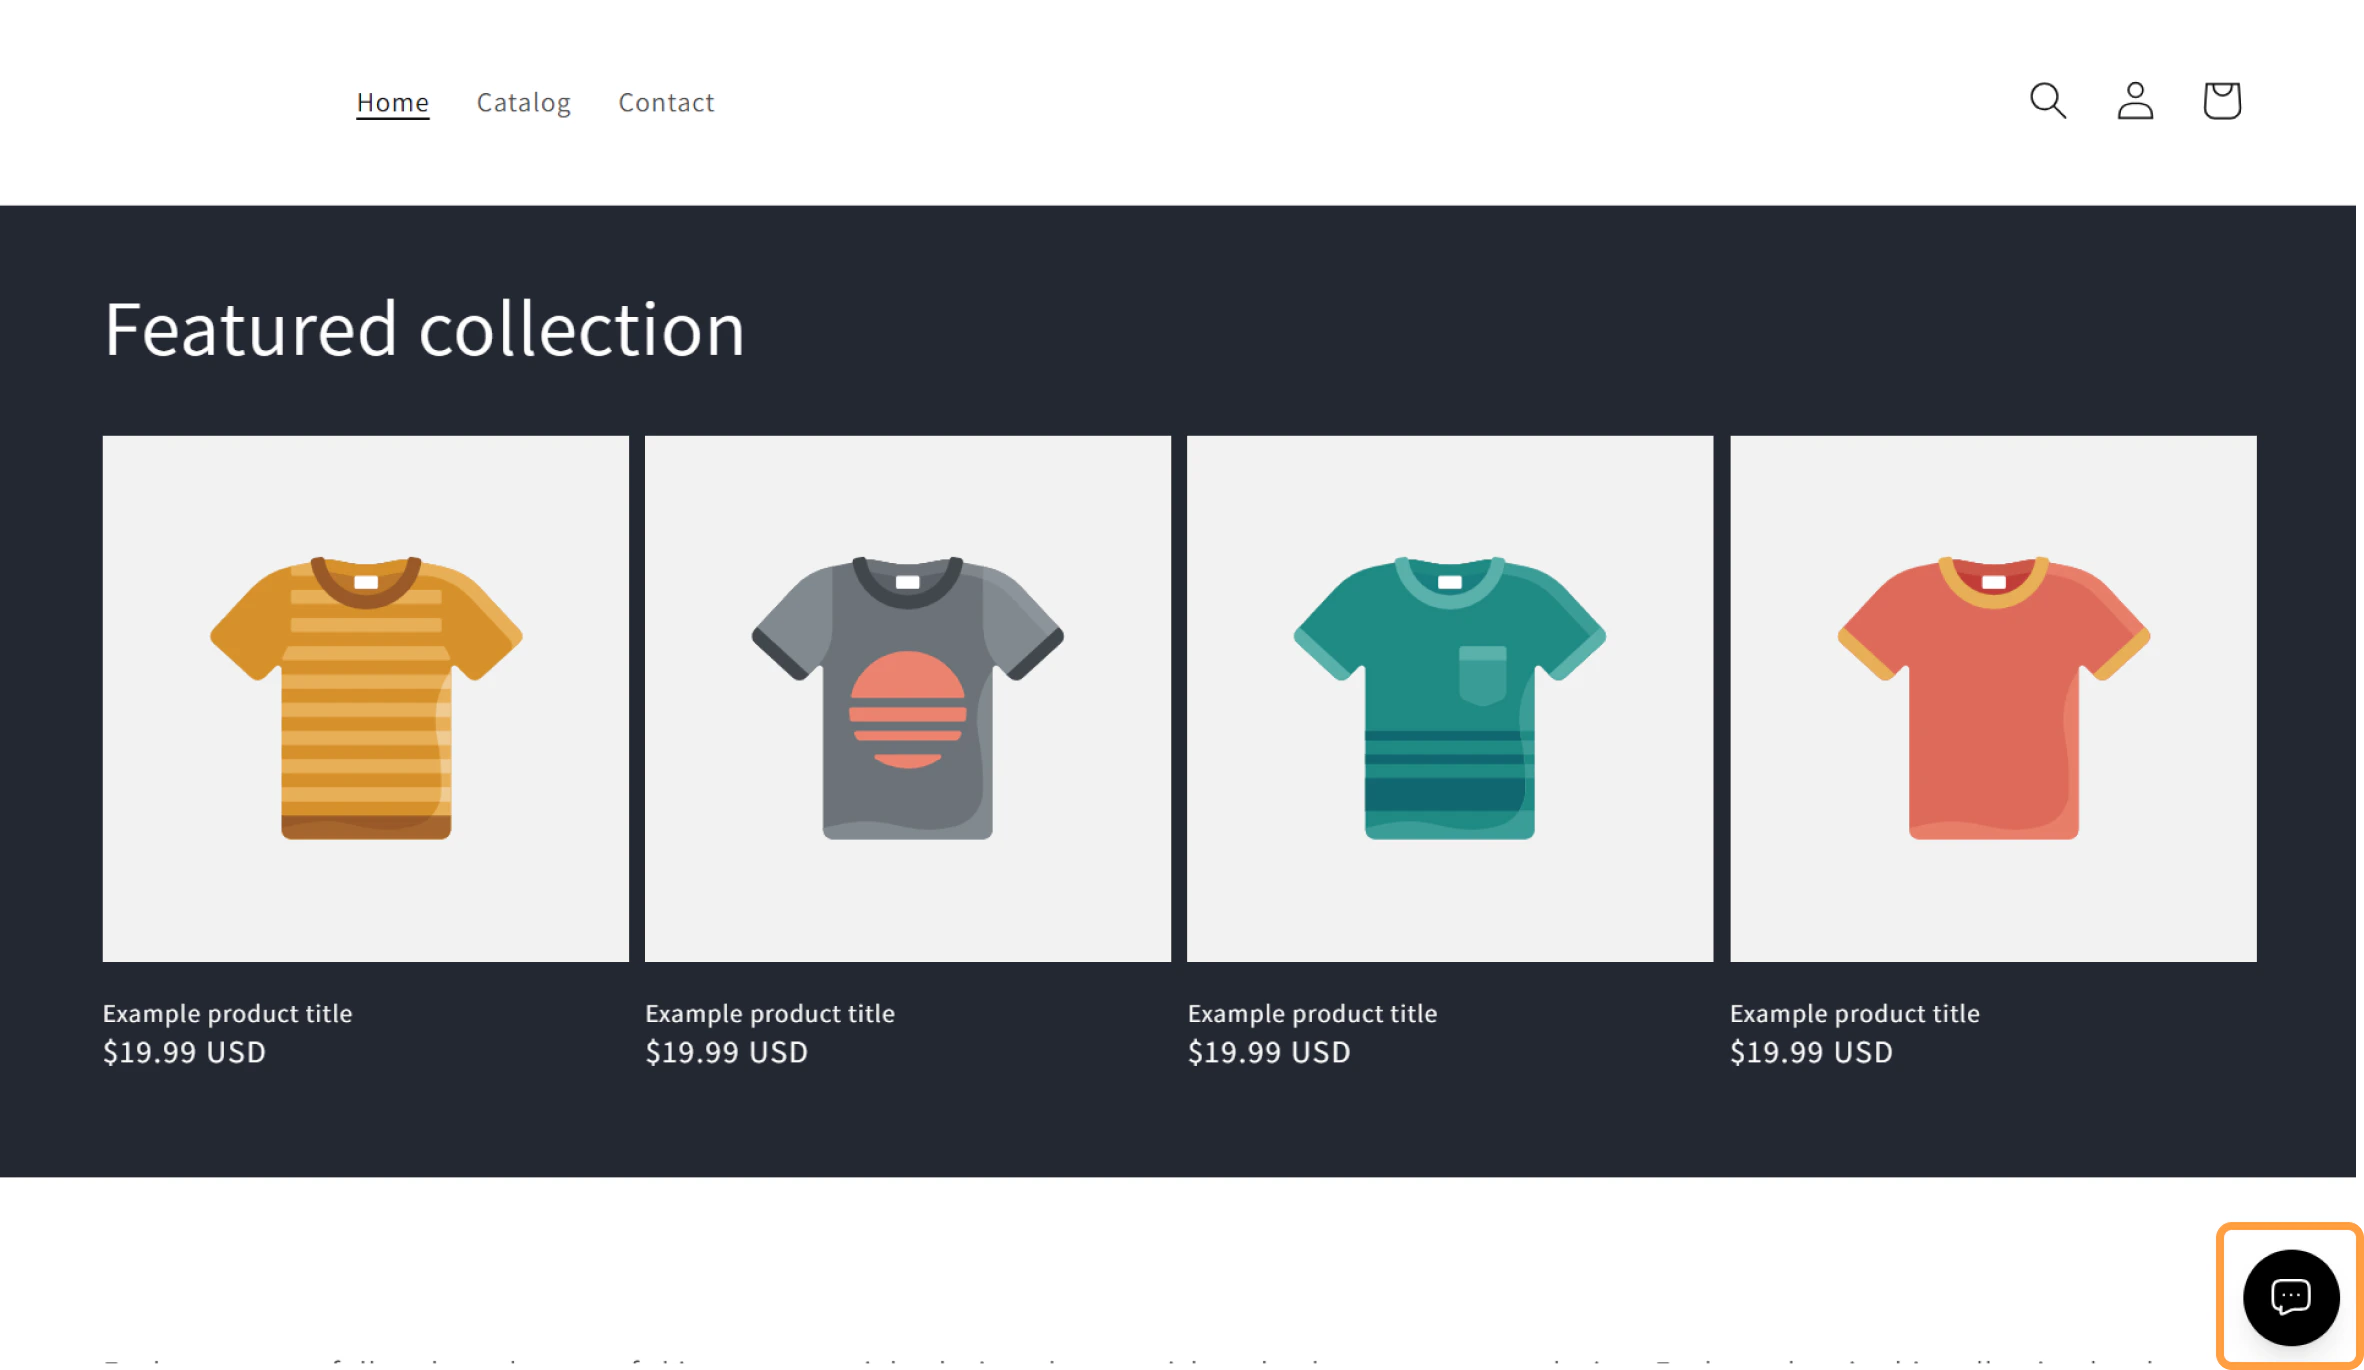
Click Save.
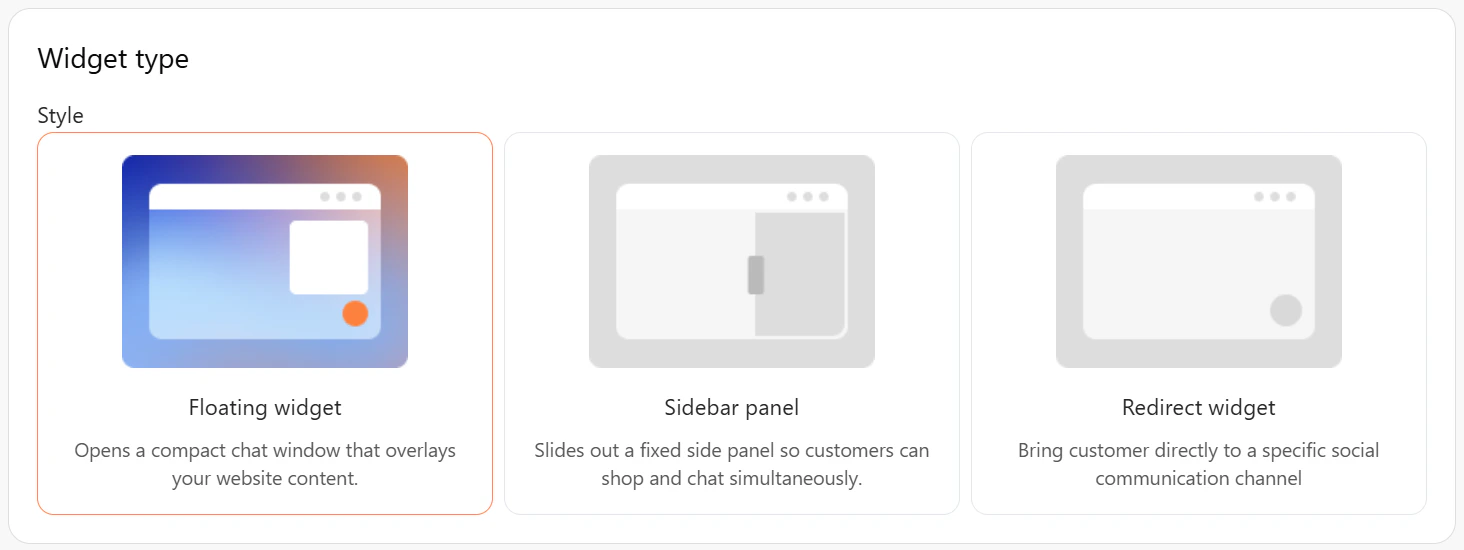
Step 3: Choose the widget style
The current Chat Widget setup includes these styles:- Floating Widget
- Sidebar Panel
-
Redirect Widget
Step 4: Install the widget on a non-Shopify site
-
Add the widget script before the closing
</body>tag of your website: - Save your site changes.