Step 1: Access Integrations
- Go to Integrations dashboard, and select “Connect” on Facebook
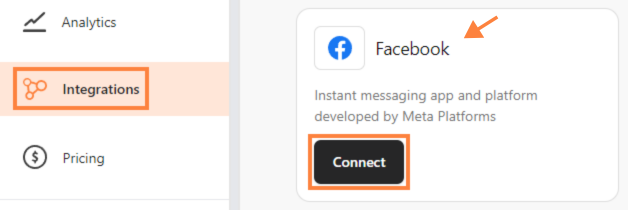 Select “Connect”
- Click “Connect to Meta” then “Continue as your Facebook Account”.
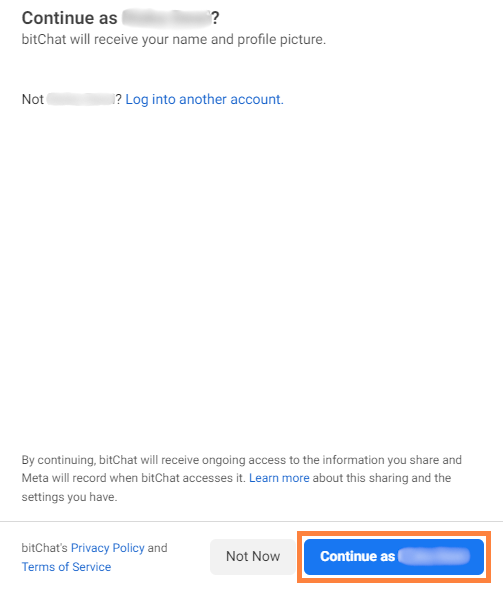 Click “Continue as your Facebook Account”
Step 2: Customize Your Business & Page Access
- On the “Choose the Businesses you want bitChat to access” page, select “Opt in to all current and future Businesses” and “Continue”
 Select “Opt in to all current and future Businesses”
- Next to the “Choose the Pages you want bitChat to access” page, select “Opt in to all current and future Pages”
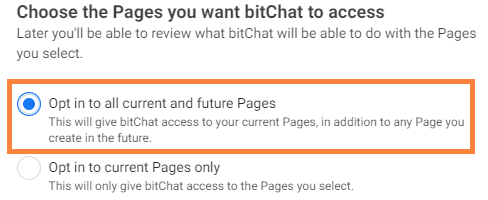 Select “Opt in to all current and future Pages”
- Or select “Opt in to current Pages only” and select assets as desired.
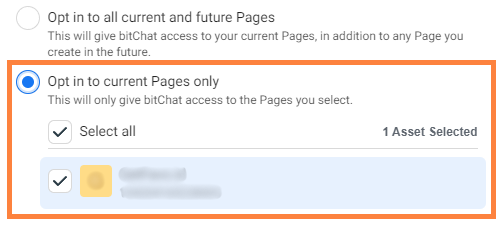 Select “Opt in to current Pages only” and select assets as desired
Note: Users can grant bitChat access to all businesses (current and future) while choosing to allow access to either all Pages or only selected Pages.
Select “Opt in to current Pages only” and select assets as desired
Note: Users can grant bitChat access to all businesses (current and future) while choosing to allow access to either all Pages or only selected Pages.
- Another option, you can select “Opt in to current Businesses only” then select asset as desired and “Continue”
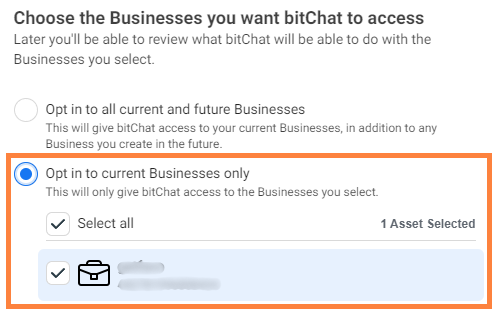 Select “Opt in to current Businesses only” then select asset as desired
- On the “Choose the Pages you want bitChat to access” page, select “Opt in to all current and future Pages”
Select “Opt in to all current and future Pages”*
- Or select “Opt in to current Pages only” and select assets as desired.
Select “Opt in to current Pages only” and select assets as desired
Note: Users can limit bitChat to specific businesses while still choosing to allow access to either all Pages or only selected Pages.
Step 3: Save
- Click “Continue” and “Save”