

Step 1: Open WhatsApp Form
- Go to bitChat > WhatsApp Form.
Step 2: Create the form
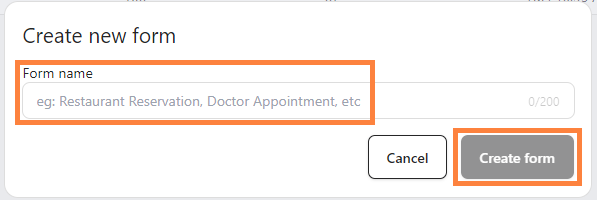
- Click Create new form.
- Enter a Form name, then click Create form.
- The form opens on Screen 1.

Step 3: Add content to Screen 1
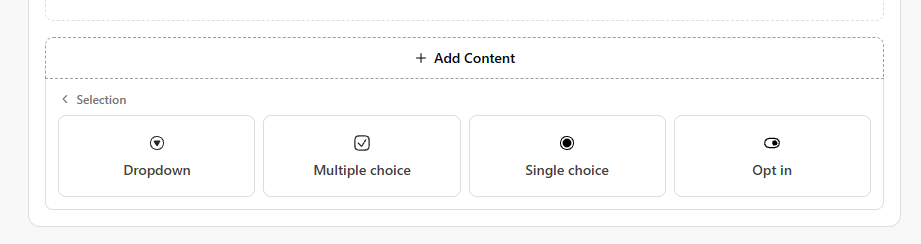
- In the CONTENT area, click Add Content.
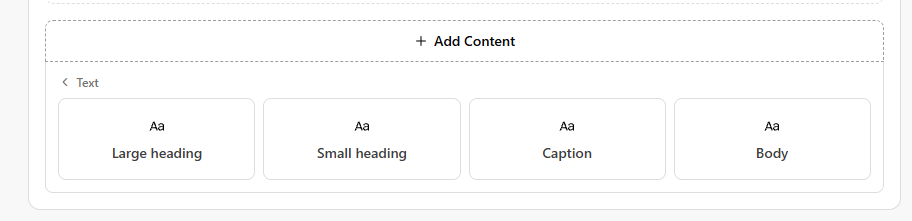
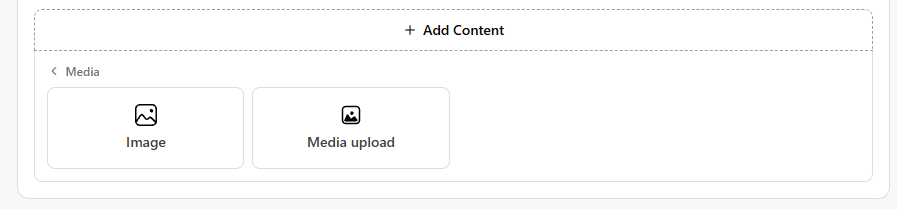
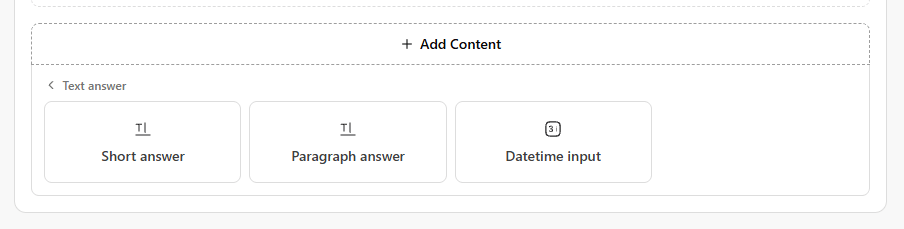
- Choose a content type, then choose an option under it.
- Fill in the fields, then save.
- Text — choose Large heading, Small heading, Caption, or Body.
- Media — choose Image to show a picture, or Media upload to let customers attach images or documents. See How to add a media upload field to a WhatsApp form.
- Text answer — ask for a Short answer, a Paragraph answer, or a Datetime input.
- Selection — ask a Dropdown, Multiple choice, or Single choice question, or add an Opt in.
Step 4: Add more screens (optional)
Use extra screens to split a long form into steps. Each screen keeps its own ordered content and questions.- In the SCREENS panel, click Add Screen to create Screen 2, then Screen 3, and so on.
- Select a screen to add content to it the same way you did in Step 3.
- Rename a screen in the Screen name field (up to 40 characters).
- Reorder screens by dragging them, or reorder content within a screen.
- Move content to another screen.
- Duplicate a screen to copy its content and questions.
- Delete a screen you no longer need. If the screen has content, you’re asked to confirm first.
A form always keeps at least one screen. You can’t delete the only remaining screen.
Step 5: Test the form
- Click Test Form.
- Step through the screens to check the sequence customers will receive.
- Go back to the builder to fix anything that looks wrong.
Step 6: Save as a draft or publish
- Click Save as draft to keep working later. All screens and their order are saved.
- Click Publish when the form is ready to send.
- If anything needs fixing, publishing stops and shows which screen contains the item to fix. Correct it, then publish again.
After you publish
A published form opens on its responses when you click it in the list. From the row menu you can also:- See responses.
- Download responses as a CSV file.
- Save or open the form’s responses in Google Sheets.
- Duplicate the form.
- Delete the form.