Step 1: Create a Agent
- Before you can set up an Away Message, you need to create a agent flow. Follow the steps in How to Create A Agent Flow to get started.
Step 2: Configure the Away Action
- Once your agent has been created, go to the bitChat Agent dashboard.
- Click on the Away action card.
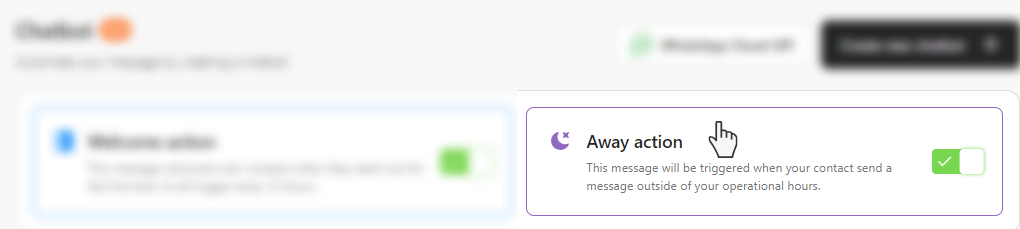 Click “Away action” card
Step 3: Assign Flow
- Click the dropdown, and select the flow for away action. You can choose between a agent flow or “Assign to AI Agent”. To activate AI Agent to suits your brand’s persona, see How to Create and Set Up Your AI Agent Persona.
- “Set ticket category”, see How to Create a Ticket Category.
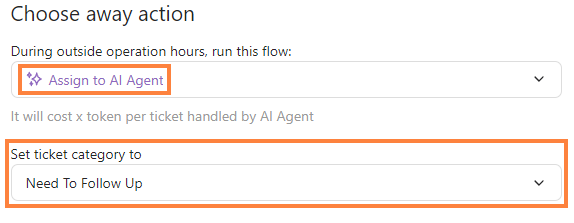 Assign the “AI Agent” and select “Set ticket category”
Step 4: Add Customer Tags and Save
- Optionally, you can also “Add customer tags” to categorize contacts. Then, click “Save”.
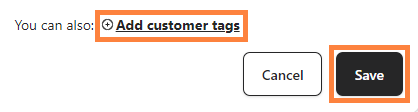 You can click “Add customer tags” and click “Save”
Note: The Away Message will be triggered when your contacts send messages outside your operational hours.
You can click “Add customer tags” and click “Save”
Note: The Away Message will be triggered when your contacts send messages outside your operational hours.