

Copy voucher action is only available on Campaign templates. It does not appear for Automation or Chat initiation templates.
Before you begin
Choose where your code comes from:- For bitbybit Commerce, create the voucher in Commerce first.
- For Shopify Vouchers, connect Shopify and create the discount code in Shopify first.
- For Custom Code, make sure the code already works in your own system.
Step 1: Add the Copy voucher action to a template
- Go to Misc → Campaign and create a new Campaign template, or open an existing one to edit.
- In the Message content step, click Add button (optional).
- Select Copy voucher action.

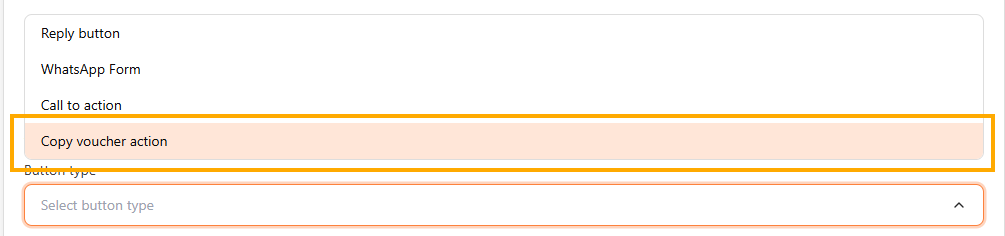
Step 2: Choose a code source and code
Select a Code source, then follow the option that matches.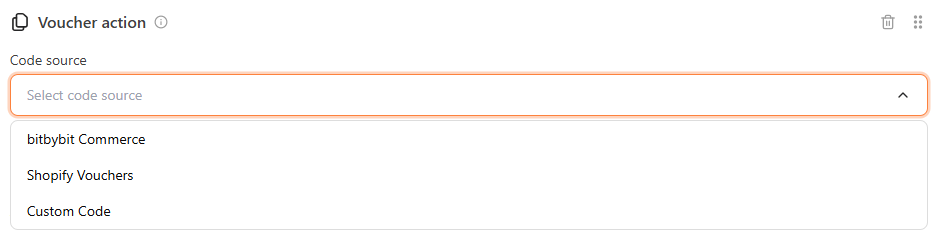
bitbybit Commerce or Shopify Vouchers
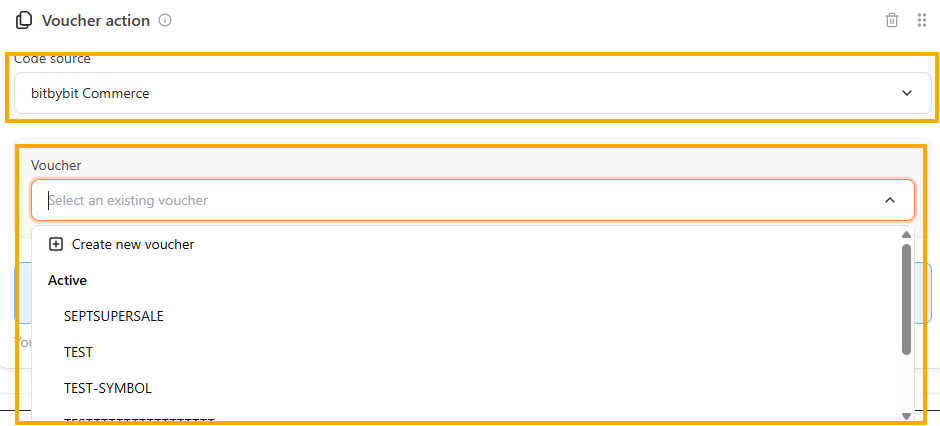
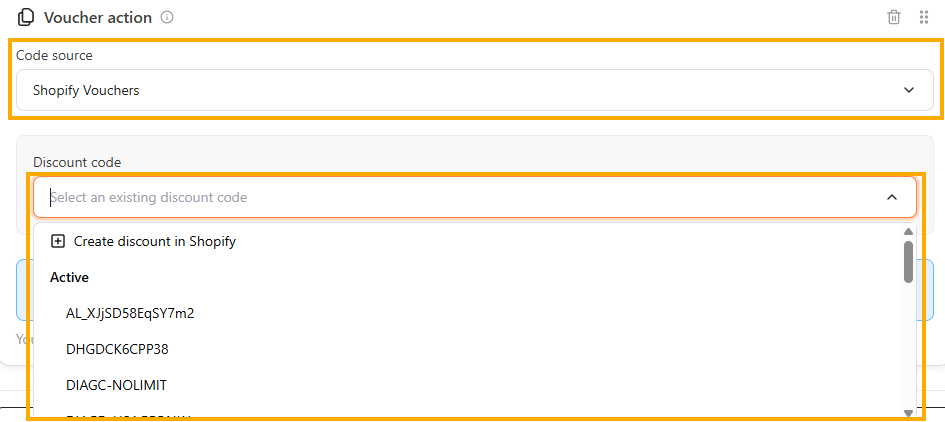
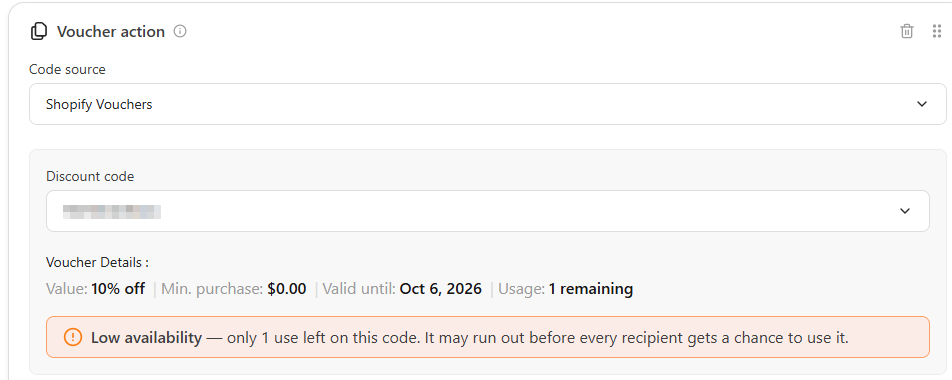
- Select bitbybit Commerce or Shopify Vouchers. If you choose Shopify and it isn’t connected yet, you’ll see the Connect Shopify flow instead.
- Open the menu and choose one code. The menu groups codes into Active, Out of usage, and Over character limit. You can only select codes in the Active group.
- To add a code without losing your draft, click Create new voucher (Commerce) or Create discount in Shopify (Shopify). The link opens in a new tab.
Custom Code
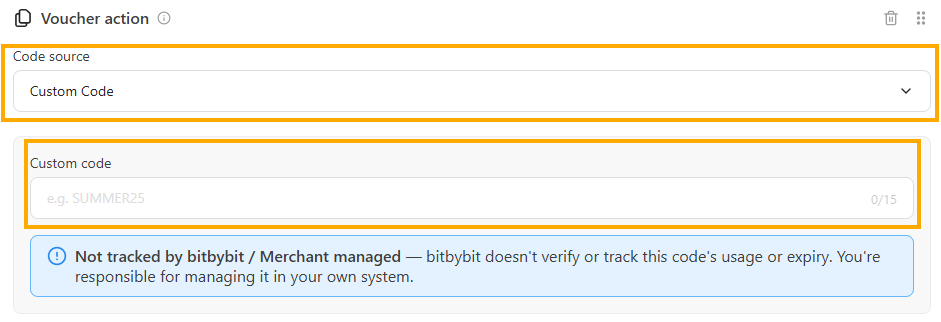
- Select Custom Code.
- Enter your code in the Custom code field.
- A banner confirms the code is Not tracked by bitbybit / Merchant managed.
Code rules
Codes can contain letters and numbers only, up to 20 characters, or 15 for Custom Code. For example,PROMO20 works, but PROMO-20 doesn’t, because WhatsApp doesn’t support special characters such as hyphens.
If a code breaks these rules, the field explains the problem and you can’t save the template until you choose another code, fix it at the source, or edit your Custom Code.
Step 3: Save the template and submit it to Meta
- Finish your message body and any other settings.
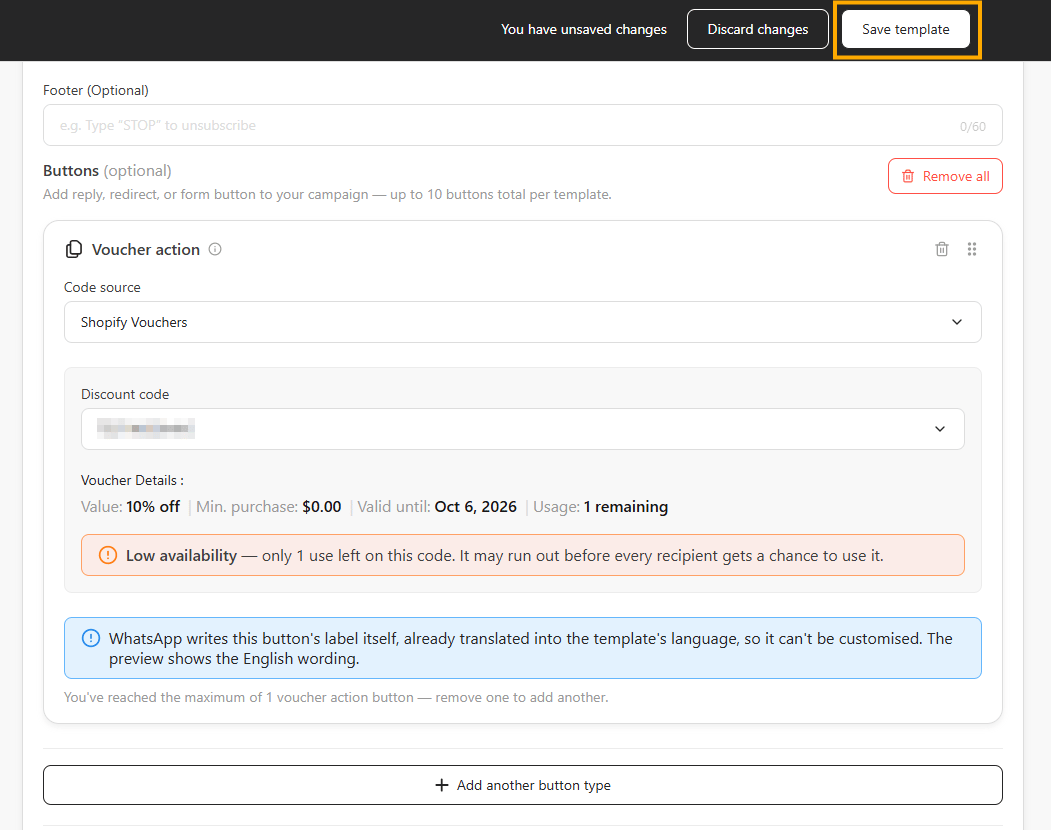
- Click Save template to submit it to Meta for review.
Step 4: Use the template in a campaign
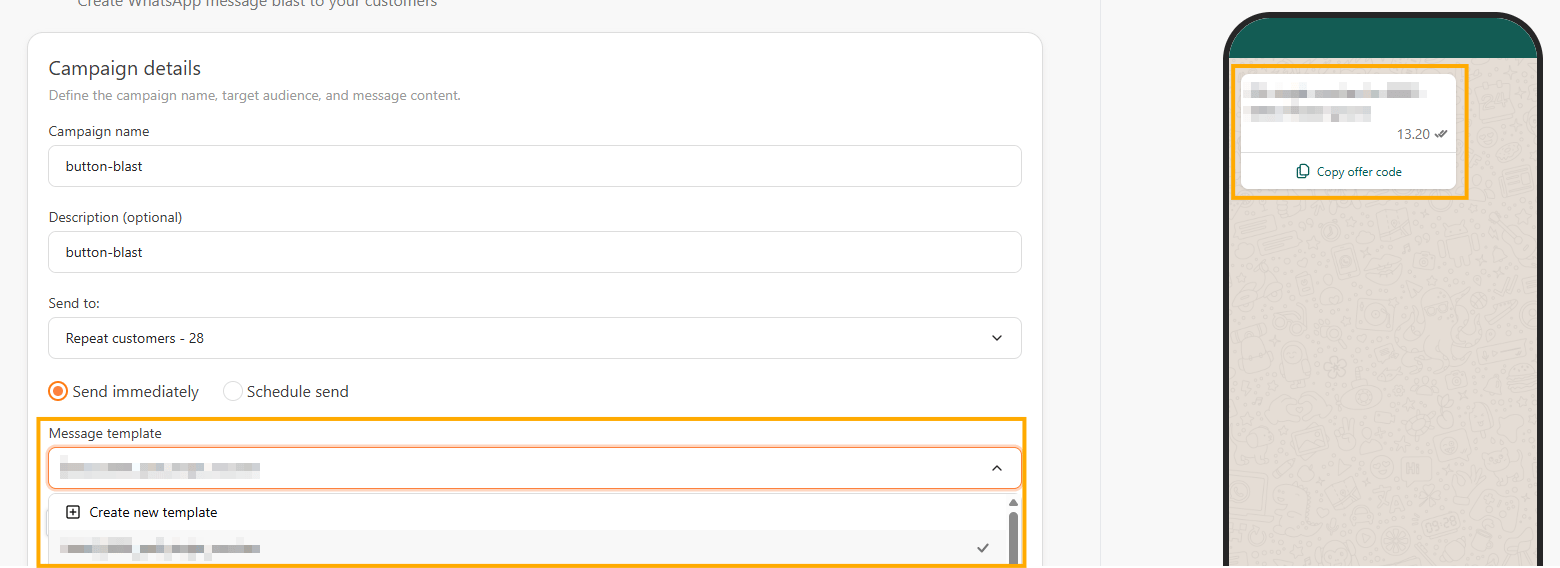
- Create your campaign and choose the approved template under Message template. The Campaign Composer doesn’t ask you to pick a code, because the template already has one. The preview shows the Copy offer code button.
- Review the campaign, then choose Send immediately or Schedule send.
What happens when a code can’t be used
For Commerce and Shopify codes, bitbybit checks the code before you send.A low-availability warning doesn’t stop your message from reaching everyone. Your message is delivered to the whole audience. Codes are used first come, first served at checkout, so some recipients may find the code has run out.
If a scheduled campaign is held
Before a scheduled campaign sends, bitbybit checks the code again. If the code can no longer be used, the campaign is not sent and stays Scheduled. In the campaign list, it shows a red Error badge, and the Progress column shows the reason, for example The offer code has no uses left.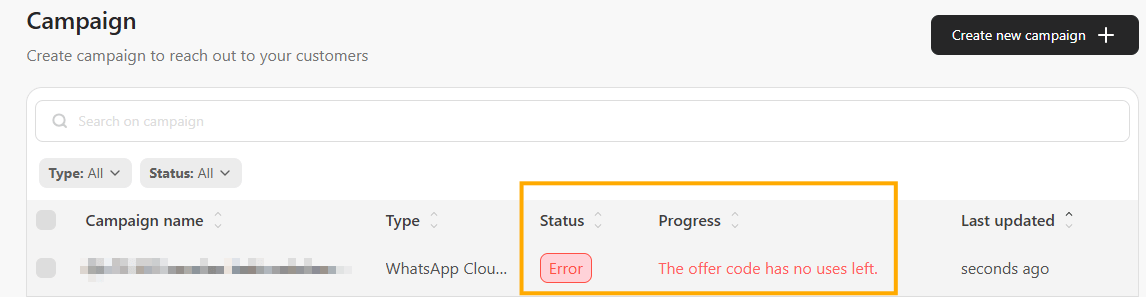
Change the code on a template
- Edit the template. Go to Misc → Campaign, open the template, choose another code in the Voucher action container, then click Update template. Once Meta approves the update, the template uses the new code.
- Create a new template if you want to keep the current code for other campaigns.
The template page only lets you update an approved template once every 24 hours. Plan code changes ahead of your send time.
FAQ
Can I send a unique code to each customer?
Can I send a unique code to each customer?
Not with this button. To send a different code to each customer, see Data management & voucher messaging via bitbybit.
Does bitbybit count a Copy code tap as a voucher use?
Does bitbybit count a Copy code tap as a voucher use?
No. Sent, delivered, read, and Copy code taps aren’t voucher uses. Usage goes up only when a customer successfully uses the code at checkout, in your POS, or in your own system.
What if my Shopify store checks out outside Shopify?
What if my Shopify store checks out outside Shopify?
Use Custom Code instead, because bitbybit can only track Shopify codes used in Shopify checkout.